How to transfer photos from iPhone to Windows PC: TOP 7 methods
Updated: November 14, 2024 Author: Andrey Isaev
There are several ways to move photos from an iPhone to a computer, and the optimal choice depends on whether you have a USB cable, whether iTunes is installed or iCloud is connected, etc. This article will help you quickly choose the best method specifically for your situation.
Choosing the appropriate method to download photos from iPhone to computer
This manual has been prepared specifically for OS Windows users. The methods for macOS and Linux are different, and we will discuss them in other articles.
The best way to transfer photos and videos depends on your needs and what programs or a USB cable you have. First, you should think about how many photos you want to upload and whether this is just a one-time operation or you will do it regularly.
If you need to selectively download photos from iPhone to computer:
- If you already upload all your photos to iCloud
- It’s faster and easier to download the necessary photos directly from the iCloud website. And you don’t need a cable or phone.
- If you have a USB cable for iPhone
- Use the built-in Windows 10 Photos app. This method is recommended by Microsoft
- If you don’t have a USB cable
If you need to download all the photos from your iPhone to your computer once
- If you already upload all your photos to iCloud
- It is likely that the original photos are stored only in the cloud, while only optimized images are stored on the iPhone. In this case, you can download photos from iCloud using standard means.
- If you have a USB cable
- All photos can be copied into one huge folder directly through Explorer.
- If you want to sort photos by year and date - use the free Tonfotos application.
- If you don’t have a USB cable
- Since you may have many photographs, it is still recommended to find a cable, as it will be faster. But if that’s not possible, then consider the transfer via cloud storage method.
If you need to regularly download new photos from iPhone to computer:
- If you have already uploaded all your photos to iCloud
- The easiest way is to use the iCloud Photos feature
- In other cases
- The best option is to use the free Tonfotos app
How to copy photos from iPhone to computer via Explorer
This is one of the easiest ways since it does not require installing any programs, including iTunes. All you need is a USB cable to connect your phone to your computer. Just follow these steps:
Connect your phone to your computer with a cable and unlock it (with your fingerprint, Face-ID or code).
The iPhone will probably ask you if this computer can be trusted. Select “Trust” to allow the connection; otherwise, you won't be able to copy photos.
If the computer asks what to do with the connected device, select “Open in Explorer”. If it doesn’t ask for some reason, then open the explorer yourself and follow the steps on your phone.
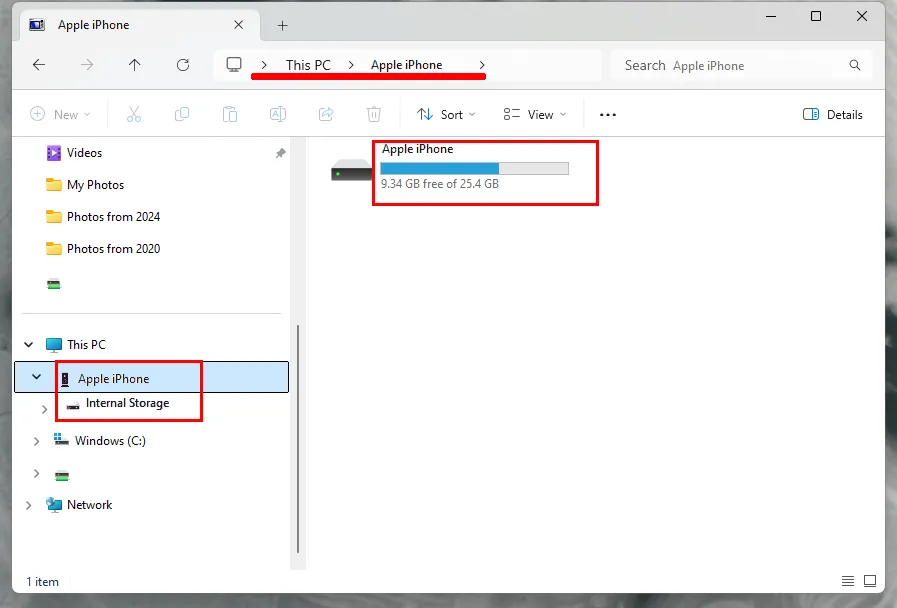
- Go to "Internal Storage", then to the "DCIM" folder. Depending on the version of iOS, you may see either one big pile of photos, or they will be divided into different folders. In the latest versions of iOS (11 and above), you will see a large number of folders, each named with the year and month the photo was taken. For example, photos taken in April 2022 will be in a folder that starts with 202204. There may be several such folders if you took a lot of photos this month.
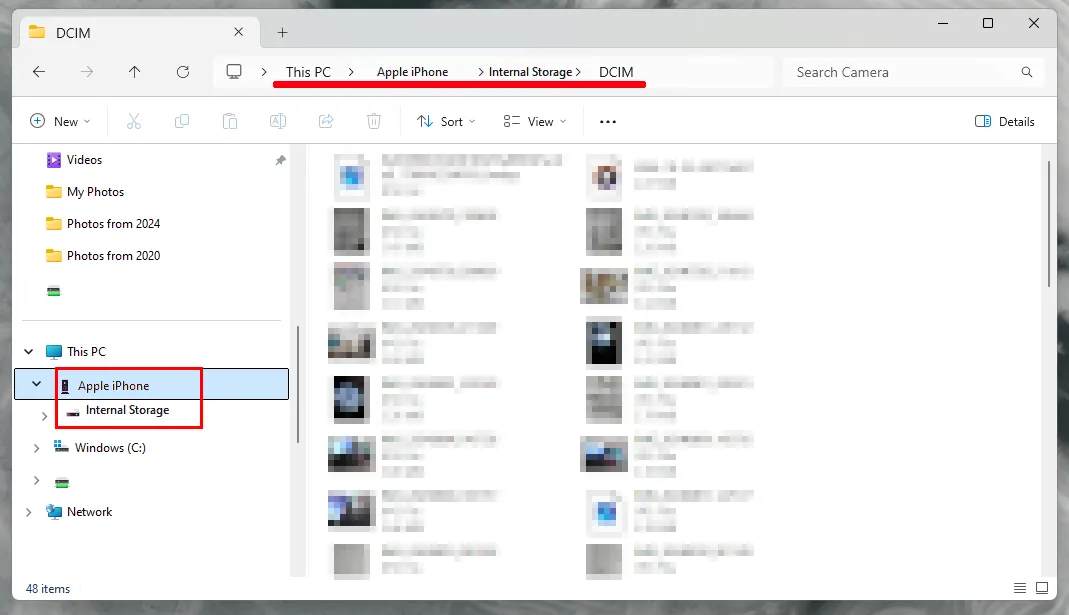
Select the files you need and copy to a folder on your computer.
Wait until copying finishes, this may take some time, depending on how many photos you want to copy.
This method is good for copying the last few photos or all the photos you have. However, if you are looking for photos taken at different times, then searching through many folders in Explorer may not be very easy. The option with the Photos application may be more convenient here.
Also, if you want to regularly download all new photos from your iPhone, then this method is too labor-intensive and requires a lot of attention to keep track of what has already been downloaded. The Tonfotos application is a better choice for that.
How to selectively download photos from iCloud to your computer
If your iPhone has automatic photo synchronization with iCloud, then you can download photos directly from the cloud without connecting your phone to the computer or installing anything. Follow these steps:
- Go to icloud.com and enter your cloud username and password. If two-factor authentication is enabled, you may need to confirm your login using a six-digit code that the iPhone will display on the screen. If you are using someone else's computer, then do not check the “Keep me signed in” box, and also do not allow iCloud to trust this browser.
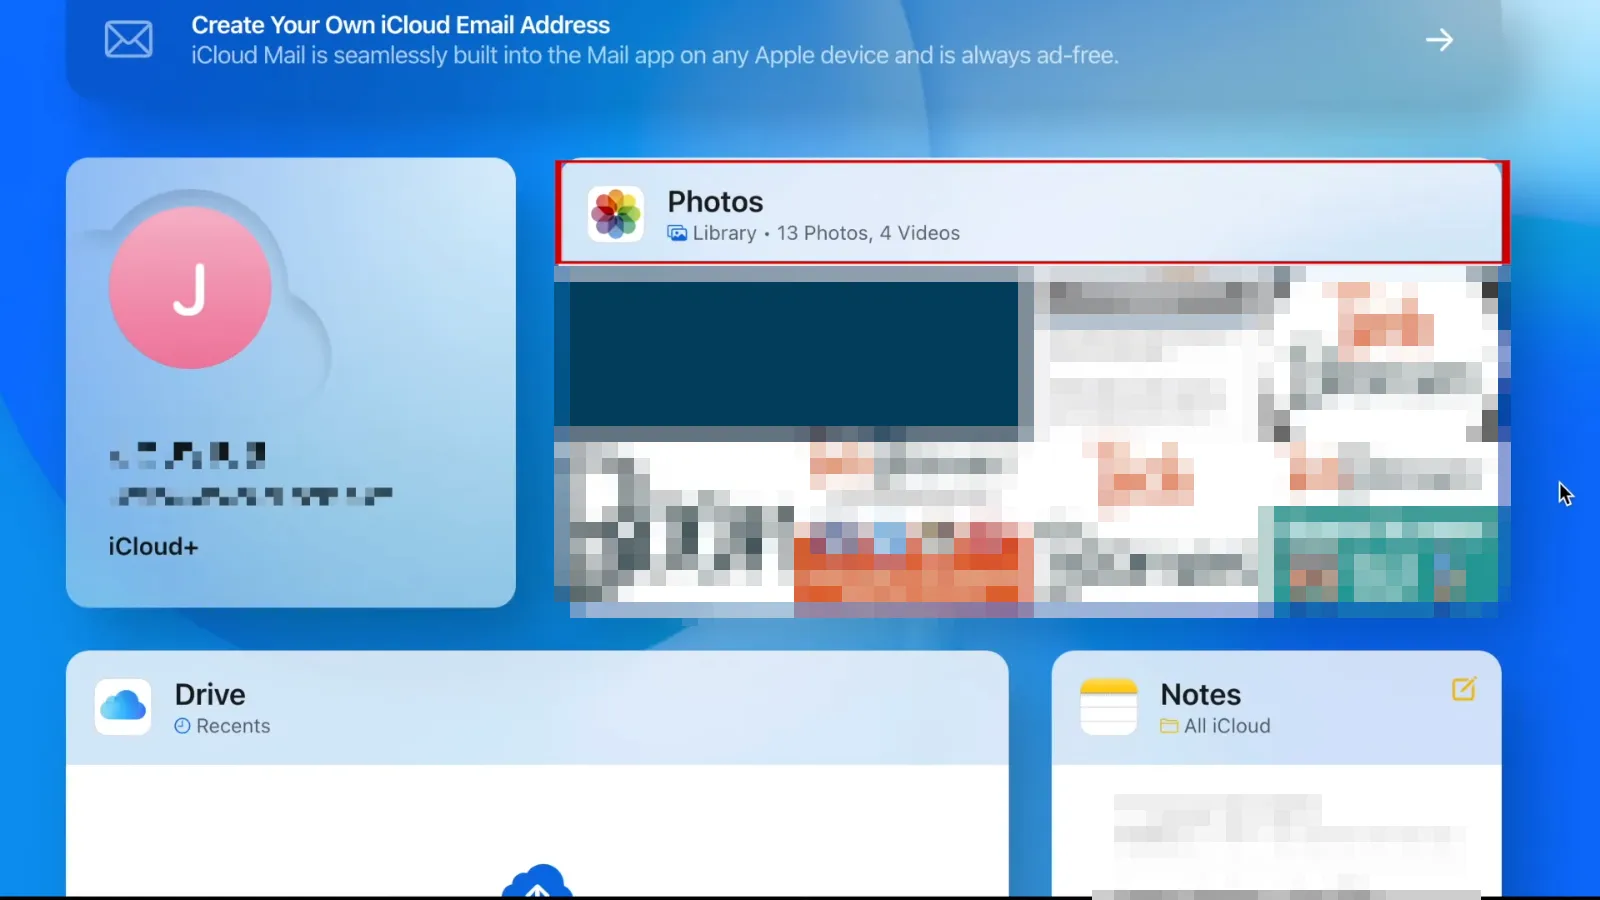
Open the Photos app.
Find the photos you need in the archive and select them by holding down the Ctrl key while clicking on each one.
Find the cloud download button at the top right of the window. Press and hold it.

You will two options for downloading your photos:
“Originals without changes” - This option allows you to download photos in their original form, without any edits. They will be in the format they were taken, which may be in HEIC format, depending on your iPhone settings.t Not all programs can view HEIC.
“Most Compatible” - This option includes all your changes and also downloads photos in the standard JPEG format.
Click "Download". If there are several photos, they will be downloaded as a zip archive.
How to download all photos from iCloud to your computer using the Windows client
The iCloud Photos feature in the iCloud app for Windows allows you to sync photos and videos across all the devices connected to your account. To use this option, follow the steps:
Download and install iCloud for Windows on your computer.
When you first launch the application, you will be asked to enter your iCloud login and password.
In the next window, the program will ask you to choose what data you want to download to your computer. Turn off any unnecessary options. Click the "Options" button next to "Photos", in the window that opens, turn on "iCloud Photos", then click the "Done" button, and then "Apply".
After this, you will see the “iCloud Photos” section in Explorer, where you can see all the photos uploaded to the cloud. They can be viewed and copied. Additionally, any new photos and videos you take on your phone will be saved to your computer automatically, but not the old ones. To save them to your computer, you need to take additional steps.
Find “iCloud Photos” in the notification area of the taskbar and select “Upload Photos” from its menu.
You will be offered a dialog where you can choose which years of photos and videos you want to download to your computer.
How to import photos from iPhone to computer using the Photos app
If you want to copy just a few photos, then the built-in Windows 10-11 Photos app will help you. All you need is a USB cable.
Connect your phone to your computer with a cable and unlock it (with your fingerprint, Face-ID or code).
The iPhone will probably ask you if this computer can be trusted. Select “Trust” to allow the connection; otherwise, you won't be able to copy photos.
Open the Photos program from the Start menu.
At the top right corner, click the Import button, and in the drop-down menu select “From the connected device”
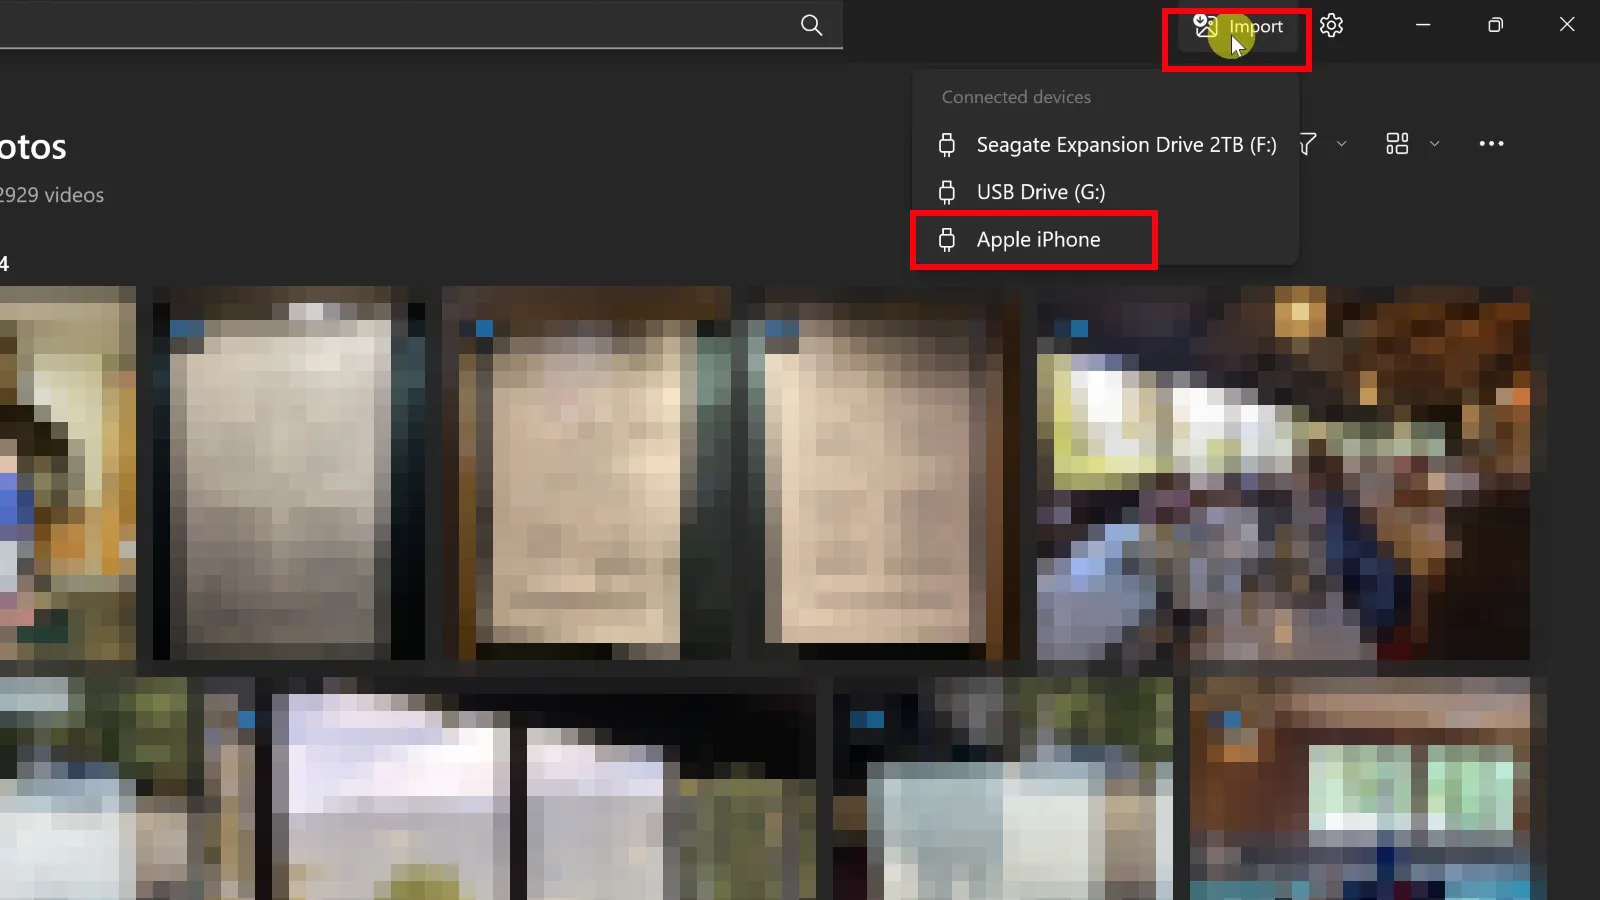
- The app will take a moment to load the list of files from your phone. After that a dialog will open, allowing you to choose the specific photos you want to import. You can also select the folder where to import and enable the deletion of photos from the phone during import.
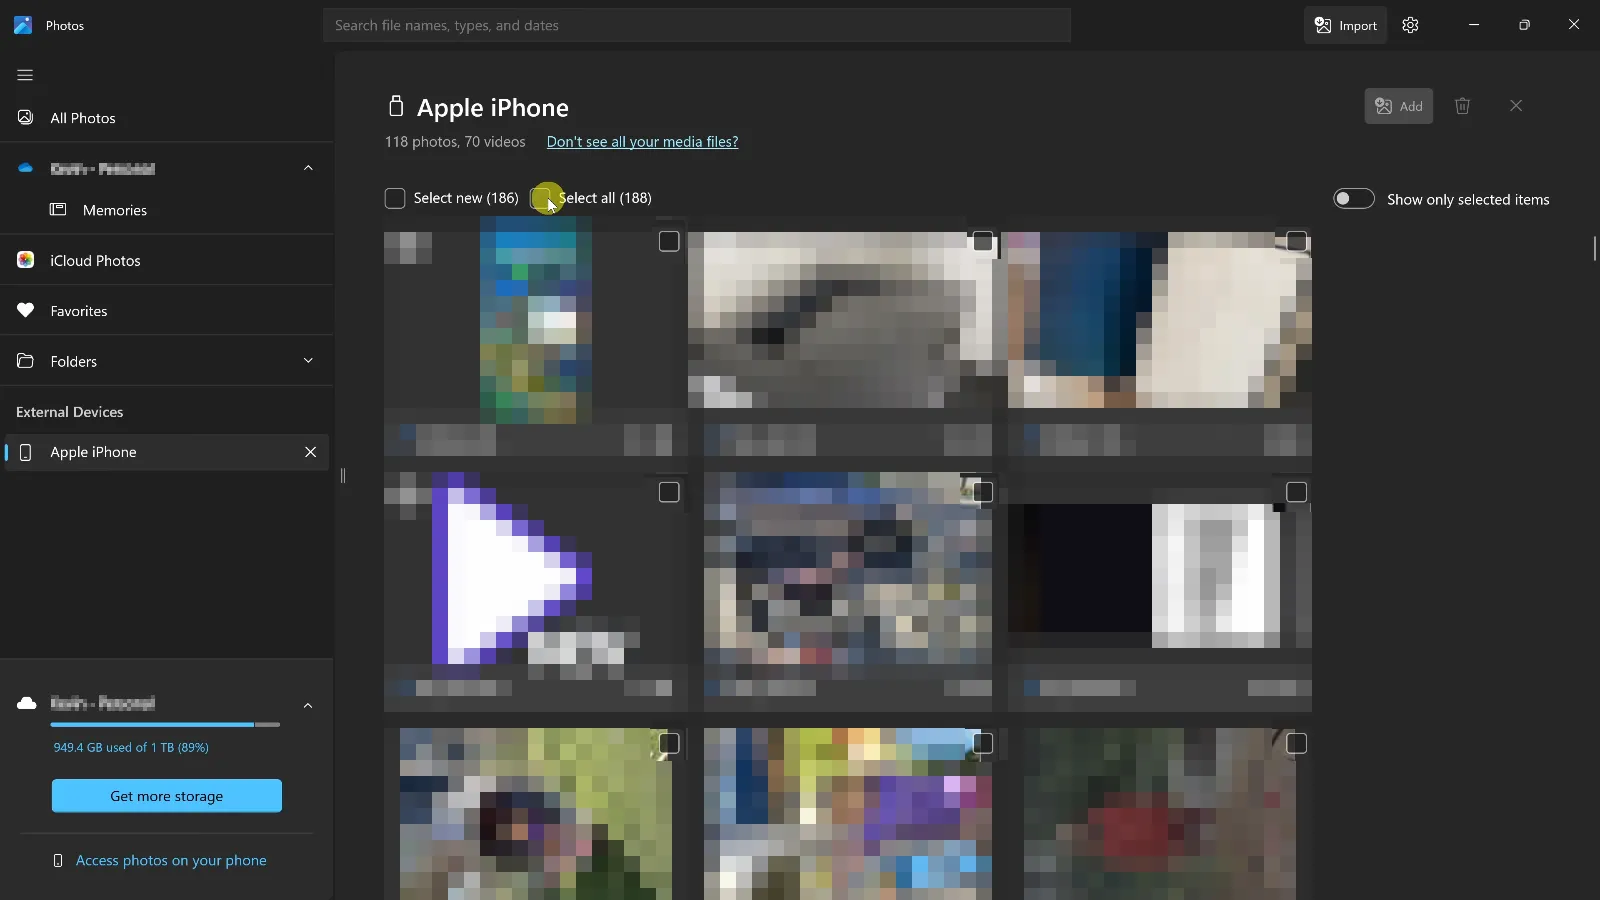
- Click the "Import" button to start the process.Once the import is finished, the photos will be located in the standard “Images” folder or the folder you chose.
How to transfer photos from iPhone to computer without a cable
Sometimes you might need to quickly transfer photos to your computer, but you don’t have a USB cable available, and getting one isn’t easy. If you were using a MacBook, you could solve this instantly with AirDrop, but that option doesn't work with Windows computers.
Then the next easiest way is to send files as attachments via email:
Select the desired photo on your phone and click “share”
If necessary, select more photos
Select “Mail”
Enter the recipient’s email, subject, and send
The application will ask if you need to reduce the size of the photos: click ‘Yes’.
You can use any messenger, but keep in mind that they often automatically reduce the size and quality of photos without asking.
Cloud services
If you want to keep the original image quality, and your photos are too large to send via email, you can use cloud storage. It doesn’t matter which storage service you choose, but the best option is to use the one you already have. And it’s even better if the client for this storage is already installed on your phone. It could be Google Drive, Yandex.Disk, or anything else.
If you don’t have any of this installed, then the fastest way would probably be to use iCloud Drive. Since your iPhone is always connected to iCloud, you won’t need to log in.
Select the desired photo on your phone and click “share”
If necessary, select more photos
Scroll up the menu and choose “Save to Files”.
Select “iCloud Drive” and pick any folder in it, for example “Downloads”
Click “Save”
That’s it for the phone. Now let's go to the computer:
Go to icloud.com and enter your cloud username and password. If two-factor authentication is enabled, you may need to confirm your login using a six-digit code that the iPhone will display on the screen. If this you are using someone else’s computer, then do not check the “Keep me signed in” box.
Open “iCloud Drive” and go to the folder you need
Download the necessary files. You can delete them immediately so they don’t take up space.
The downside of transferring a photo via cloud storage is that it usually comes in HEIC format (unless you changed the default format in the phone settings). Unfortunately, not all programs understand this format on Windows.
Transfer photos from iPhone to computer using the free Tonfotos application
If you want to transfer photos from the phone to the computer regularly, so you always have a backup, then all of the methods mentioned earlier are not as convenient as the Tonfotos program.
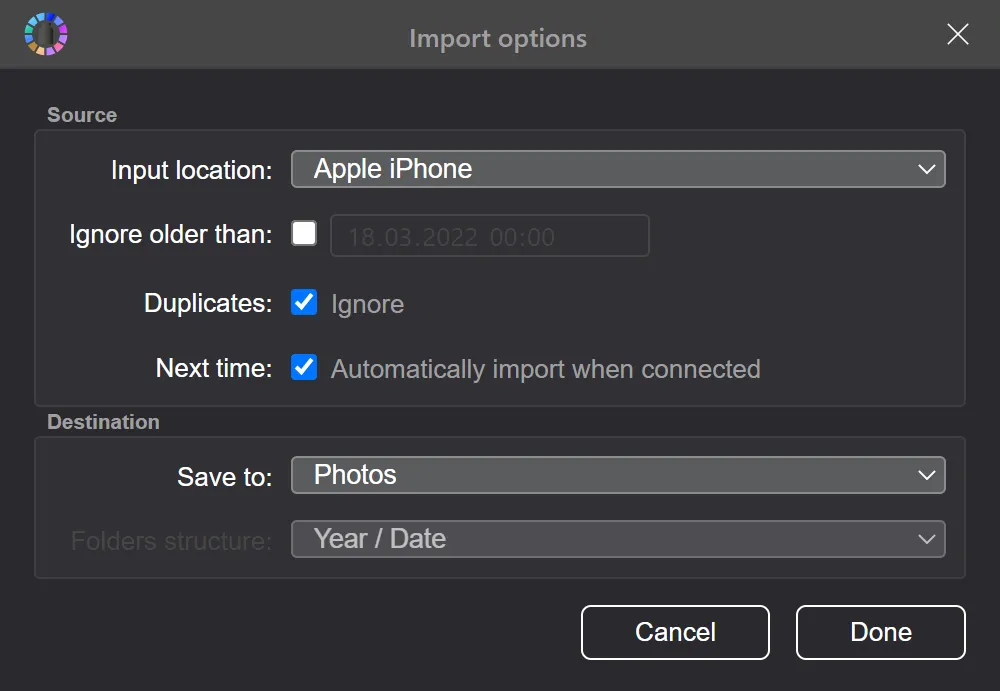
This program is specially designed to make managing your photo archive as simple and convenient as possible. To copy new photos from your iPhone to your computer, just connect the phone with a USB cable.You don't even need to press any buttons. The program will automatically detect which photos have already been imported and which are new, then download them and organize them into different folders by date. It will let you know when you can disconnect your phone. Meanwhile, you can safely continue working on your computer.
Read more about the function of automatically importing photos from an iPhone to Tonfotos.
