How to Back Up iPhone to an External Drive
Updated: September 23, 2025 Author: Vitaly
Here are the best ways to back up videos and photos from your iPhone to an external drive. We've covered backup options for both older models with Lightning and newer models with a USB-C port.
Apple is to blame for creating the iPhone with a truly stunning camera that allows for high-resolution photos. This encourages people to take photos not only of memorable moments but also of small details, like store signs with opening hours or items on the shelf, so they can find them later online at a better price.
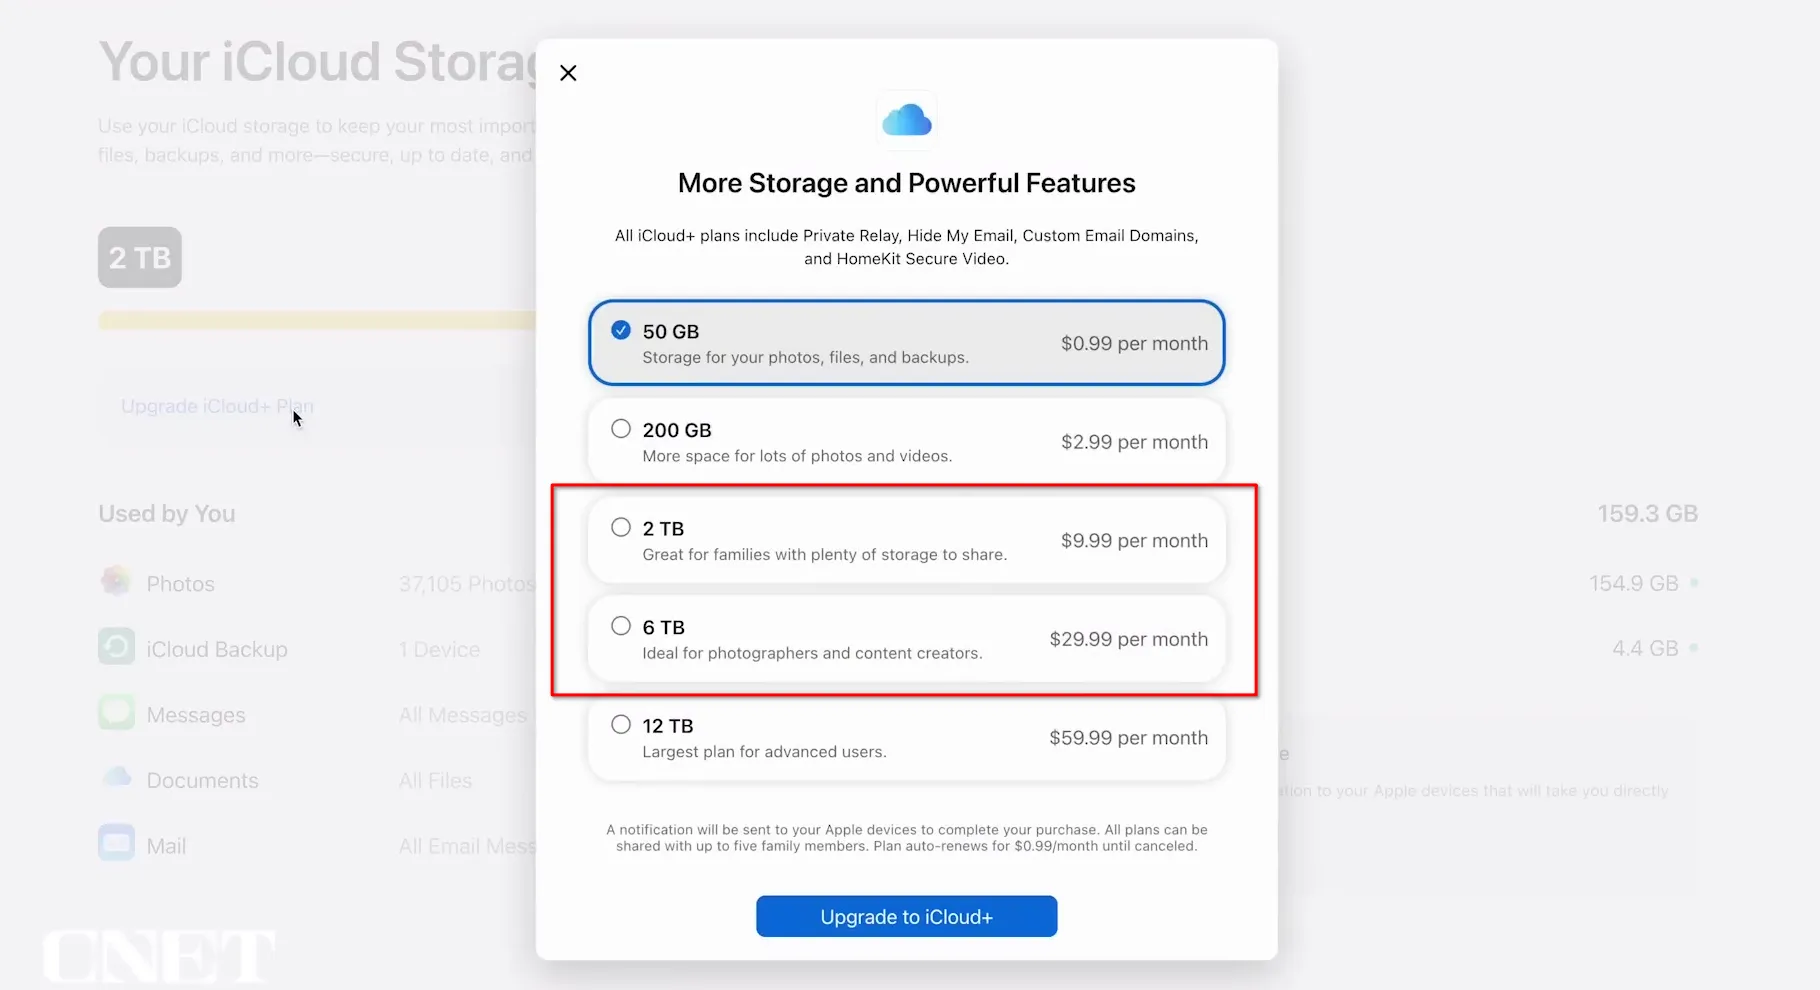
The situation with video is even worse. The iPhone allows us to shoot home videos of pets or children in the highest quality. This means that even a short 10-minute clip takes up around 2 GB of storage. However, the phone's storage capacity doesn't increase with the amount of video recorded or photos taken. You can purchase additional iCloud storage, but this is more of a temporary solution that requires ongoing investment. The price difference is especially noticeable when the required storage exceeds 2 TB.
Moreover, storing all photos and videos exclusively on your phone is a foolproof decision. While Apple devices are quite reliable, no one is immune to losing their phone or accidentally dropping it.
In this situation, the most cost-effective solution is to periodically back up your iPhone photos and videos to an external drive. This way, you can protect your memories and free up space on your phone without affecting the memory on your work computer or laptop.
The problem is that simply connecting an HDD/SSD drive isn't possible with all iPhone series. So, I've prepared several methods for doing this using special adapters or via a Mac or Windows laptop.
How to backup iPhone to external drive using Macbook?
Since iOS iPhone and macOS Macbook are closely related to each other, you can back up your phone data effortlessly by simply clicking the corresponding button in Finder.
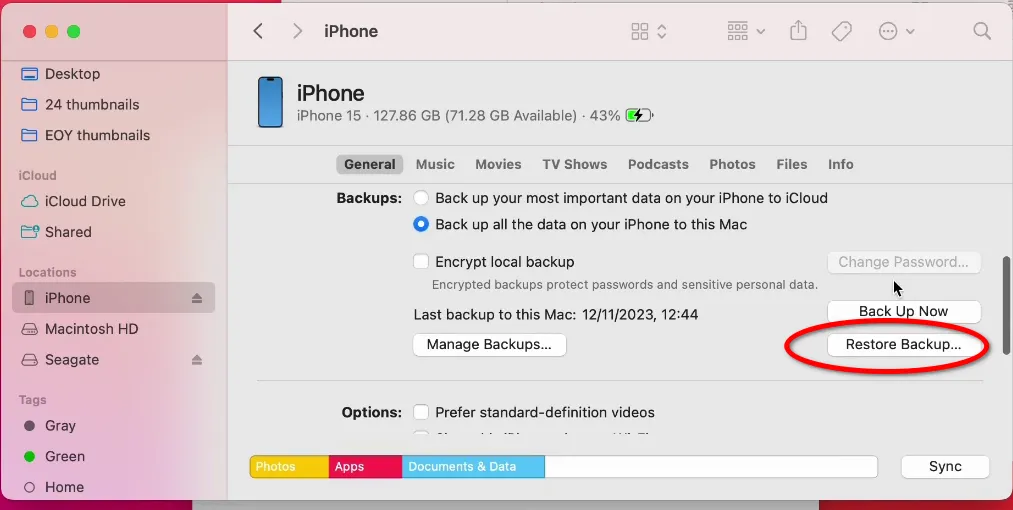
However, there's no option to choose where exactly your phone's data is saved. By default, all backups are sent to the MobileSync folder, which is located in the Application Library on your Macbook's internal storage.
If your laptop's storage space can accommodate all the data from your phone, you can first back up to the default folder and then transfer the files to an external SSD/HDD. However, from personal experience, this option only works when the iPhone's storage is small, up to 10 GB. If you need to transfer 100 GB or more, the double-copy process will take time.
I'd like to show you a way to trick Finder into creating iPhone backups directly to an external drive.
- Connect your iPhone and external HDD or SSD drive to your Macbook.
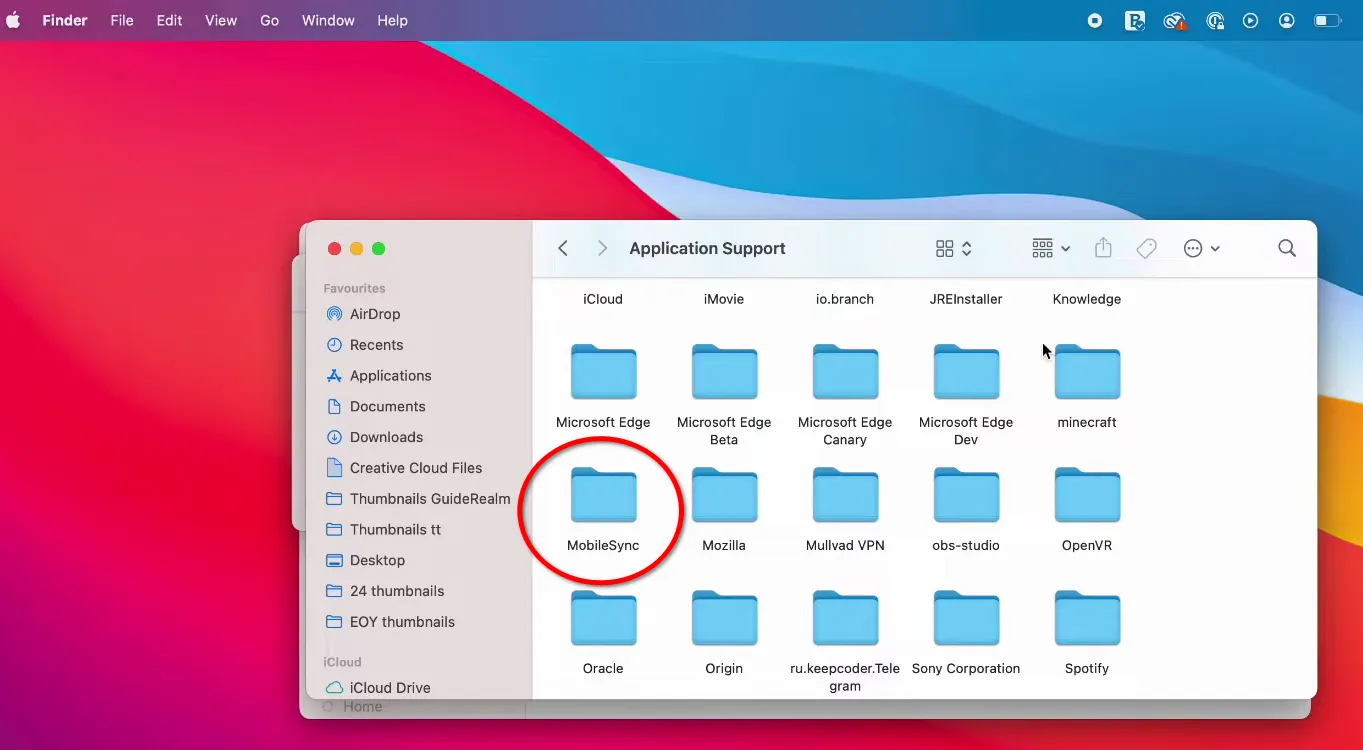
- Open the external drive in Finder and create a MobileSync folder.
- Locate the original Backup folder at ~/Library/Application Support/MobileSync/Backup/.
- Copy or move the entire Backup folder to an external drive.
- Delete the original Backup folder from your Mac.
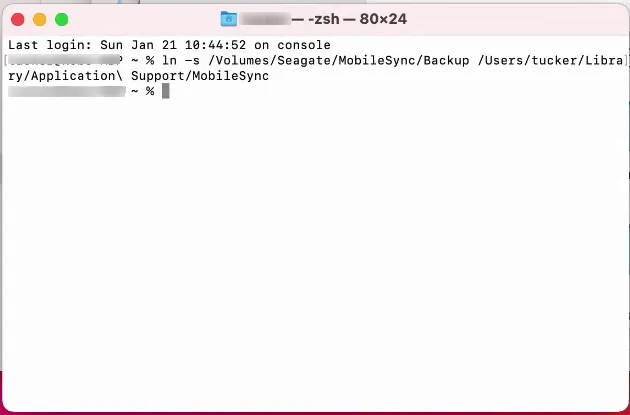
- Open Terminal and enter the command: ln -s /Volumes/[ExternalDiskName]/[NewFolderName]/ ~/Library/Application\ Support/MobileSync/Backup
This command creates a symbolic link (symlink), which is a shortcut to a folder or file. When you open it, the system redirects you to the original.
Now, when you launch the built-in iPhone backup tool, all files will be automatically copied to the connected external drive.
The advantage of this method is that all operations can be performed using standard cables for connecting the iPhone and SSD/HDD to the Mac.
How to backup iPhone to external storage using Windows 11?
Unfortunately or fortunately, Windows 11 doesn't have the same deep integration with the iPhone as the Macbook. Microsoft's proprietary Phone Link app only provides basic features: viewing contacts, monitoring battery life, and sending individual files. To create full iPhone backups, you need to install iTunes.
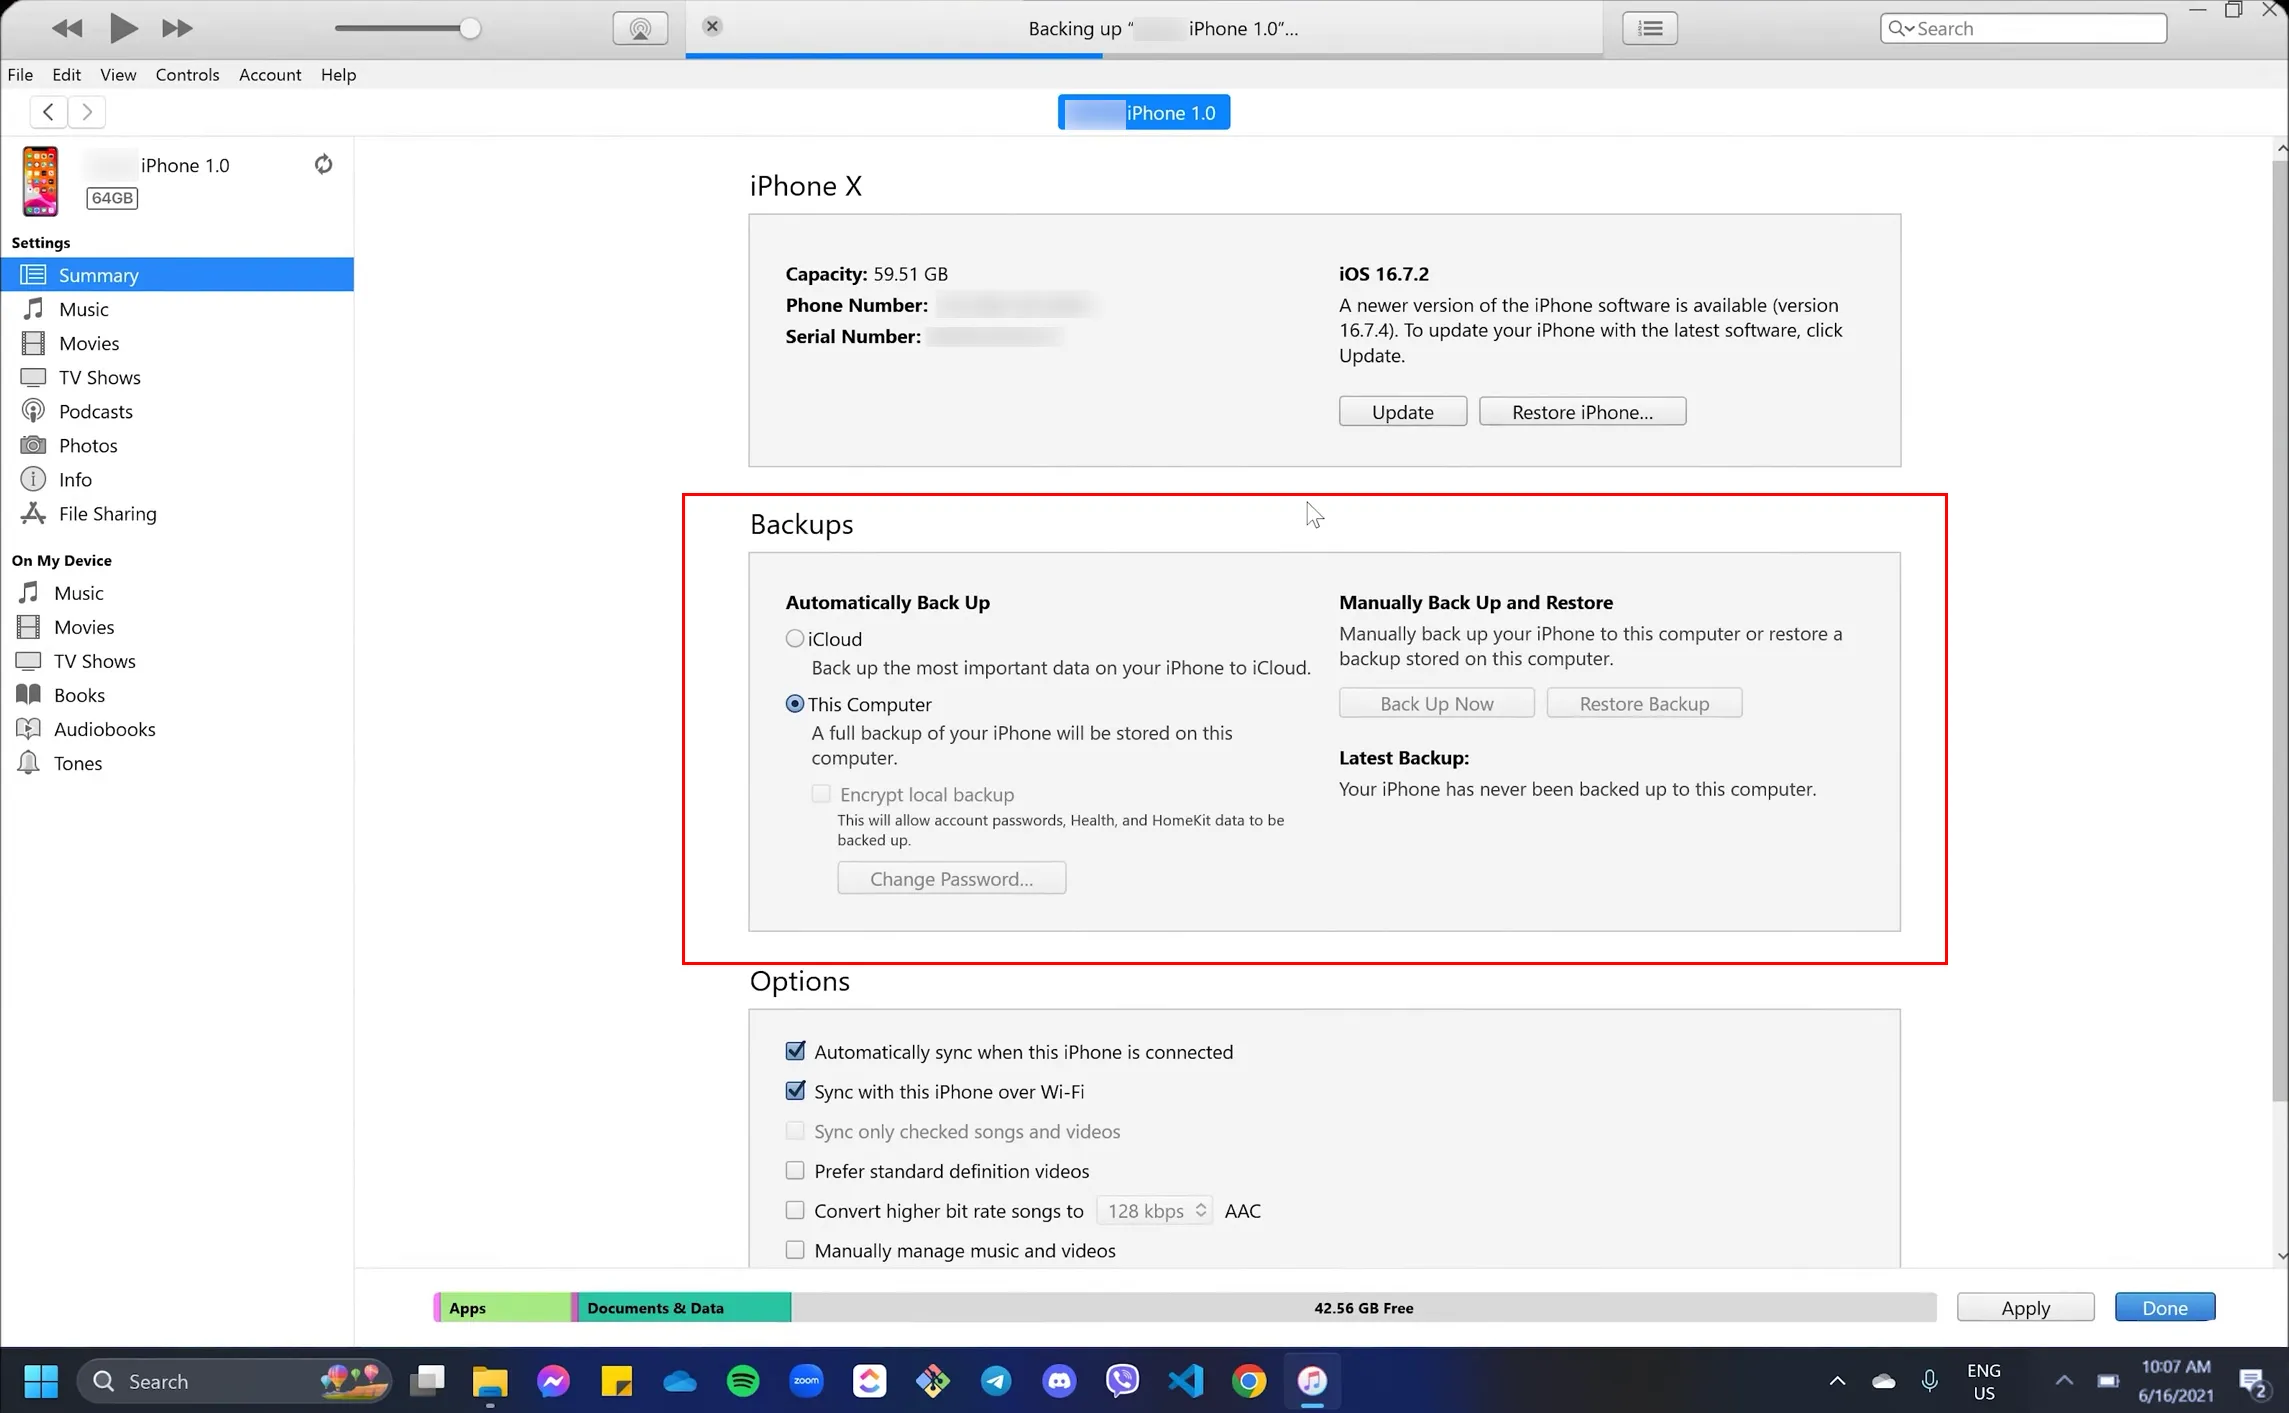
As with the Finder on a Mac, copying occurs to a default folder, although its location depends on where iTunes was downloaded.
- Microsoft Store – C:\Users<Username>\Apple\MobileSync\Backup.
- Apple website – C:\Users<Username>\AppData\Roaming\Apple\MobileSync\Backup.
You can use it to subsequently transfer data to an external drive, but it will take more time.
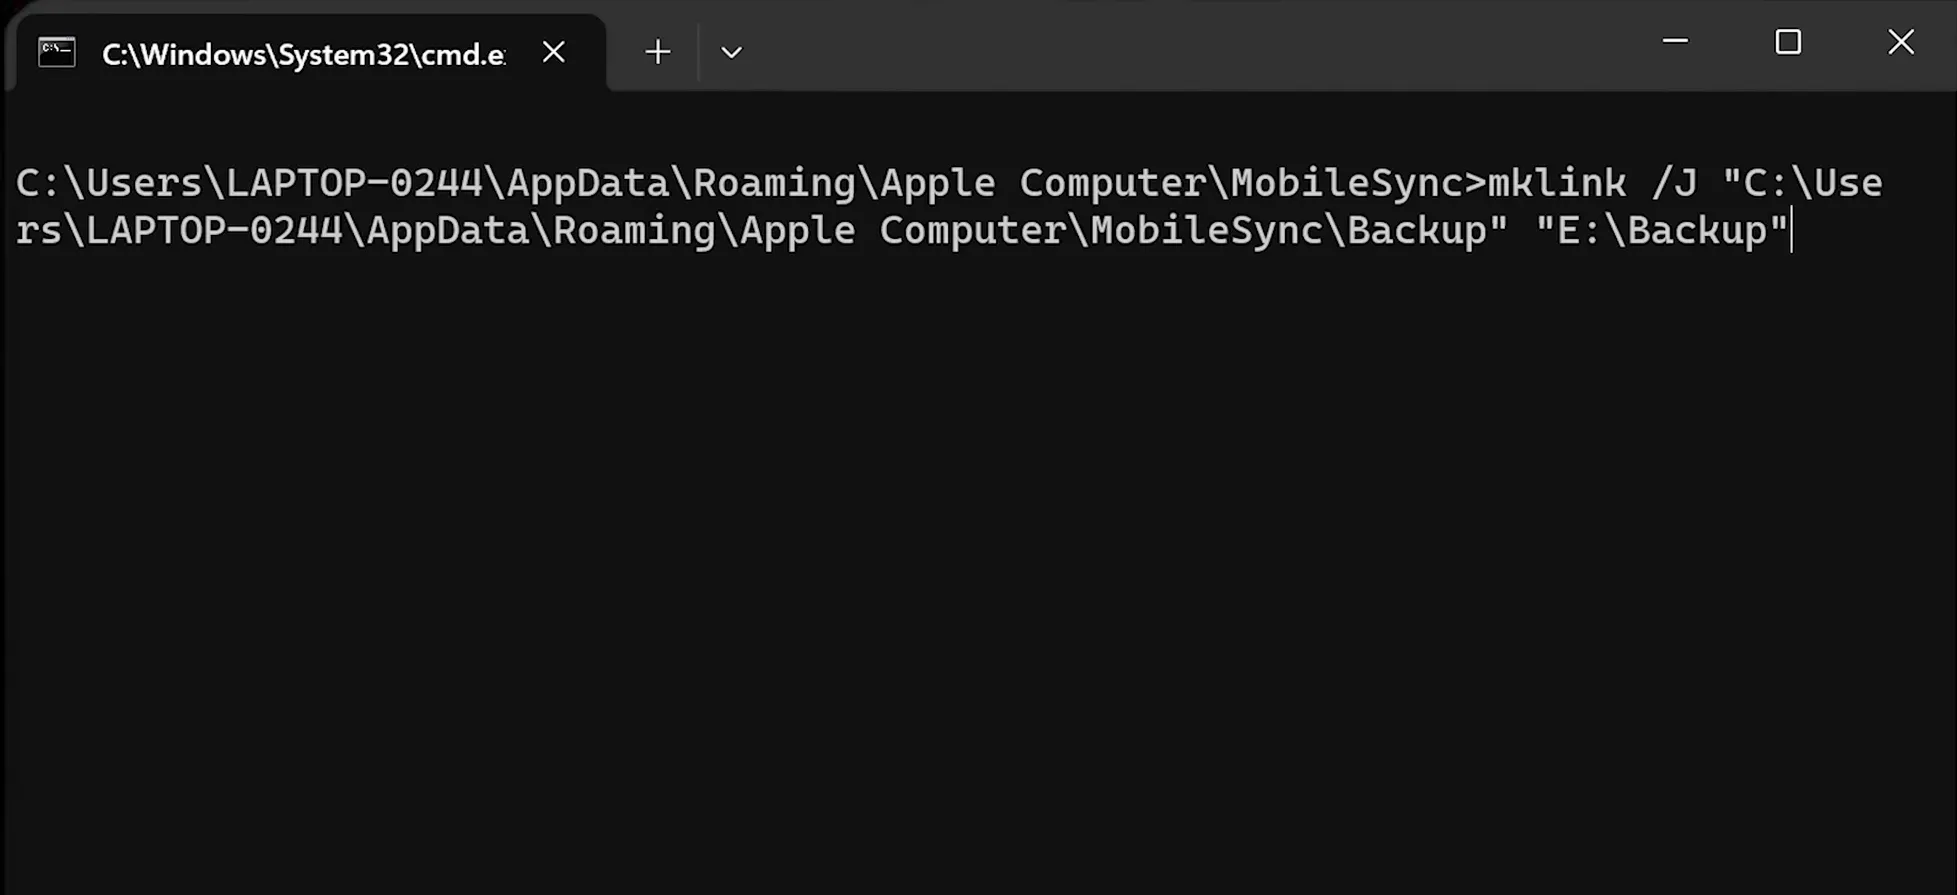
To redirect the backup folder to an external drive in Windows 11, use a junction point, which is similar to a symbolic link in macOS. This allows you to store backups on an external drive while iTunes/Apple Devices "thinking" they're still in the default location. To perform this operation, you must run Command Prompt as administrator.
Enter one of the following commands depending on your version of iTunes:
- Для iTunes из Microsoft Store: mklink /J "%USERPROFILE%\Apple\MobileSync\Backup" "E:\NewBackupFolder".
- For iTunes from the Apple website: mklink /J "%APPDATA%\Apple Computer\MobileSync\Backup" "E:\NewBackupFolder".
How to backup an iPhone with a Lightning port?
The last Apple smartphone with a Lightning connector was released in 2022 (the iPhone 14), so it hasn't been long before these devices fell out of use, according to the analytics agency. Telemetry Deck,The iPhone 13 remains the most popular model, holding the largest market share. Therefore, I must explain how to back up smartphones with a Lightning port.
The unique feature of this proprietary connector is that it was originally designed for connecting accessories, not peripherals. Therefore, Lightning supplies a small amount of current, which is insufficient to operate external HDDs and SSDs.
I found a solution to this problem using a special adapter and a USB hub with additional power.
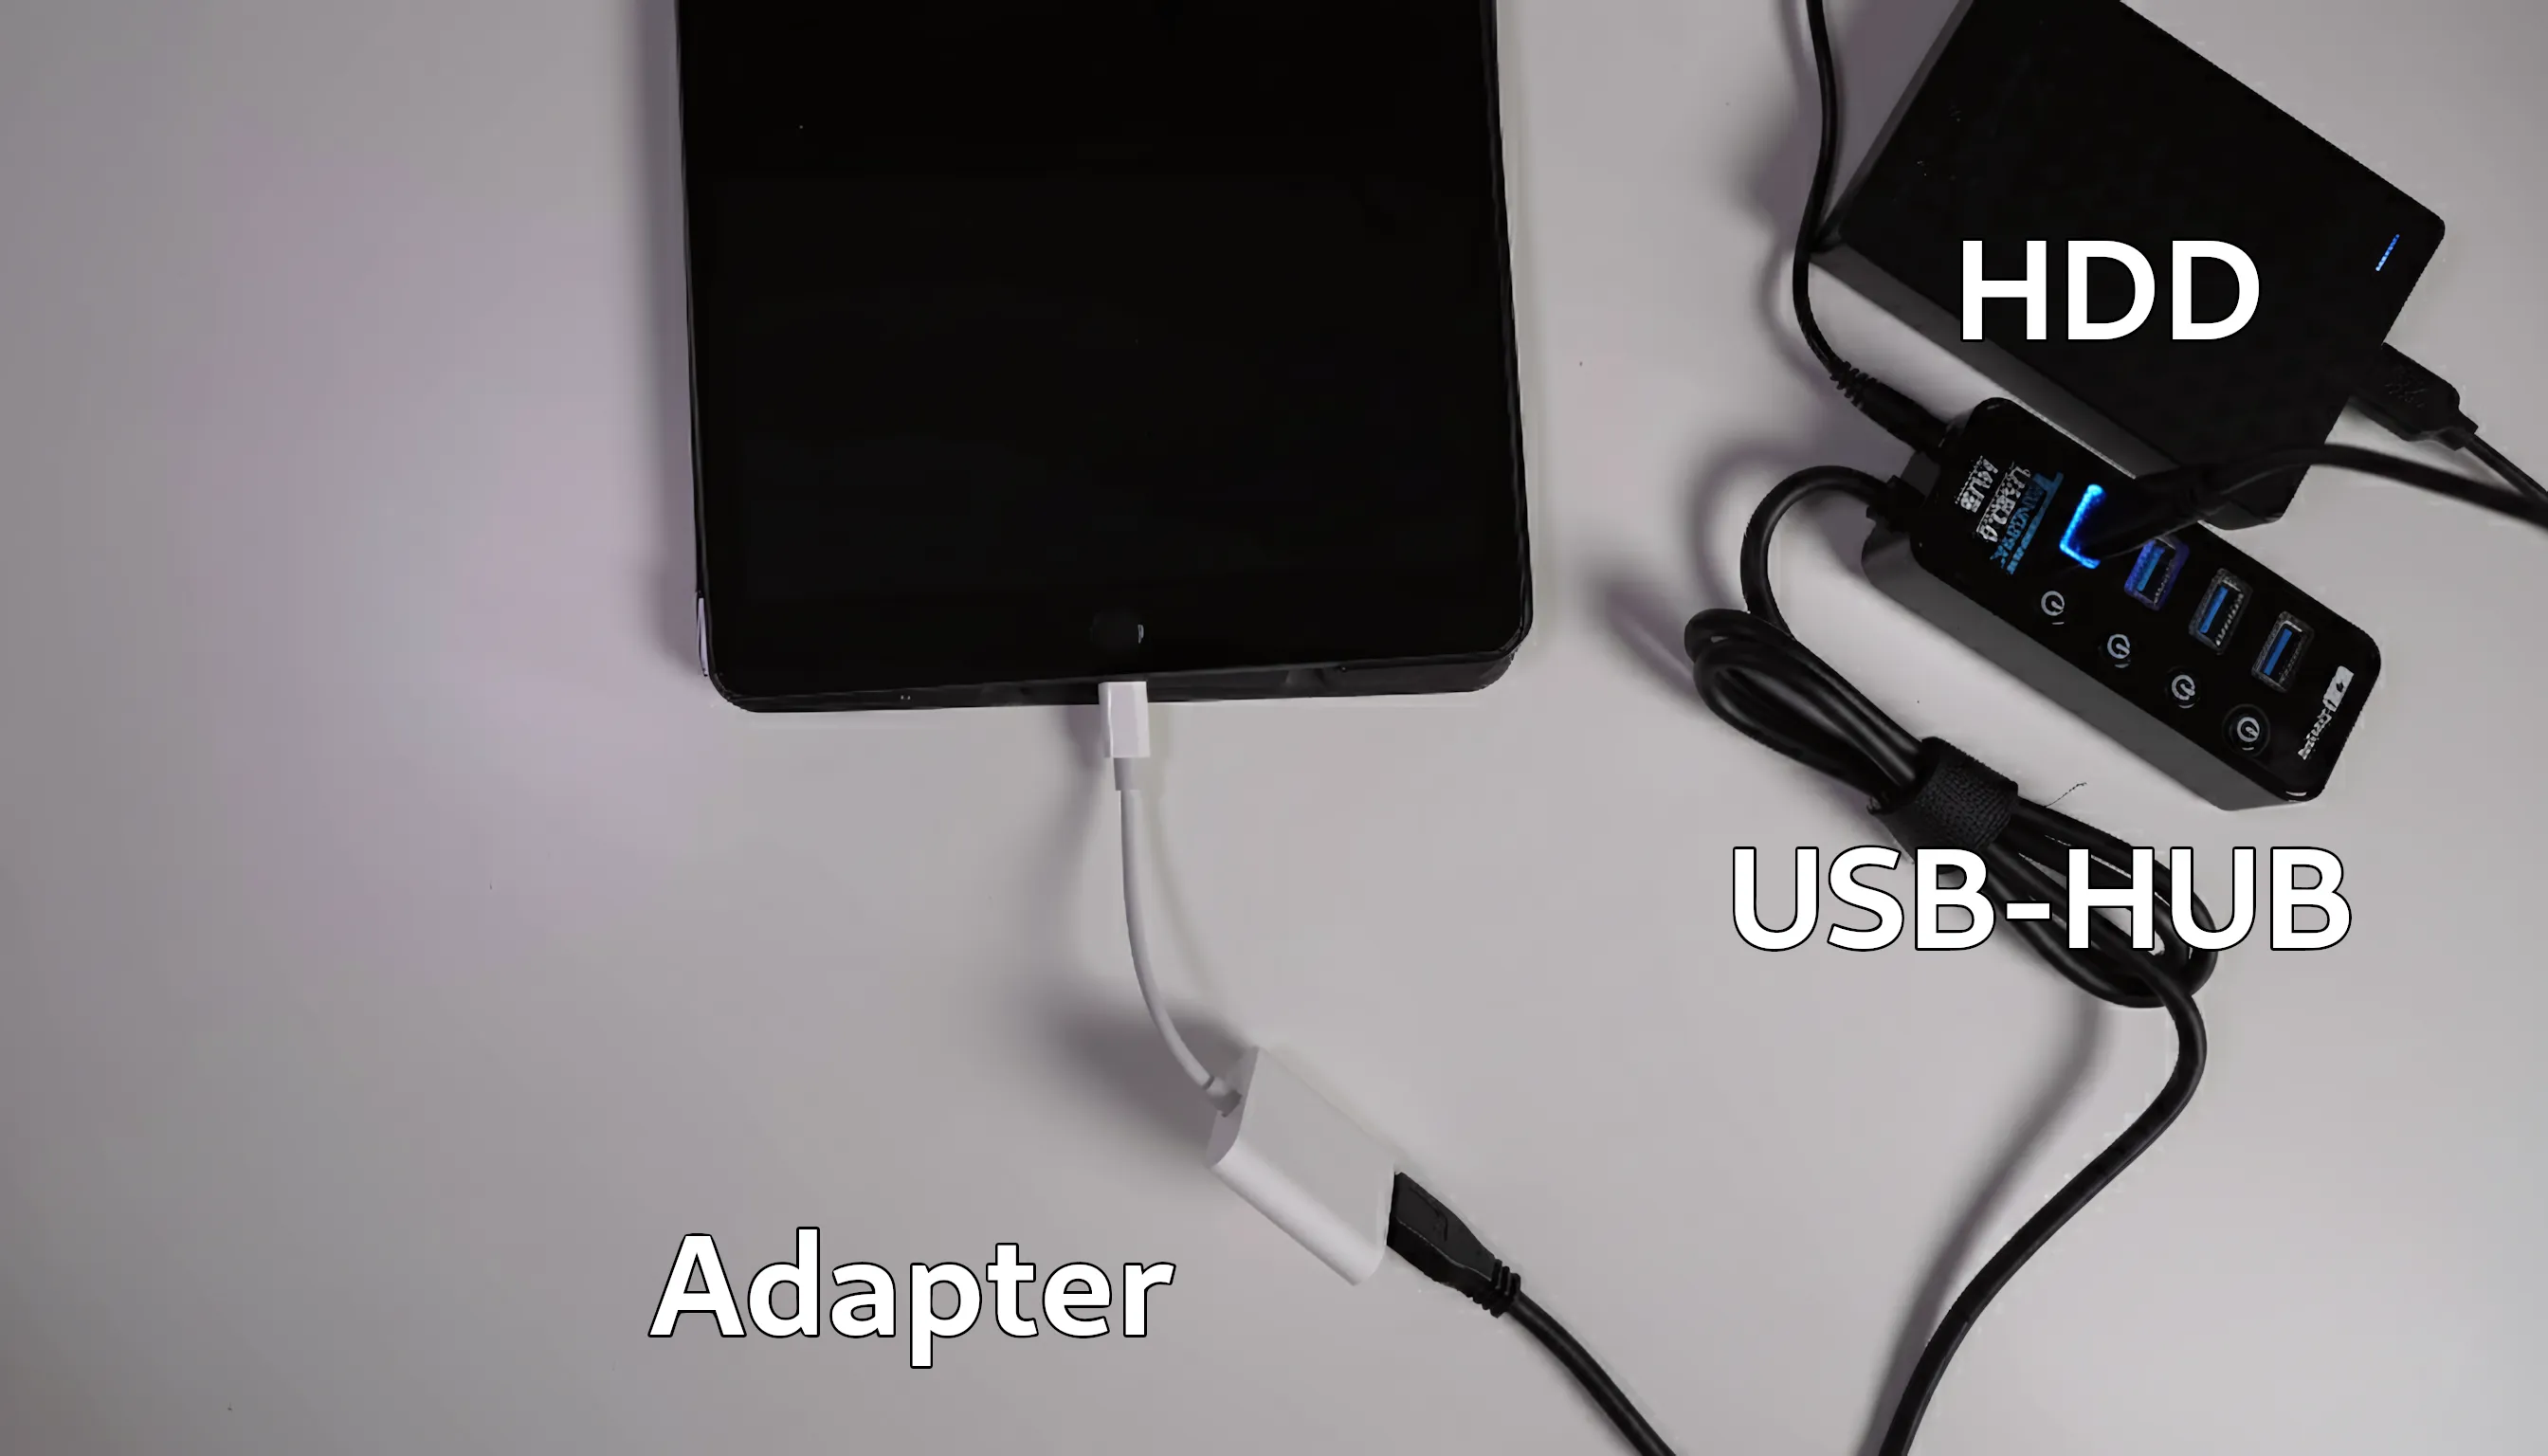
After this, the iPhone will be able to detect the connected HDD. To disconnect the external drive, simply wait until the phone enters standby mode and the screen turns off.
How to connect an external drive to an iPhone with a USB-C port?
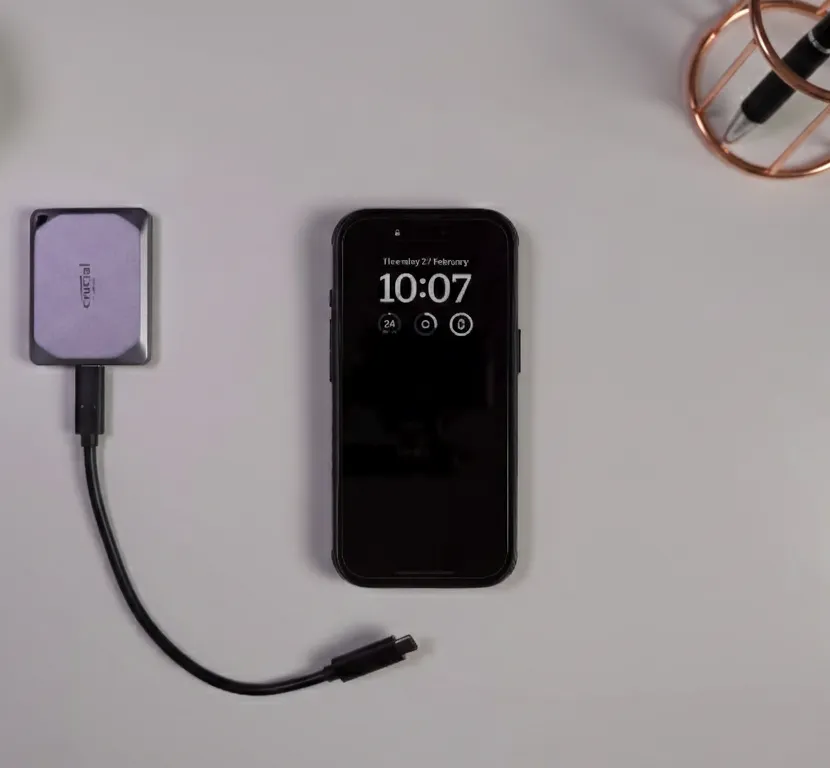
Unlike the outdated Lightning, USB-C offers more options for connecting peripherals. This is due to its support for a wide range of data transfer protocols and the ability to output power from a smartphone up to 150W or more, as well as various volt-ampere profiles. This is more than enough for the full functionality of external drives.
Since most modern SSD drives come with a USB-C to USB-C cable, there's no need for additional adapters to connect it to your iPhone. Simply plug the connector into the appropriate port on your phone.
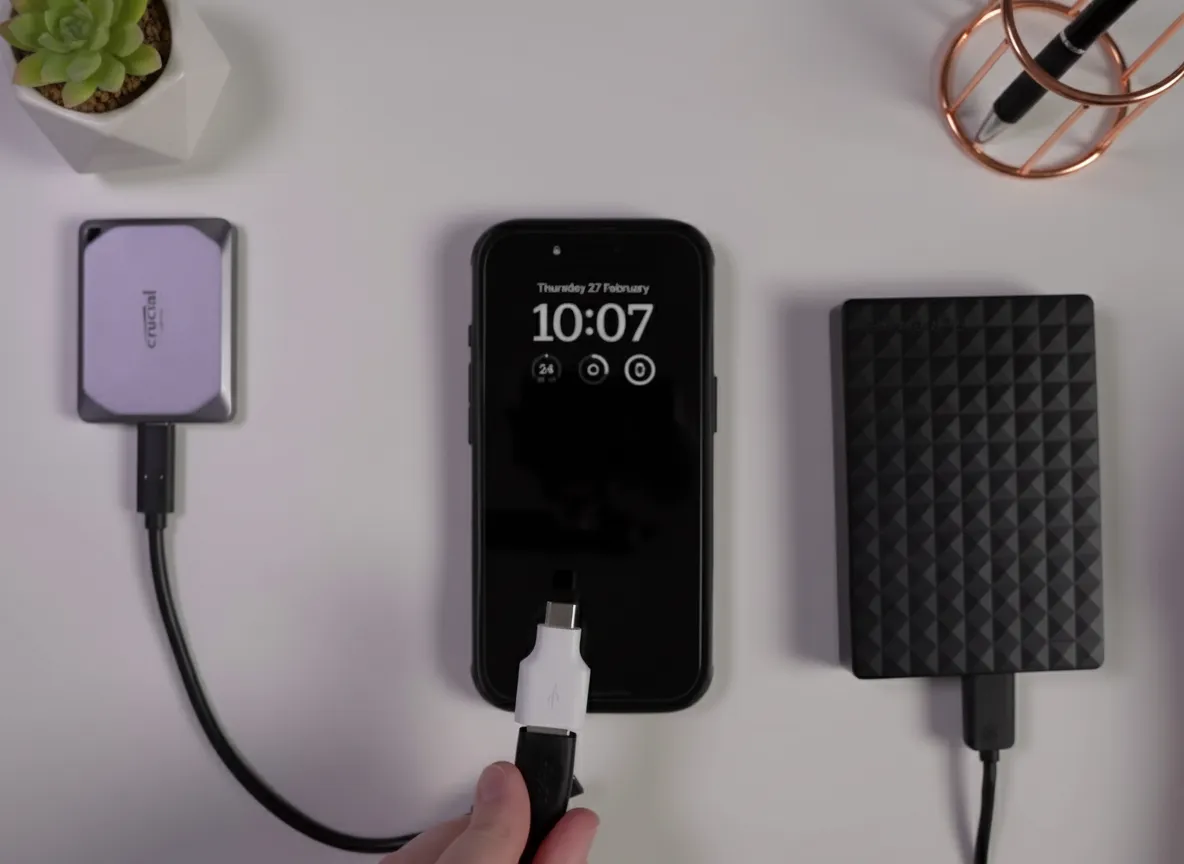
However, external HDDs often come with a USB-A cable, so you'll need an additional USB-A to USB-C adapter to connect it.
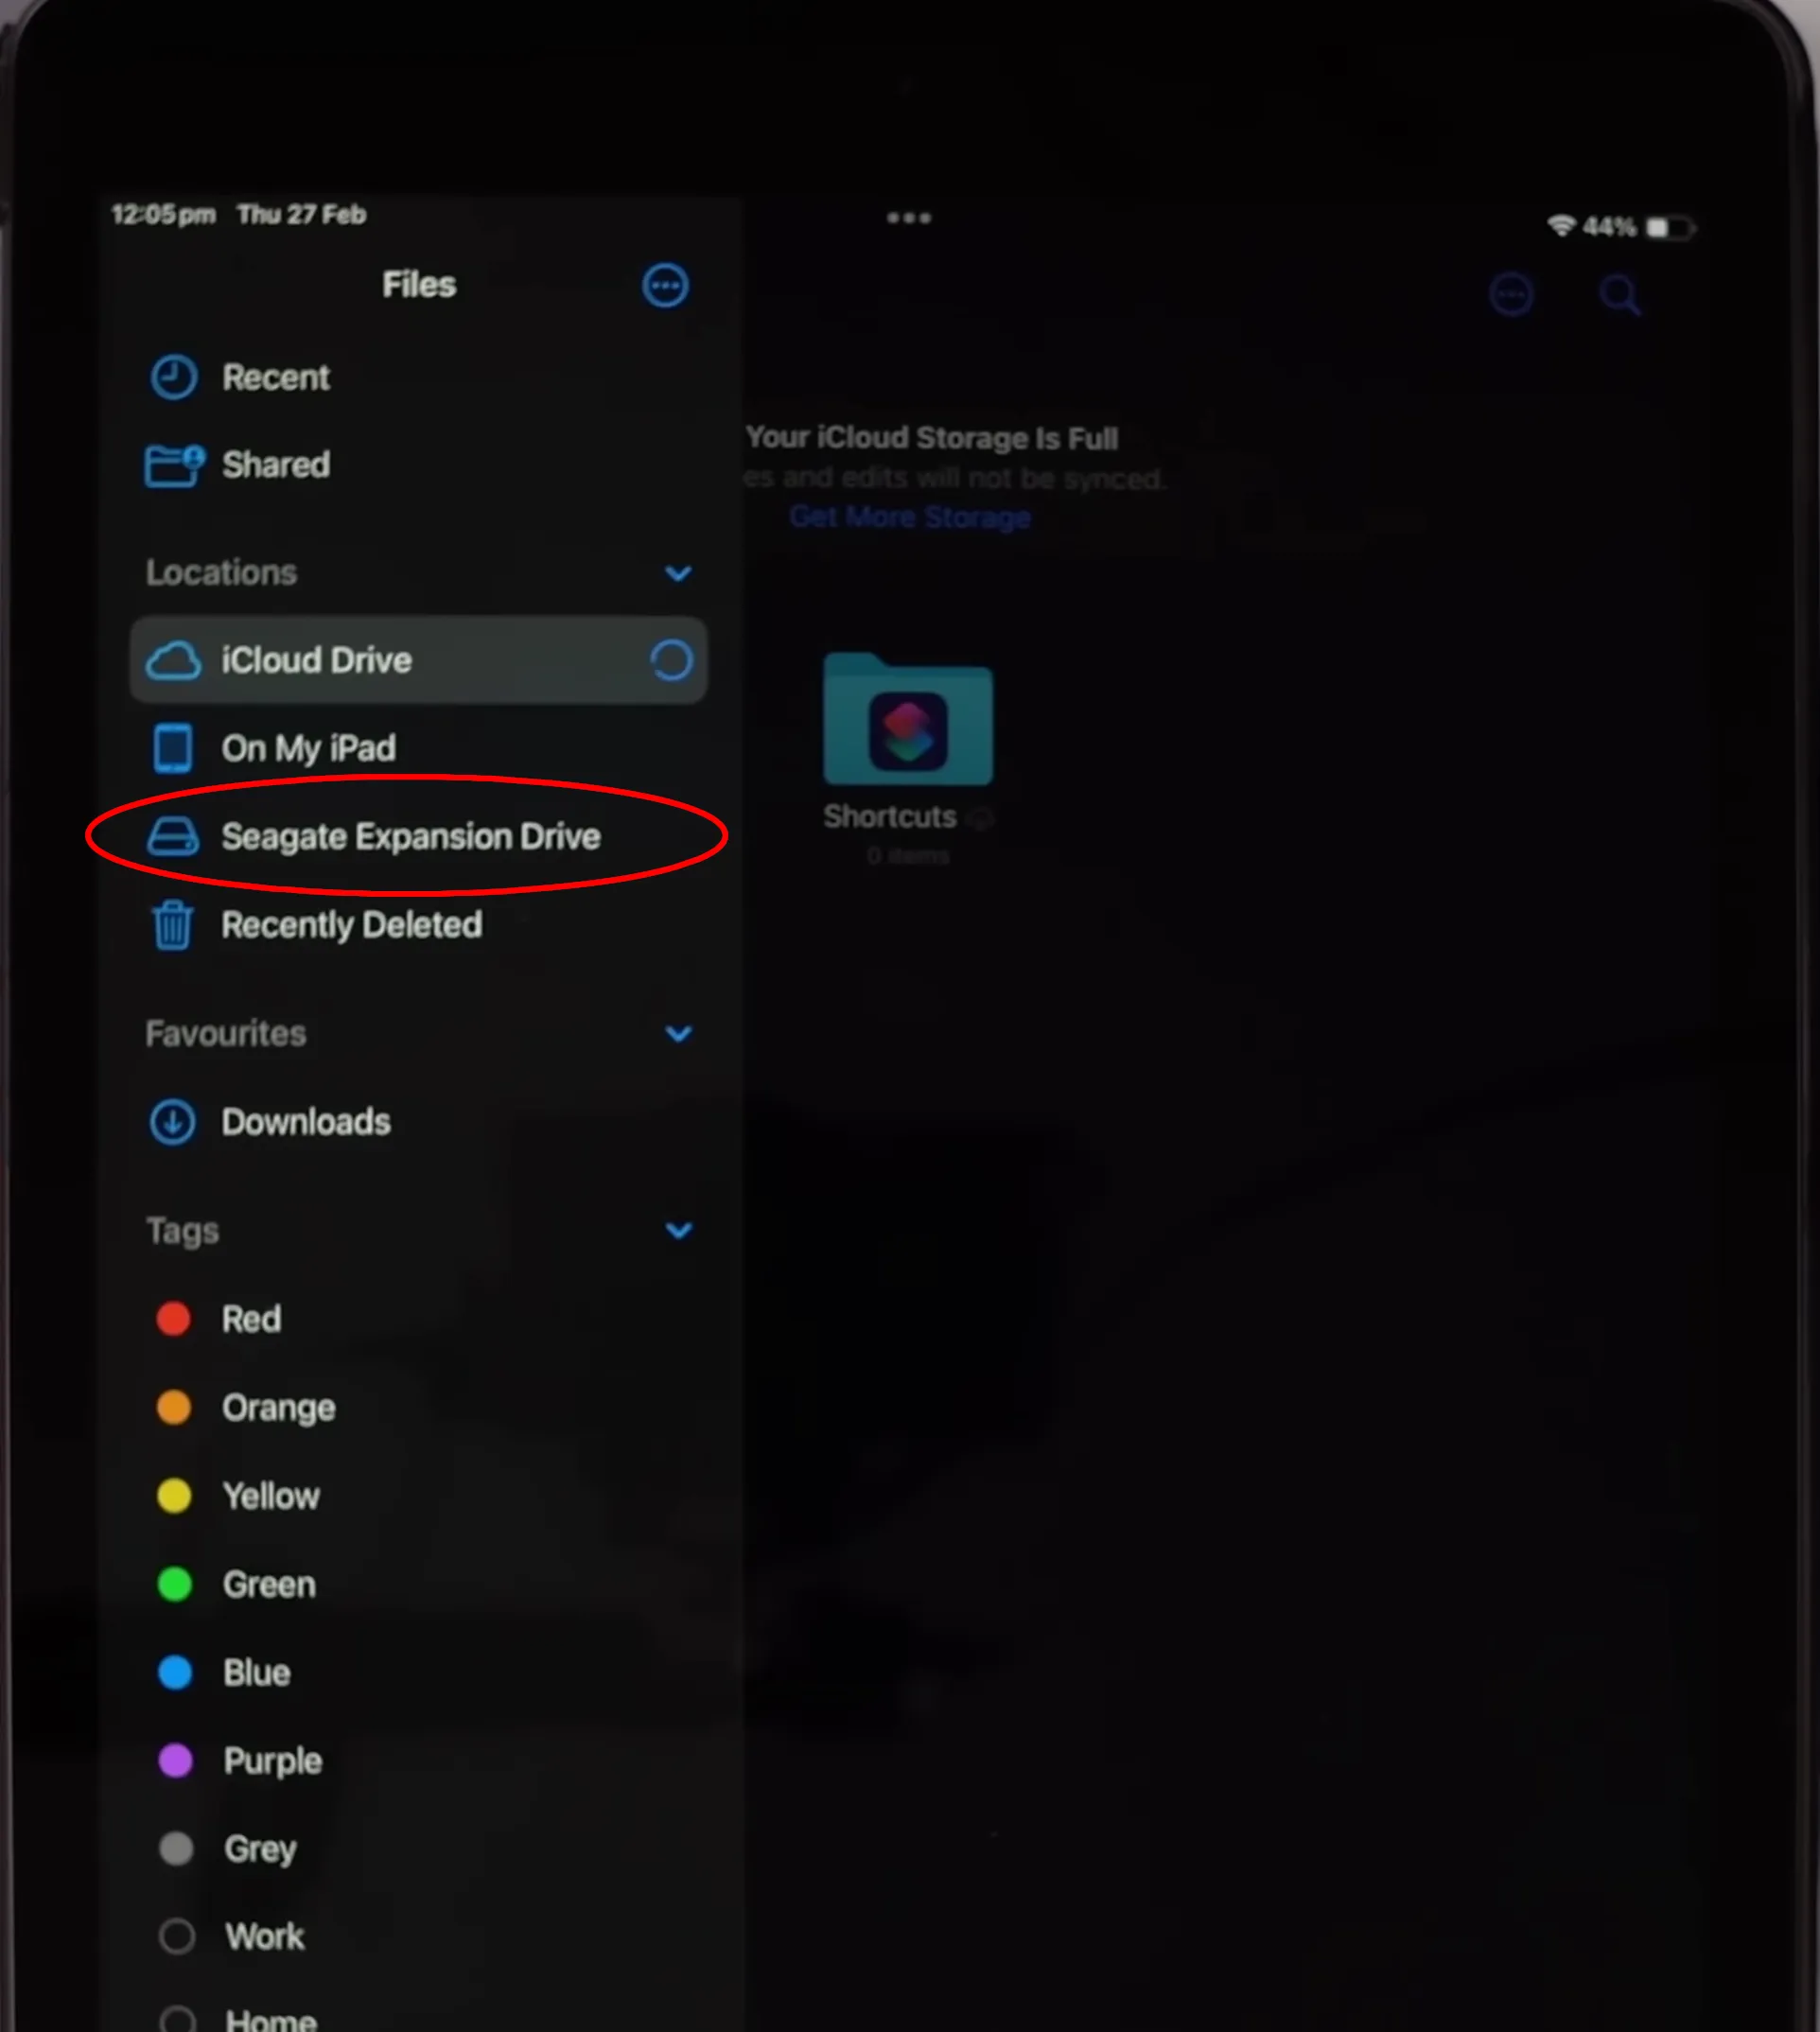
Regardless of your iPhone's port, the process of transferring photos and videos to an external drive is identical. Open the Photos app, select all or some of your media files, and use the Share button to send them to the external drive.
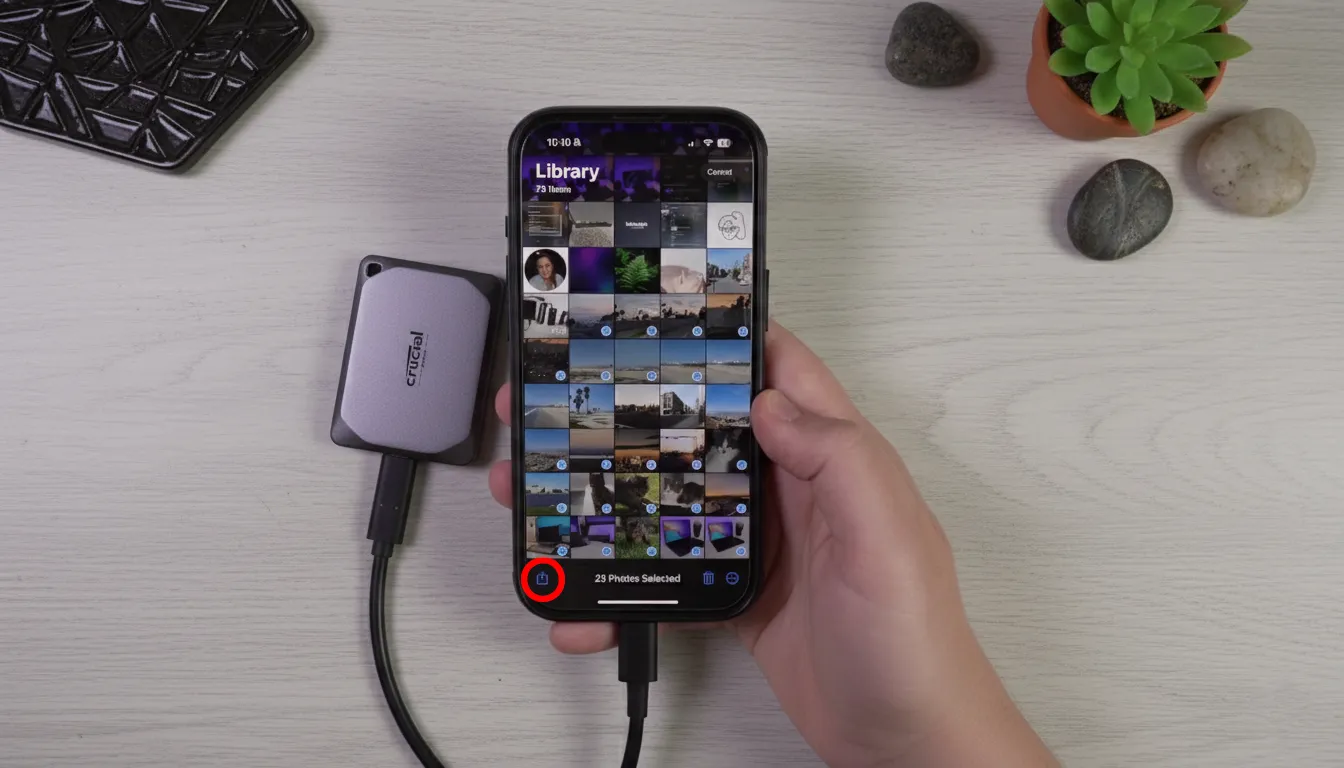
Please note that your phone's screen must be on during the copying process. Otherwise, the copying process will be interrupted and the drive will automatically turn off.
External storage requirements for successful connection to iPhone
A key technical requirement for this method is file system compatibility. The Files app on iPhone can read and write data to drives formatted with APFS, APFS (Encrypted), macOS Extended (HFS+), exFAT, and FAT32. It can also read data from NTFS-formatted drives, but cannot write to them. This is an important limitation. While NTFS is the default file system for many Windows computers, its read-only functionality on iOS makes it unsuitable for writing data directly from an iPhone. For this reason, exFAT is becoming the preferred choice for cross-platform use, as it provides full read and write functionality for both Windows and macOS users.
An alternative way to back up photos and videos from your iPhone to an external drive
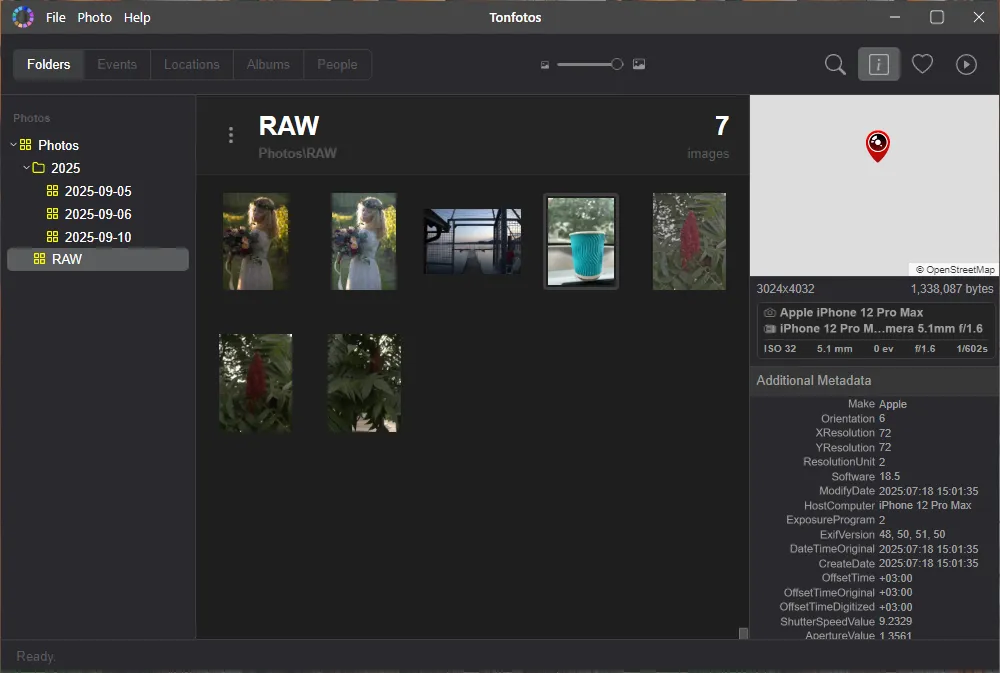
The downside of using built-in backup tools is that they don't have automatic photo sorting features. However, I've found an effective way to overcome this: Tonfotos.
To begin the backup process, simply launch the program and connect your iPhone. It doesn't matter if you're using Windows, Macbook, or Linux. Tonfotos will immediately display a dialog box prompting you to copy all photos and videos from your phone.
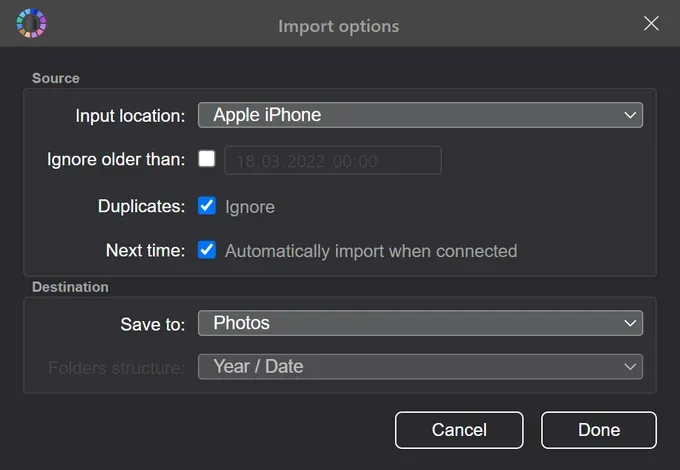
You can configure the import of photos after a specific date and skip duplicates immediately. Next, you need to specify the copy location, which will be a folder on your external drive. The program will automatically sort photos according to their creation date, which is specified in their metadata.
In addition, the program has other useful functions:
- Geodata visualization. If location recording was enabled when taking a photo, Tonfotos can read this data and visualize the coordinates on an interactive OpenstreetMap or Yandex map.
- Tags and albums. Creating virtual albums within the program allows you to thematically sort photos without actually moving them to your computer's memory or external drive.
- Facial recognition. Tonfotos uses multiple AI algorithms for facial recognition, capable of recognizing specific individuals even in conditions of partial visibility or low lighting.
- Family connections and person profiles. You can tag a person and find all photos of them or create a complete profile showing their connections to other people.
Tonfotos is a powerful tool that lets you not only back up photos and videos from your iPhone to an external drive but also instantly organize your media library.
Conclusion
Don't rely solely on your iPhone's storage or pay monthly for iCloud. It's far more cost-effective and reliable to set up backups to an external drive. This way, you'll save thousands of photos and videos and have peace of mind: your memories will be safe, and your phone space will always be free. Use convenient tools like Tonfotos and turn a simple backup into an organized photo library you'll enjoy accessing again and again. Start taking care of your photos today: this decision will save you from major losses one day.