All about backup in Windows 10/11
Updated: September 4, 2024 Author: Vitaly
Backing up your data is crucial for keeping your important files safe. In this article we will show you how to protect your data without paid applications, using only standard Windows tools.
As an active computer user, you may have experienced situations where you lost some important data due to technical reasons or carelessness. This can be a document, a photograph, or software files you cannot work without. Of course, there are many ways to recover lost data, but their effectiveness depends on many factors.
The best way to protect yourself from losing files is to regularly back up your data.
A reliable backup involves creating copies of files on a drive that is isolated from the operating system most of the time. This is the only way to guarantee the safety of valuable files. Ideally, backups should be stored in another geographical location, but this is usually much more expensive.
How to use backup correctly
Backup can have different purposes, so different approaches are needed for their organization.
One common scenario is to ensure the safety of important data, such as work files or family photos. The main risk in both of these cases is not so much physical damage to the storage medium, but most likely your own careless actions like accidental deleting or unsuccessful editing.
For such a situation, backup saves the history of changes to all files over a long period. This allows you to recover a file to a previous, undamaged state.
Another typical scenario is saving the computer’s operating system and all applications on it to quickly restore functionality in case of a malfunction, a virus attack, or spontaneous damage to some applications.
In such situations, a full backup of your system disk at some intervals is best. Restoring these backups lets you completely revert the system to one of the previous, undamaged states. In such cases, it does not take much time to realize that “we are screwed” and an urgent need to recover. And recovery is usually done entirely - you simply restore the state of all files to a day or two ago, when the system was working normally. You usually don't roll back too far, as you'll lose some recent useful changes.
Below we'll detail how to set up your computer for both backup scenarios. But first we need to figure out where we can store our backups.
Selecting a drive for backup
First, it’s important to remember that backups are not free. You need to spend money on storage space, which will be several times more than the data itself. But this is the price of reliability.
There are three typical places to store backup files.
- External drive or additional internal drive. Thisincludes both HDD and SSD drives. The only difference between them is the cost and speed of writing and reading data. Traditional hard drives are cheaper and slower, while SSDs are faster, but much more expensive. For backups, an HDD is usually the best choice due to data safety being the main priority.
- NAS server. Essentially, this is home cloud storage that allows access on the local network and via the Internet. The solution is not cheap, but convenient for creating regular automatic backups of data, since you can simply forget about the need to connect an external drive for the next backup. Besides, you have full control over the operation of your cloud and the information recorded on it.
- Cloud storage. Usually the most expensive option in the long run, but it provides backup storage in a geographically remote location, ensuring data survival even if all your equipment is completely lost, for example, in the event of a fire.
The choice of a specific option depends on the data size and the level of autonomy, considering that without the Internet, cloud backups are not possible.
Backing up working files on Windows 10/11 with tracking the history of changes
File change history is a magical tool that saves you from your own mistakes when files are constantly being edited. You can delete files, thinking that they are no longer needed, but after some time you realize that you were wrong. It is the same with editing a document, and deleting some important data. By saving versions of documents over a long period, you will have every opportunity to quickly correct these errors.
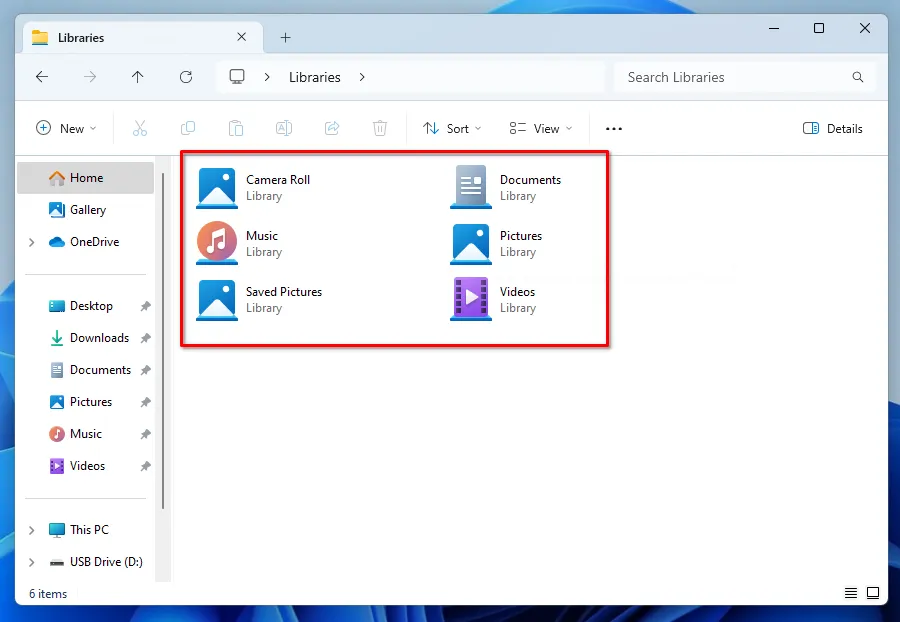
Windows can make backups in this mode; the necessary tool is located in the Control Panel. However, you can't just add any folder to it. This can only be done through Libraries, which combine files from different places on your computer and display them in a single window. It is not a physical data storage, but rather a tool that allows users to organize and manage their files across different folders and even different devices as if they were in one place.
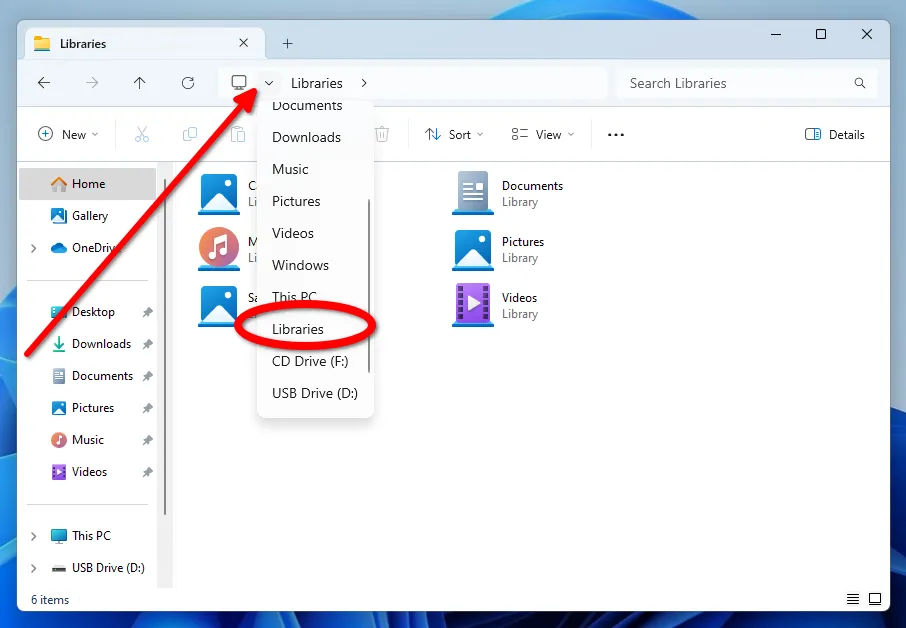
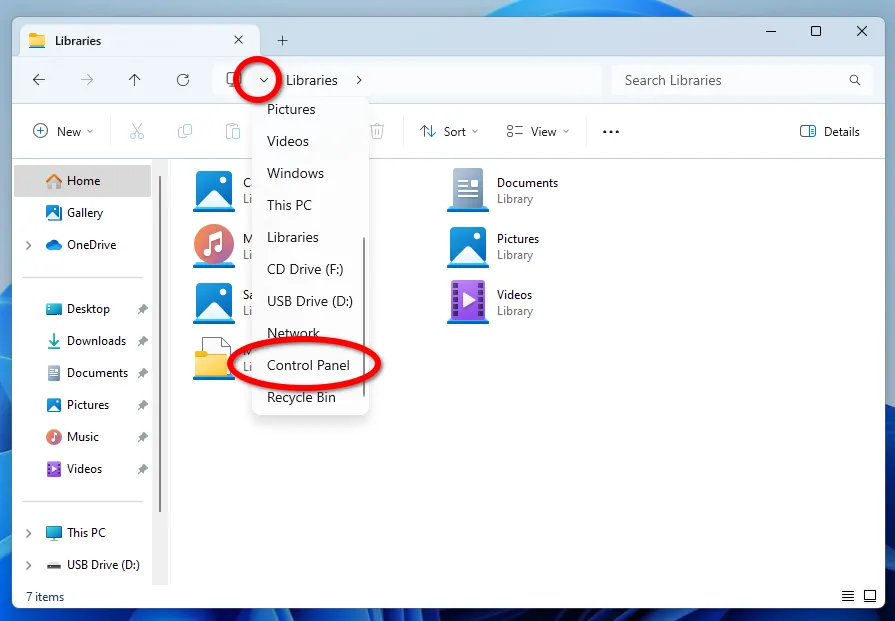
To gain access to the Libraries and add other files and folders, except those in the user's system folder, you must open Explorer, click on the triangle at the beginning of the address bar and select the appropriate section.
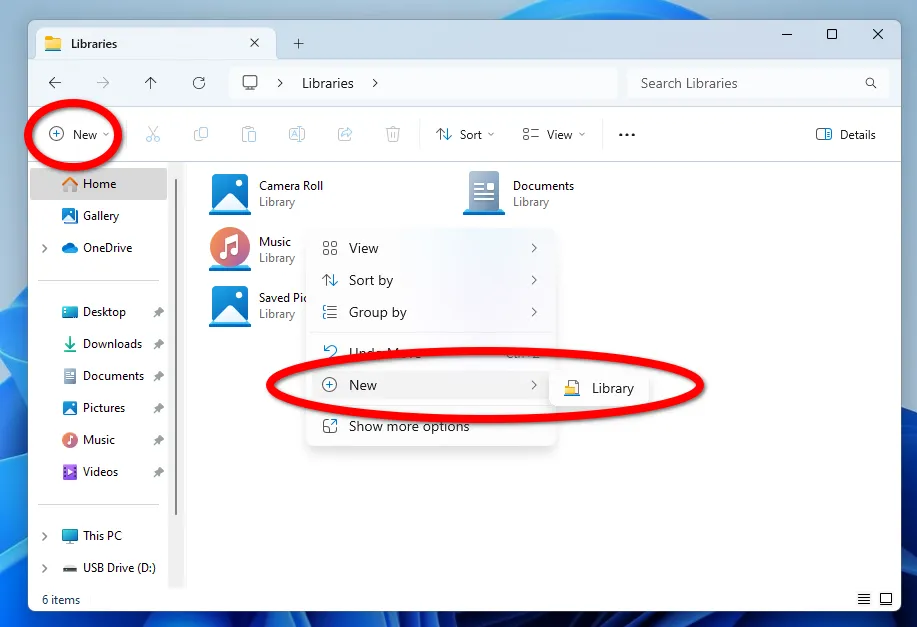
To create a new Library, click on the Explorer main menu button or use the context menu. You can create multiple Libraries by organizing them thematically, like for programs, photos, and documents.
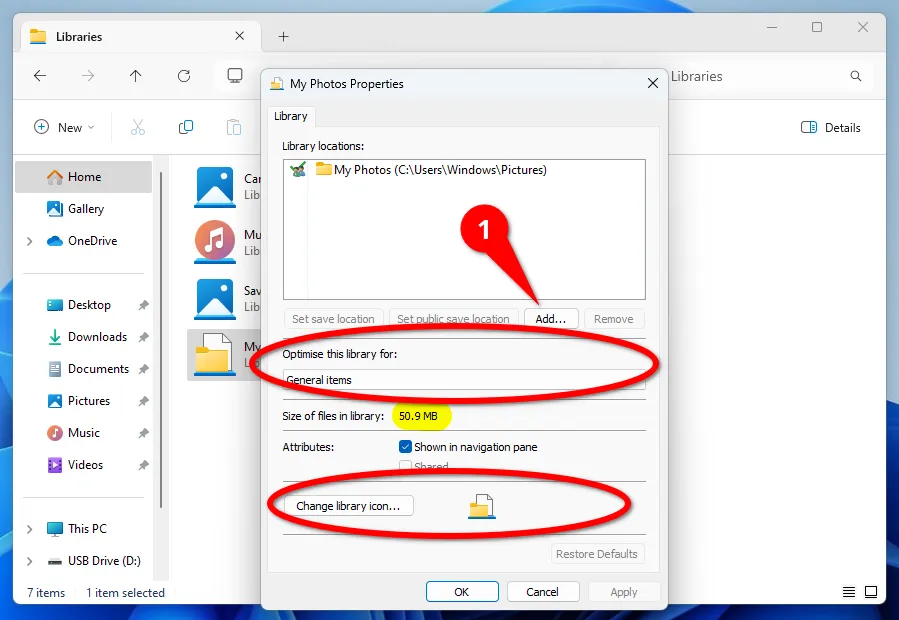
By default, the directory will be empty; to add the necessary folders, open the Libraries properties through the context menu. As you fill it, the total amount of data will be automatically calculated, which will allow you to control whether there is enough free space on the drive where you plan to store backup copies of data or not. And for better identification, you can set optimization or set your own icon.
After creating all the necessary Libraries, you can start creating backups through File History. To find the tool, click on the triangle in the address bar of Explorer and select Control Panel.
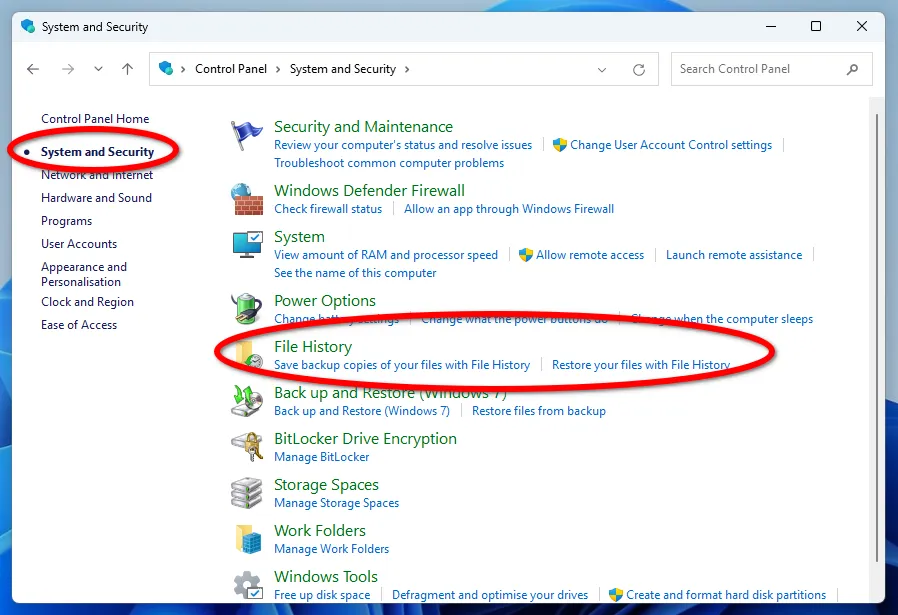
Next, open the System and Security category.
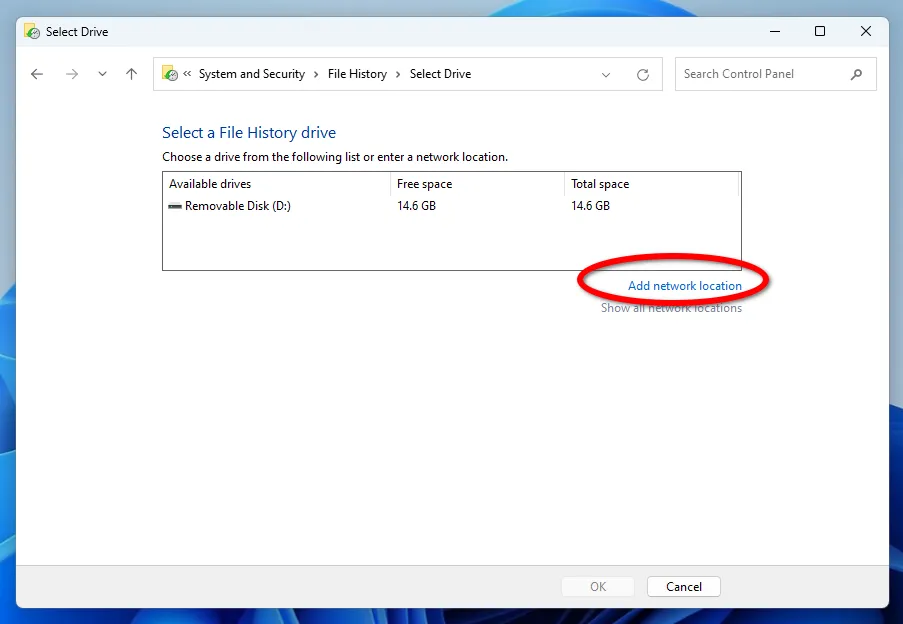
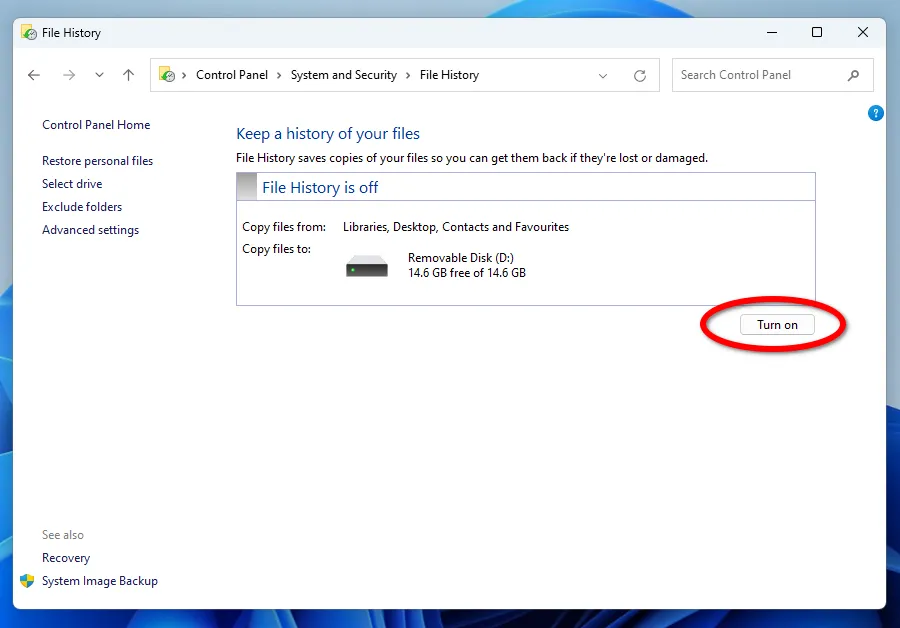
It is noteworthy that you can choose an external drive or a network folder as the storage location for copies, for example, on a home NAS server.
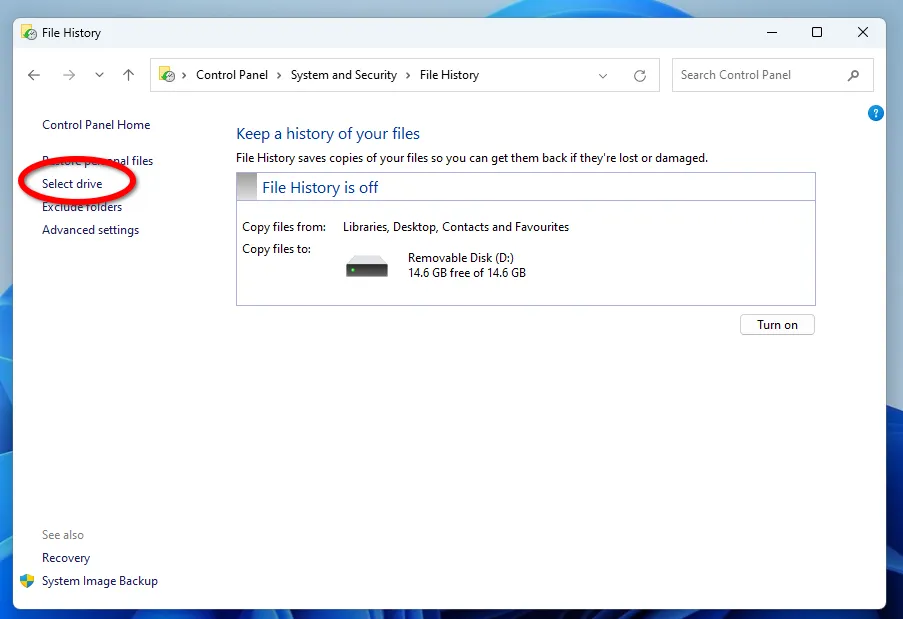
If necessary, you can replace the backup disk anytime by clicking on the corresponding settings button.
Additional File History options allow you to set the frequency of backups and the number of file versions to save.

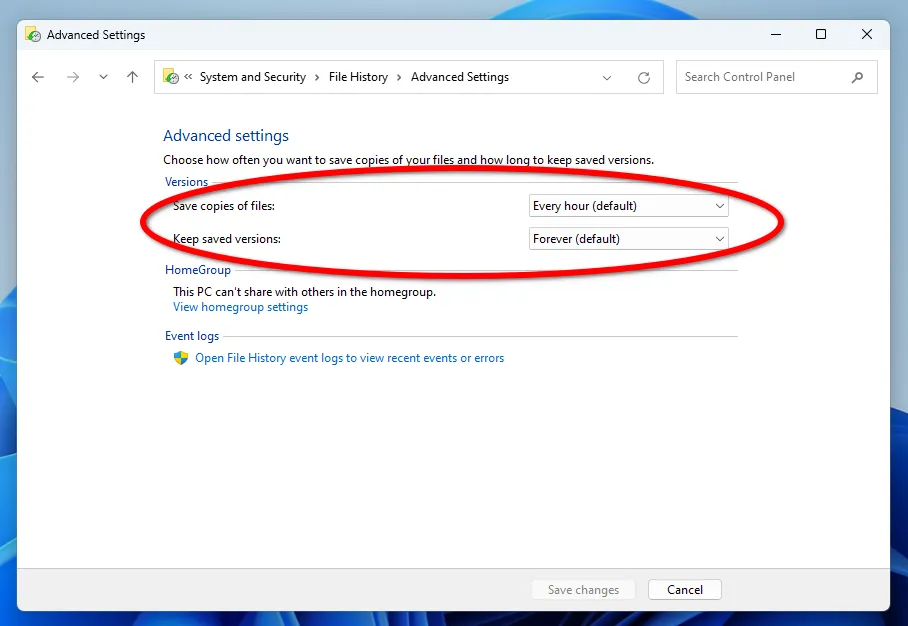
The minimum interval between saving copies is 10 minutes, and the maximum is daily. The storage period for backups can be set from 1 month until the space is needed.
After all the settings, just click on the Enable button.
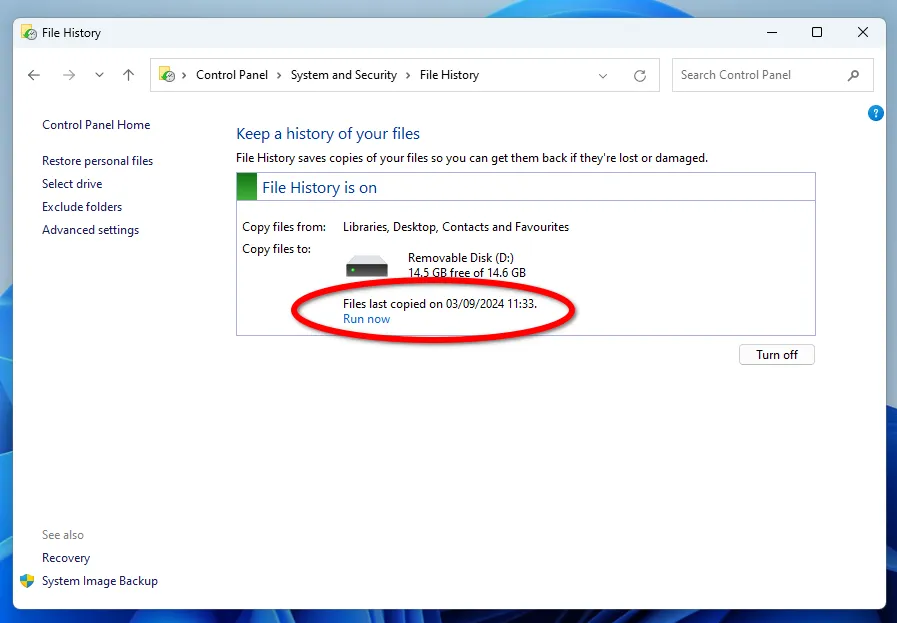
Creating backups for the first time may take some time, depending on the volume of data. A message will signal the completion of the reservation process.
How to restore the state of multiple files to a specific version
Let's say you discover that some important file does not contain the necessary data, that definitely was there some time ago.Maybe you lost it at the last edit, or maybe earlier. Let's figure out how to get out of this situation.
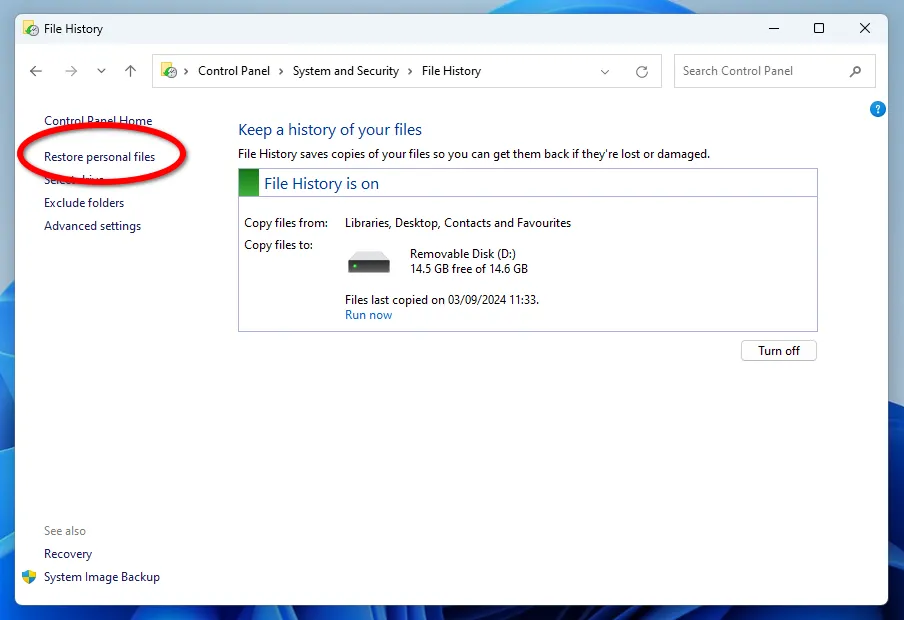
To roll back to a specific version of a file or folder, click the Restore personal files button.
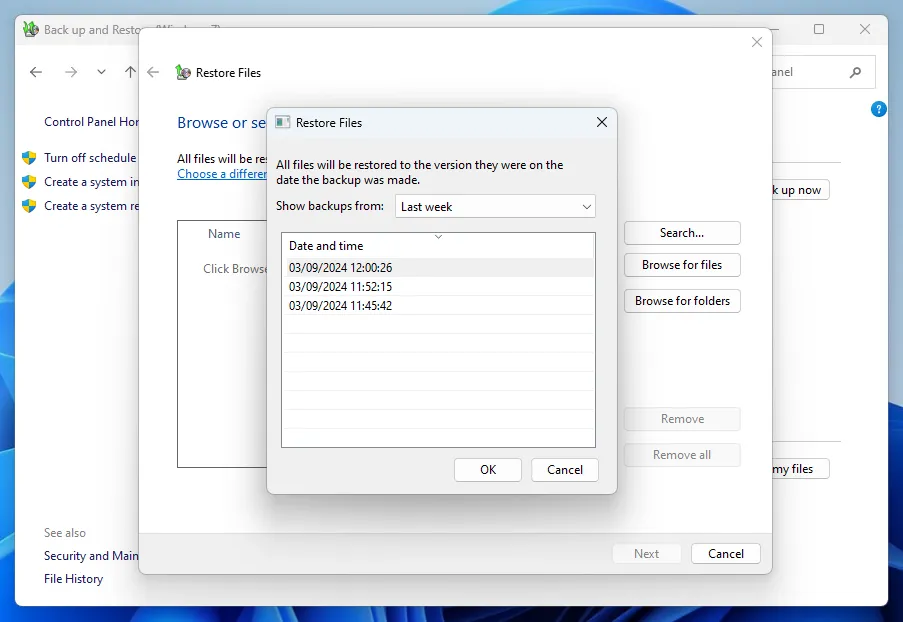
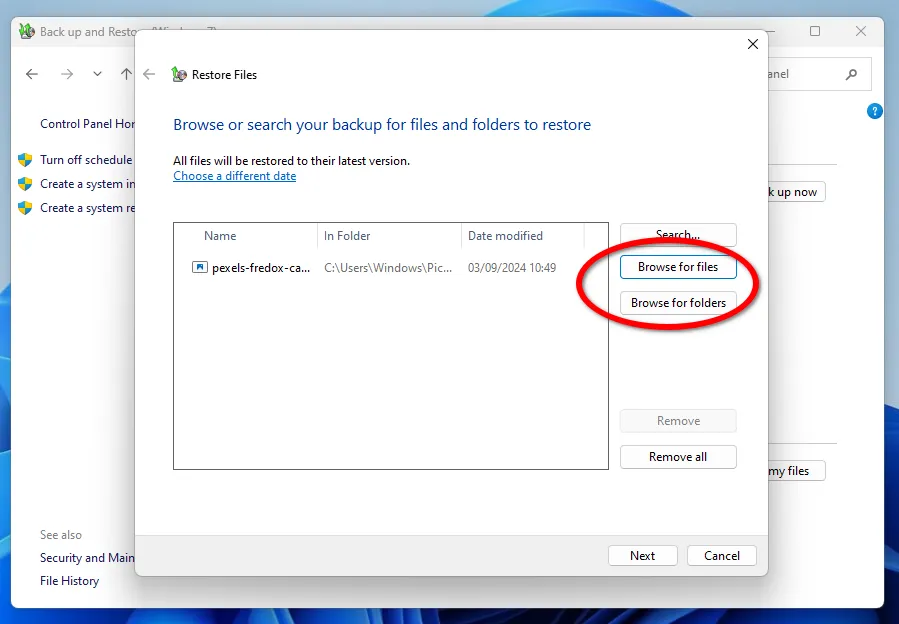
In the window that appears, select the date of the snapshot by clicking on the arrows (1 screenshot below) of the File History from which you want to restore. Next, select the required file (2) or folder and click on the green button (3) with the recovery arrow.
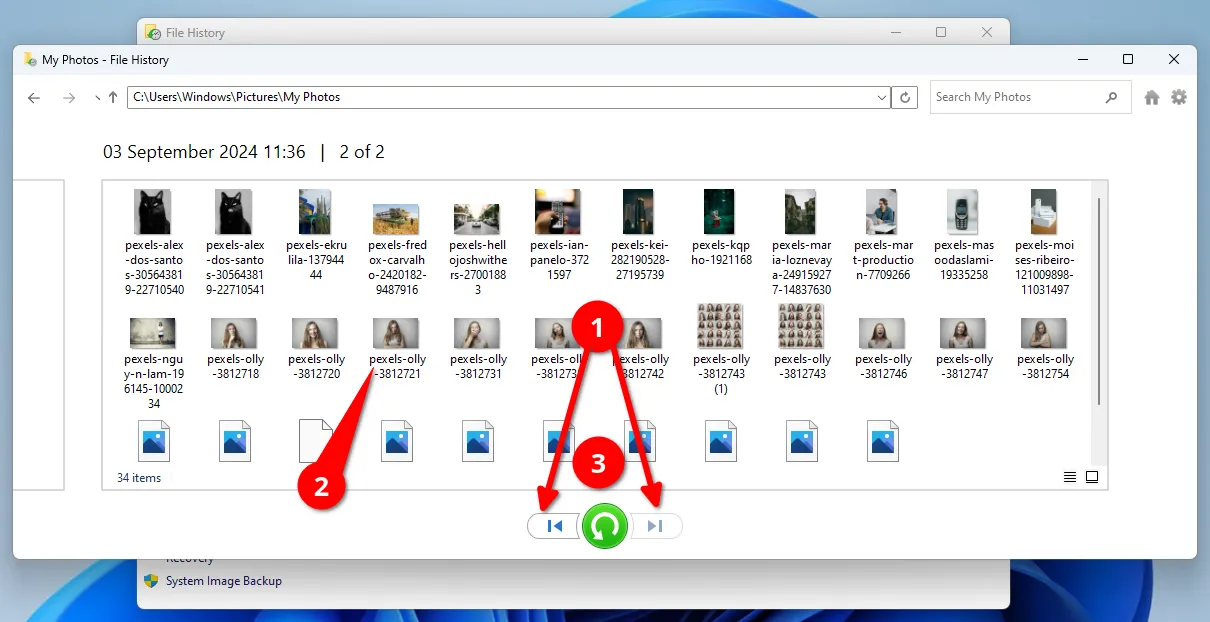
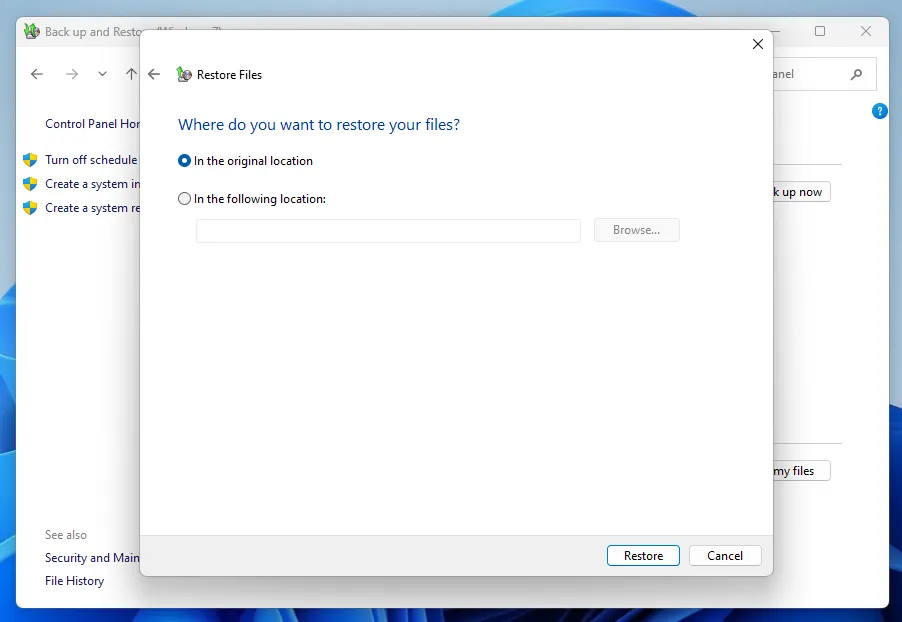
Please note that you can only restore to the original location of the file or folder. However, you can always roll back to any date saved in History if the installed current file does not contain the necessary data.
How to set up a backup of your operating system in Windows 10/11
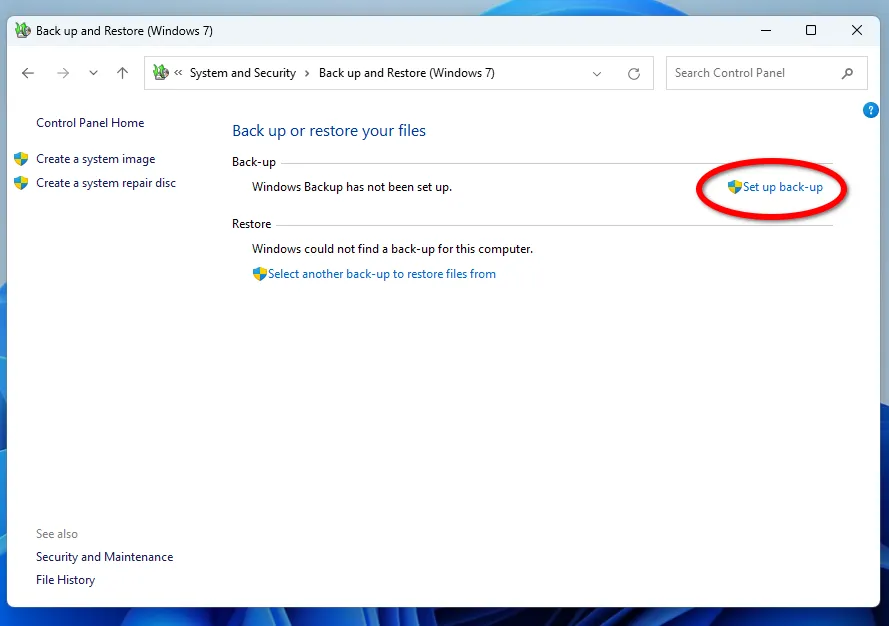
Another Windows backup tool, File Backup and Restore (Windows 7) (yes, Windows 7 is part of the tool's name) allows users to create copies of files throughout the operating system and restore them. It was first introduced in Windows 7 and remains available in later versions, including Windows 11.
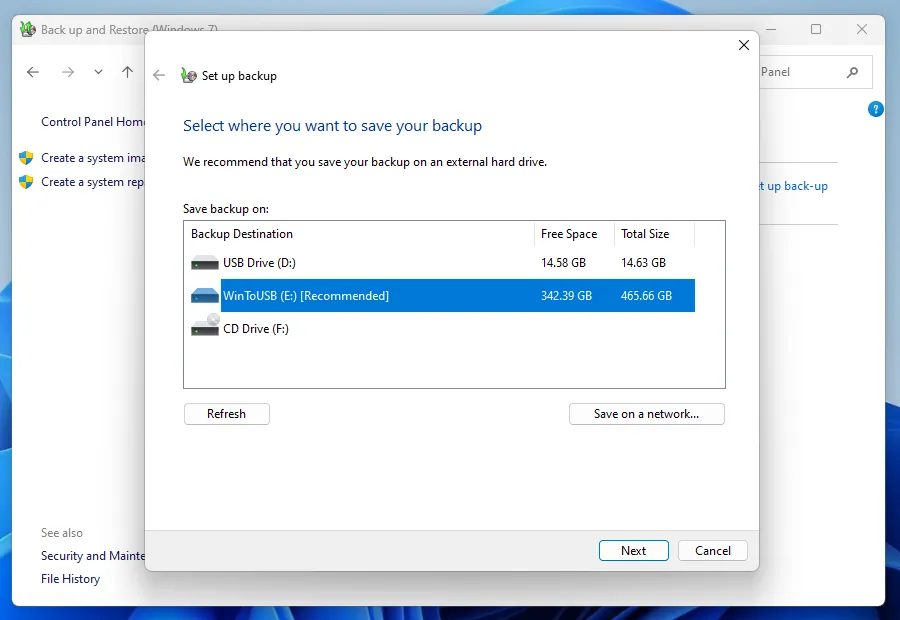
First of all, choose the drive to store your backups. It's best to choose a drive with double the capacity of your system HDD or SSD. You can select Saving to a network, for example, to a home NAS server.
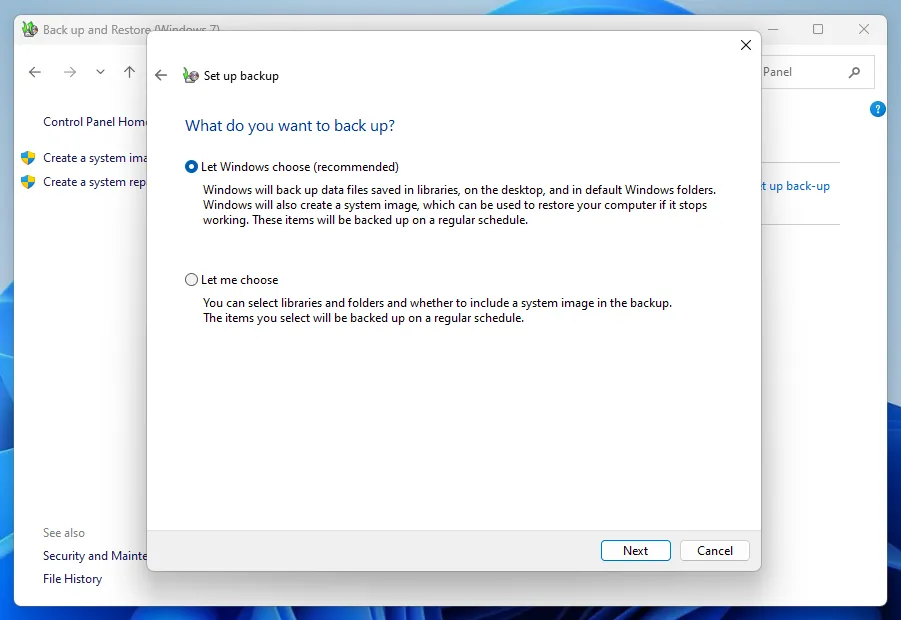
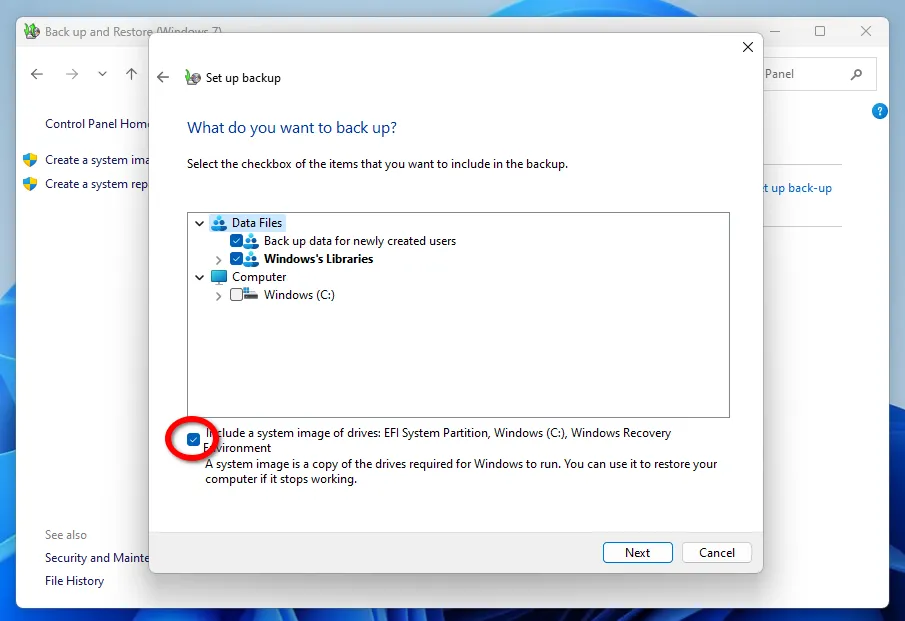
Next, select an archiving mode: recommended or your own choice to create copies of specific folders.
When assigning directories, pay attention to the checkbox at the bottom, which is responsible for creating an image of the entire Windows operating system. If you do not need this feature or the drive does not have enough free space, you can remove it.
The last stage is setting up a schedule for automatic program launch.
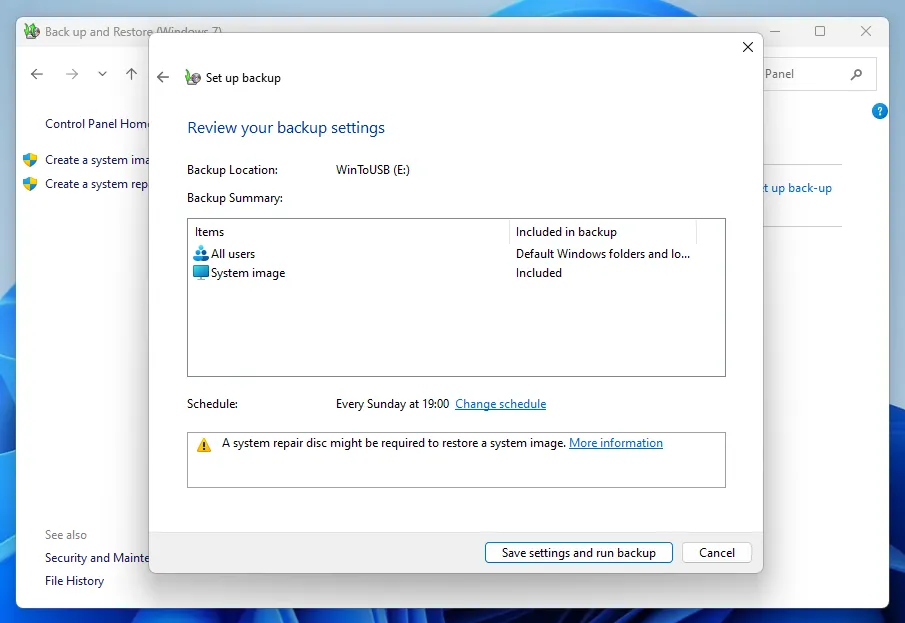
Remember that the first backup takes longer than subsequent ones, especially if an external HDD is used as a storage device, which is physically incapable of quickly recording a large amount of data.
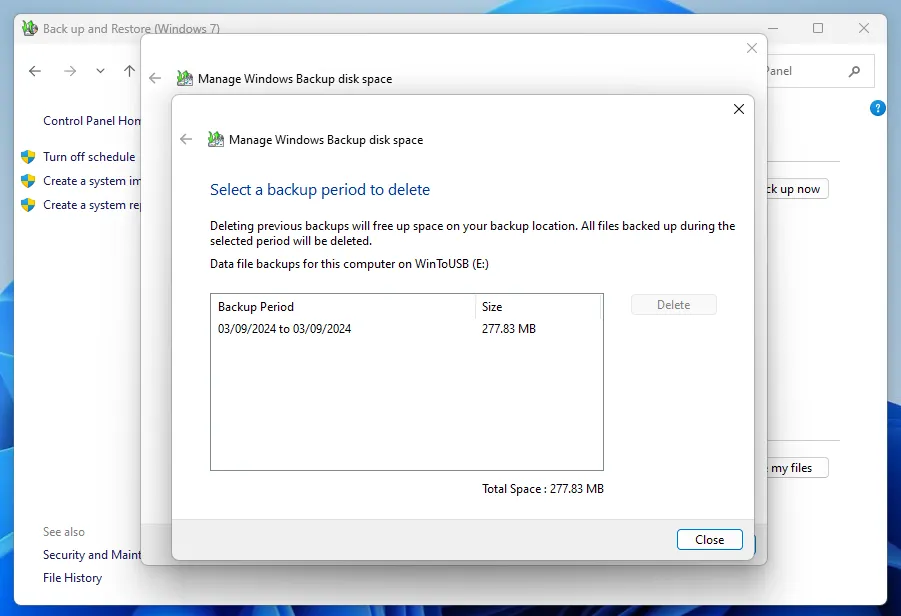
To view all created backup copies of data, click on the Manage space button.

In the dialog box that appears, you can see how much memory each archive takes and delete irrelevant ones if necessary.
How to quickly recover data from individual programs in case of failure
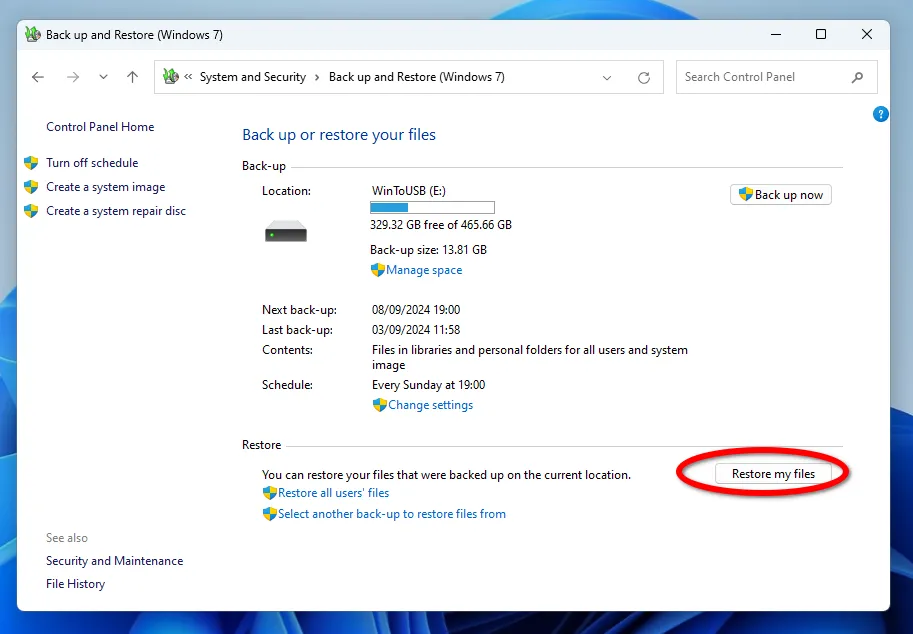
If you need to restore files from a backup, but your operating system is working fine, go to the main window of the file backup and recovery program (Windows 7) and click on the "Restore my files" button.
Select the archive from which you want to recover files.
After clicking Next, you need to choose whether you want to restore files or folders. Keep in mind that it's important to know which files and folders need to be restored, especially when recovering a program after a failure. This may not always be obvious since data can be stored in many different places.
You don't have to restore a file or folder to the same location. You can choose a completely different directory, including a network one.
How to restore system functionality if Windows 10/11 does not boot up
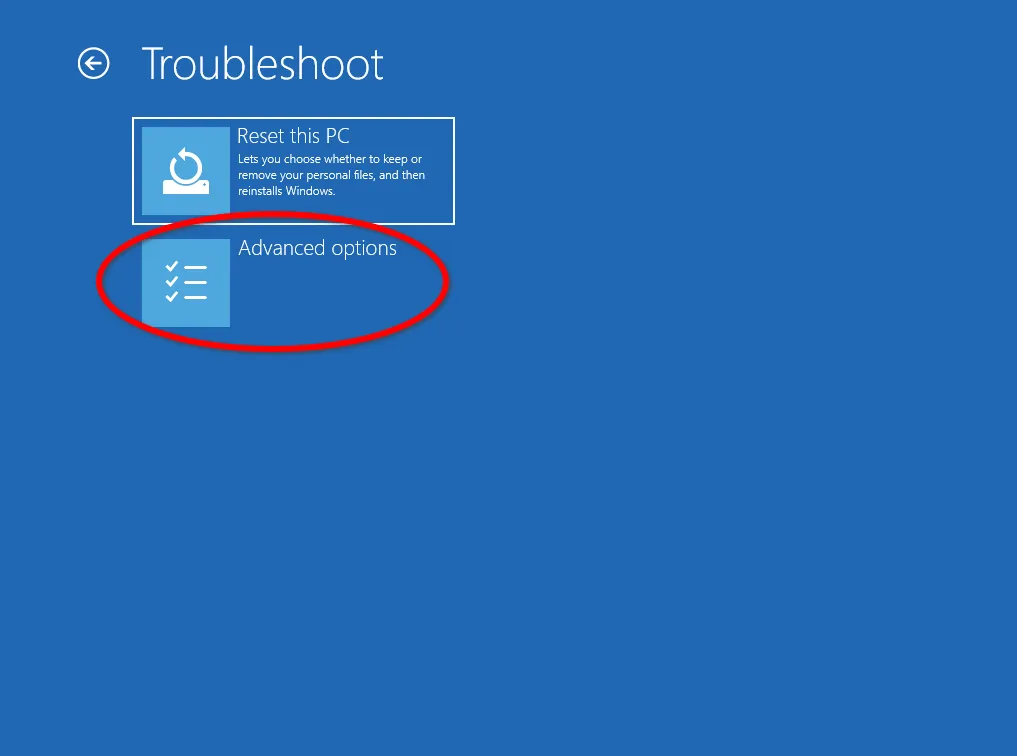
If your computer has been infected by a virus or if there was an unsuccessful installation of drivers or programs that caused Windows to crash, you can use a full OS image created by the File Backup and Restore tool from Windows 7. To start the operating system recovery process, you must press and hold the F4 key at the BIOS (UEFI) initialization stage to open the Safe Mode, where you must click on Troubleshooting.
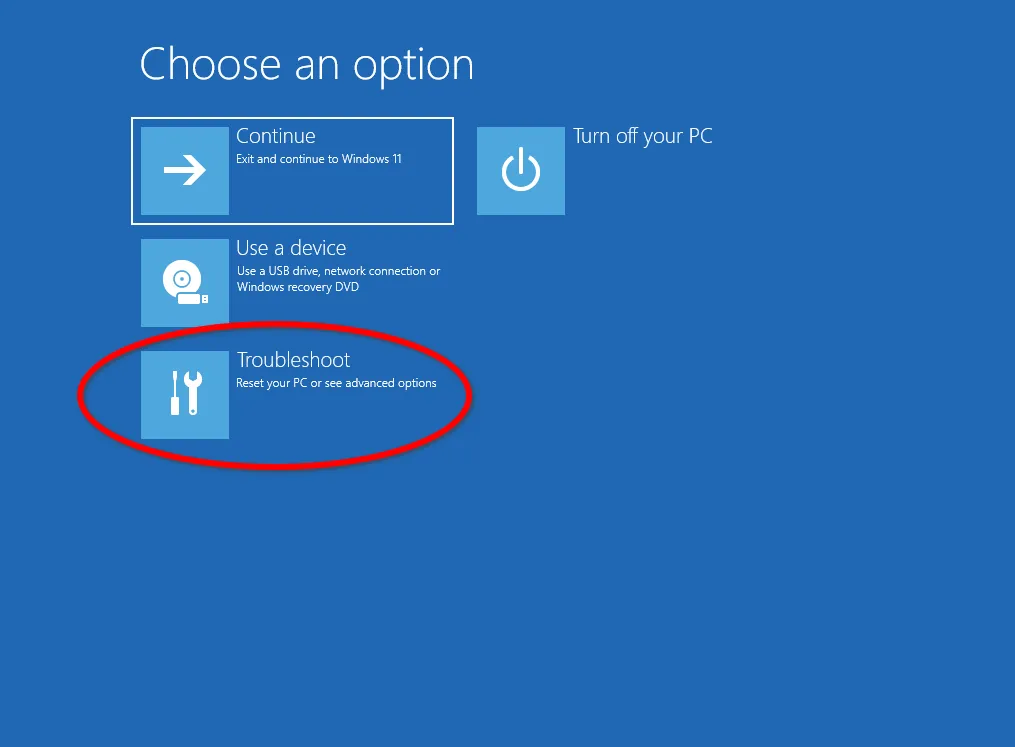
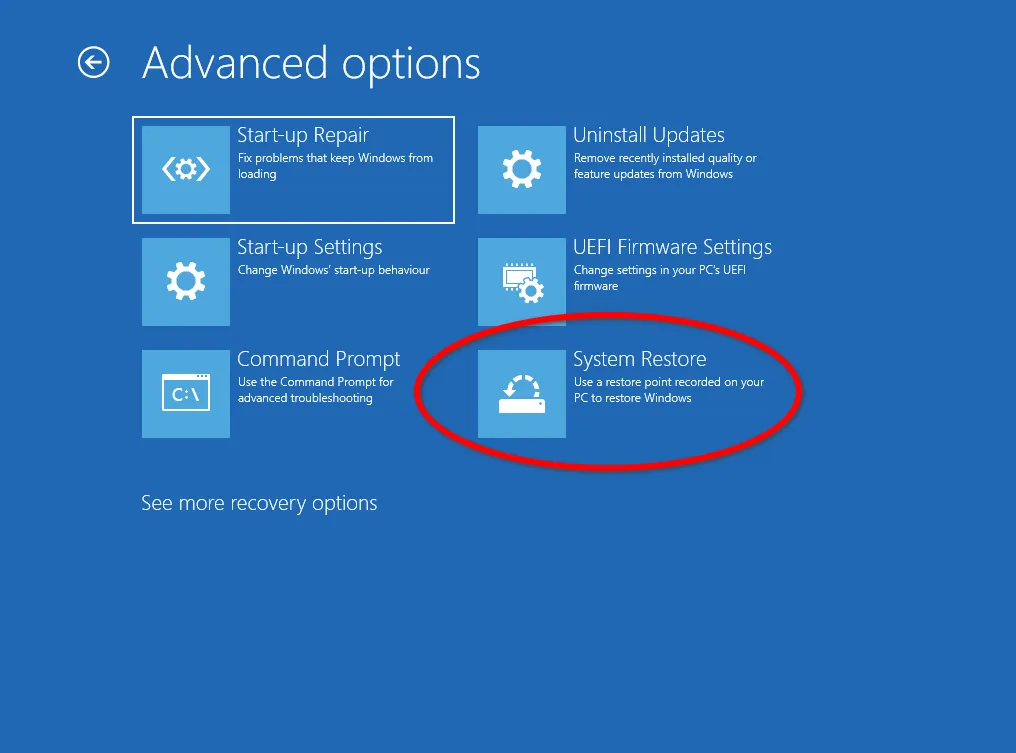
In the Diagnostics window, click on Advanced Settings.
Now all that remains is to run the System Restore Option from the previously created image.
The recovery program will automatically scan connected external drives and offer an available image.
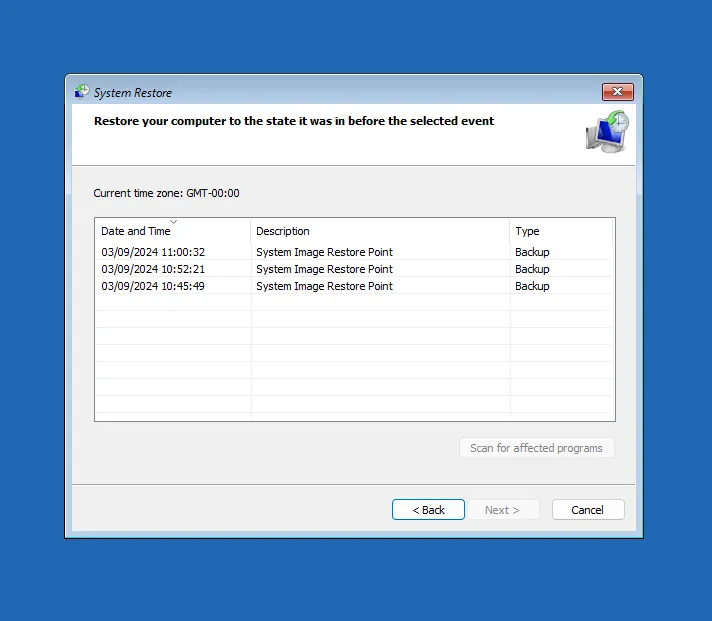
After selecting the image, click Next and agree that all data on the recovered disks will be replaced with the data from the image.
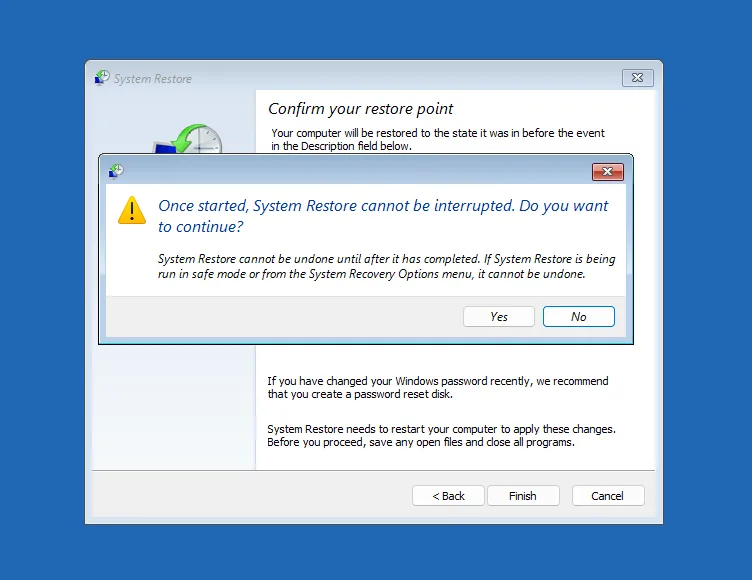
Once the procedure is complete, your computer will reboot and start working as usual. However, if the latest version of the system image was made a long time ago, you may lose some saved information. Therefore, it is recommended to perform a full OS backup after each successful update, installation of a third-party program, or other significant changes.
Comparison of Windows 10/11 backup methods
We looked at two different built-in Windows tools for backing up your data: File History and File Backup and Restore (Windows 7). Of course, these are not all possible methods; at least there is one more built-in tool for backing up to the OneDrive cloud, not to mention many third-party solutions. Both of these methods are available for free to all users and do not require a cloud subscription. Both methods have their own characteristics and are suitable for different use cases.
| Parameter | File history | File Backup and Restore (Windows 7) |
|---|---|---|
| Purpose of Backup | User files and folders | System files, full system image and user files |
| Storage location | External drives, network folders | External drives, network drives |
| Frequency | Customizable (automatically scheduled) | Customizable (automatically scheduled) |
| File versions | Saves multiple versions of individual files, allowing you to selectively roll back to previous ones | Designed to create a complete image of all computer data at the time of backup. |
| Use of space | Updates only changed files, saving space | Each backup creates new copies, which can take up more space |
| Ease of use | Easy to set up and use | Requires more settings and care when creating an archive |
| System Restore | Does not support full system recovery | Supports restoring the entire system using the created image |
The backup method you choose depends on your needs. If you only want to store a few versions of user files, select File History. If you need to create a backup copy of the entire system or specific data, File Backup and Restore (Windows 7) is more suitable for you. At the same time, you can use both methods simultaneously for different data, the main thing is to make sure that the backup occurs at different times.
Conclusion
Regularly creating backup copies is crucial for safeguarding critical files and restoring them in case of unforeseen situations.
The choice of the appropriate method depends on the volume of data, hardware availability and user preferences. Regardless of the method and tool chosen, regularly creating backup copies allows you to avoid losing critical files, and remember that a proper backup process always pays off when it comes to restoring lost information.