How to transfer photos from Google Photos: difficulties and their solutions
Updated: September 27, 2024 Author: Vitaly
The process of transferring photos from Google Photos is simple and complex at the same time. In this article we discuss the problems associated with exporting photos from Google cloud storage and ways to solve them.
There are many reasons why people decide to transfer photos from Google Photos. It could be to switch to another cloud service, create a backup on physical media, or due to concerns about access and privacy. However, transferring photos from Google Photos may come with difficulties, that are consciously or unconsciously created by the developers of this service.
The problem is that when using standard Google photo import tools, there are problems with the correctness of uploading additional information about the photo - metadata. This especially applies to the information entered through the Google Photos application or a browser on a computer. Because it is not recorded in the metadata of the photo itself, but in a separate JSON file, which you receive along with the images downloaded from the cloud.
When you want to catalog the photo archive you transferred from Google Photos, you will find that all your changes (dates, descriptions, or geolocations) will not be saved. This issue also affects the faces of people recognized and tagged in Google Photos. In this article, you will not only learn different ways to upload photos from Google cloud, but also effective solutions to fix the metadata mismatch problem.
How to transfer individual photos from Google Photos
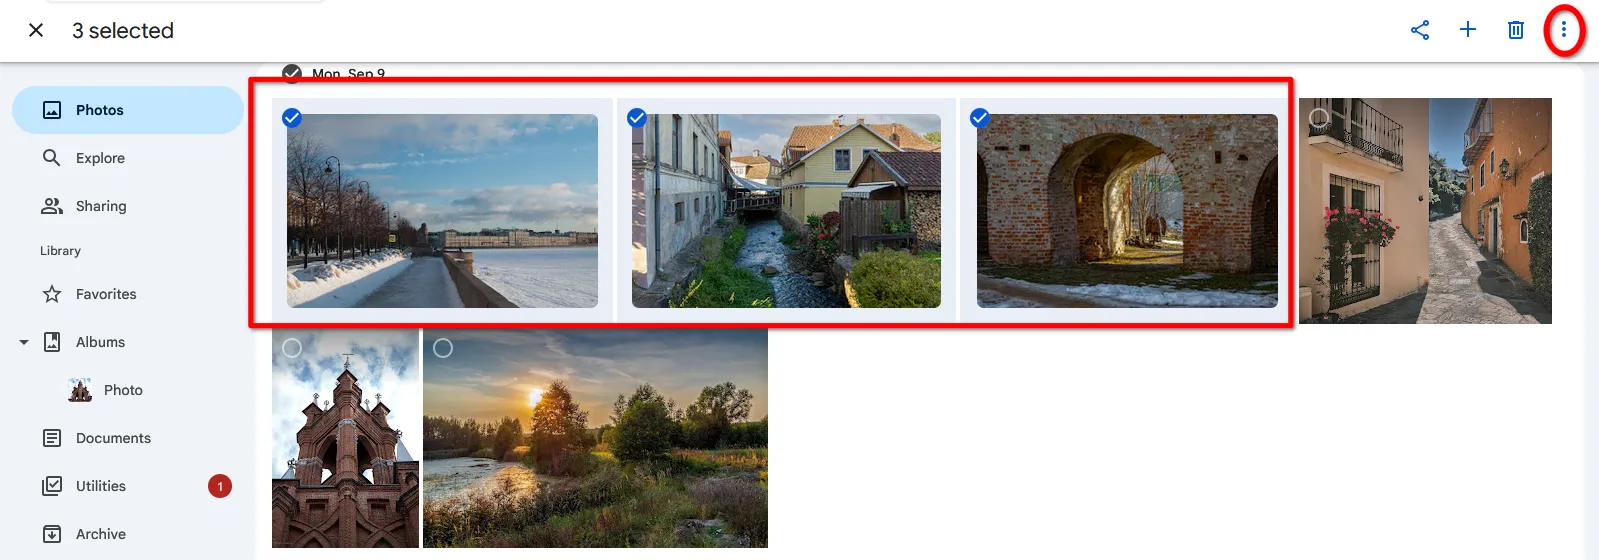
Selecting individual photos and downloading them is the simplest solution, available both from a browser on your computer and through the Google Photos mobile application. On a PC, simply select one or more photos, click on the ellipsis and Download. If only one photo is selected, it will be downloaded; if there is a group of photos, they will be combined into a ZIP archive.
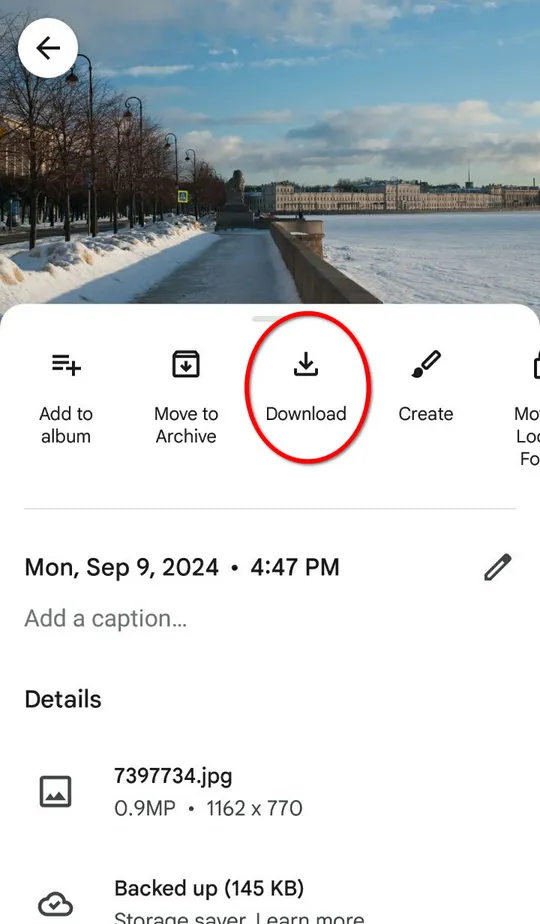
On the mobile app, you can only download one photo at a time.
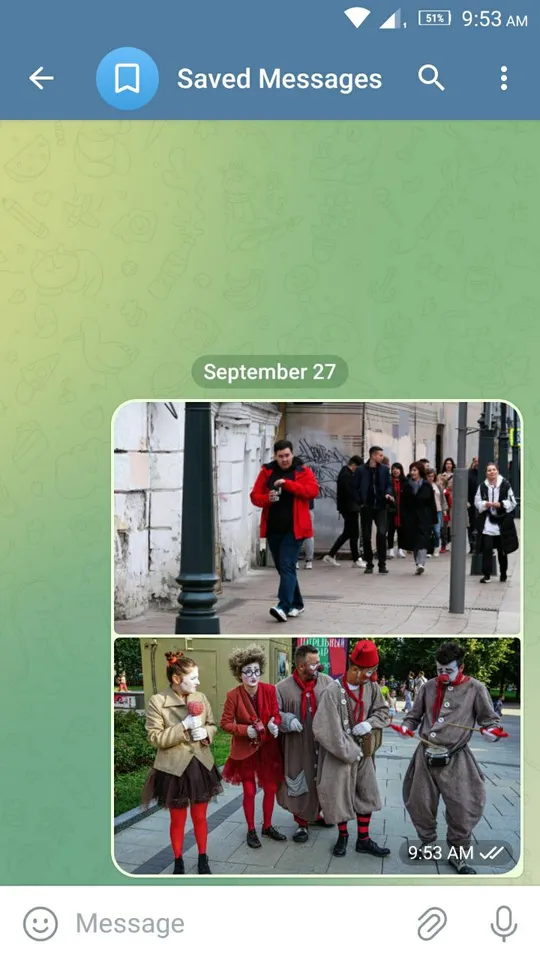
To download multiple photos, you can use the share function by sending them to Bookmarks in the messenger.
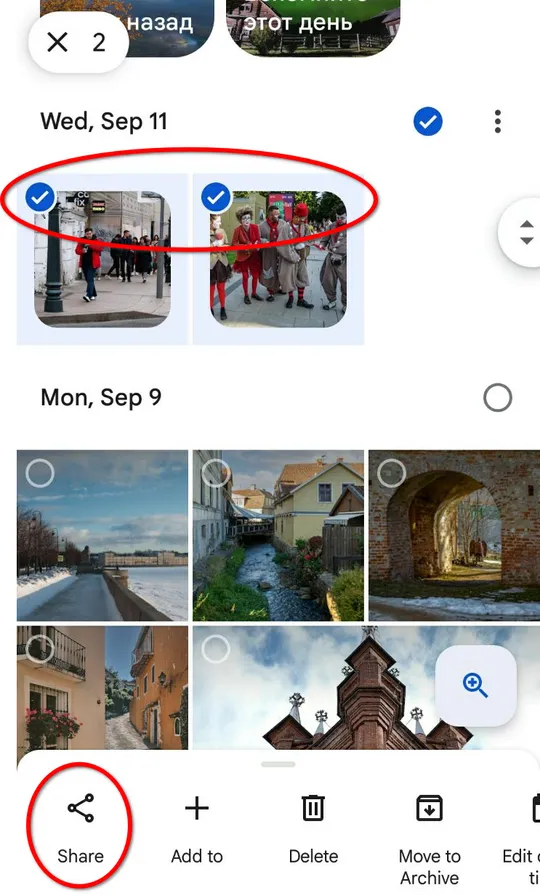
Once the photos are in Bookmarks, they can be downloaded to your smartphone or computer if the messenger program is installed.
However, this method deletes all metadata from photographs, making further sorting and cataloging more difficult.
How to transfer all photos from Google Photos using Google Takeout?
Takeout is a service that allows users to download copies of their data stored on Google to their local computer. It allows you to transfer all photos from Google Photos at once in the form of one or several archives, depending on the number of photos.
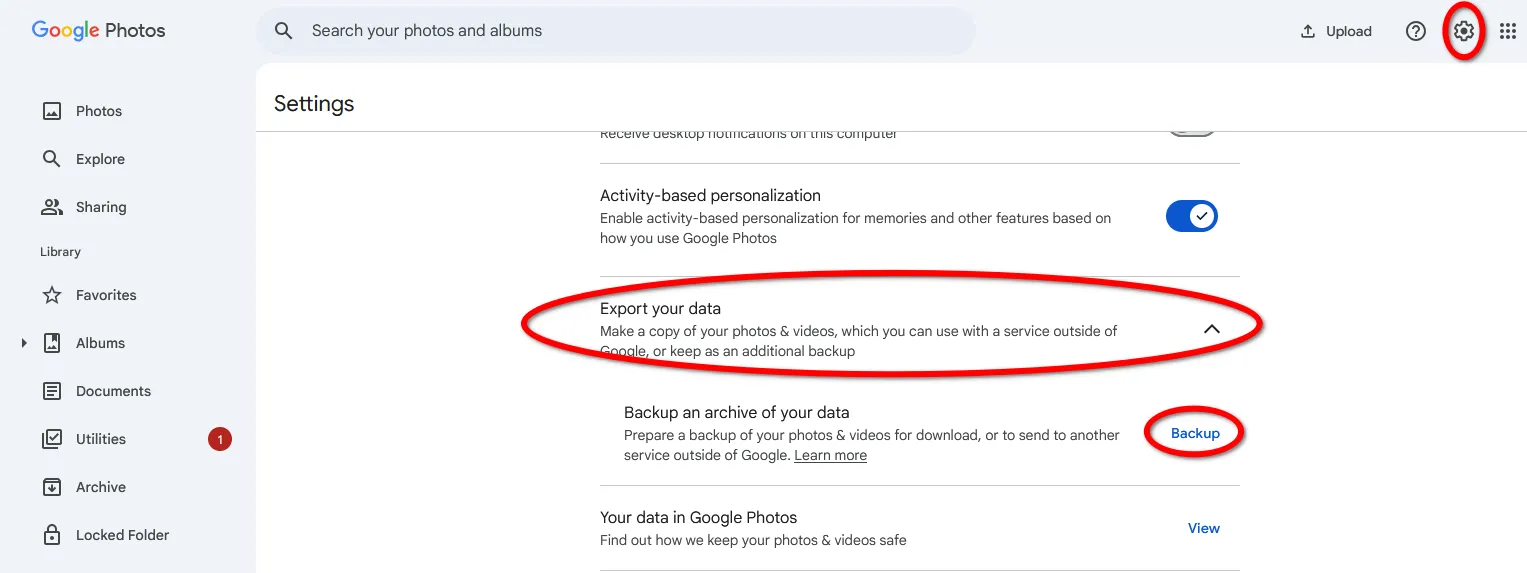
To access Takeout, click on the gear icon in the upper right corner of the Google Photos website and select “Export data” in the Settings.
After this, you just need to follow the step-by-step instructions until you reach the Create Export button.
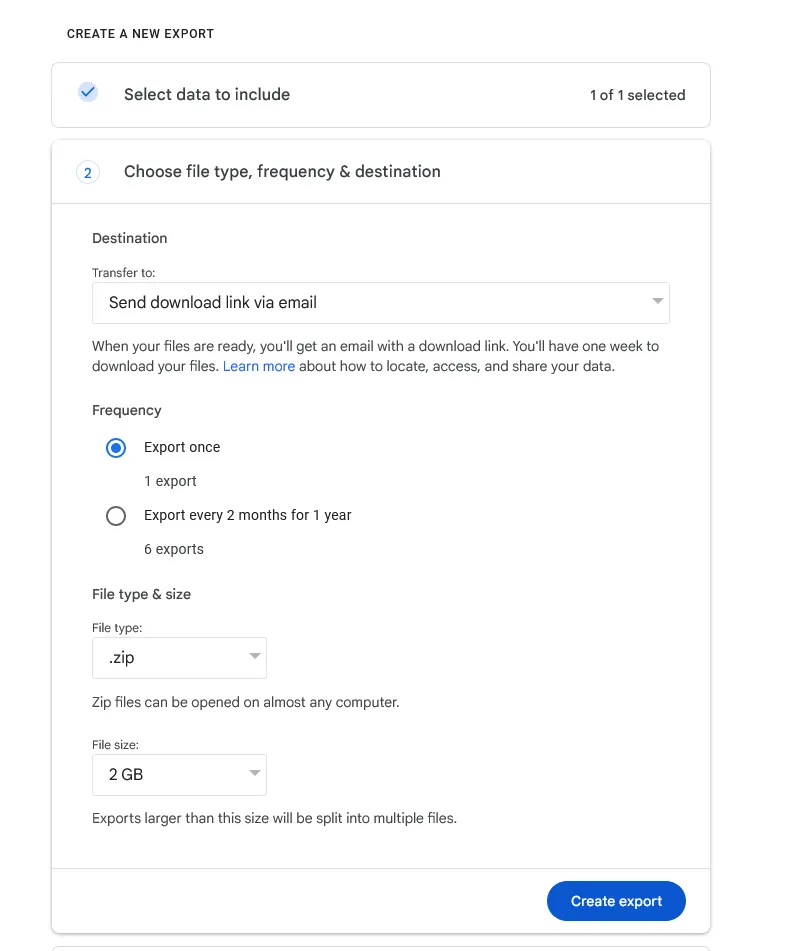
Take into account that creating an archive takes some time (up to several days), depending on the size of the photo archive. Once it’s ready for download, you will receive a notification to your Google account email.
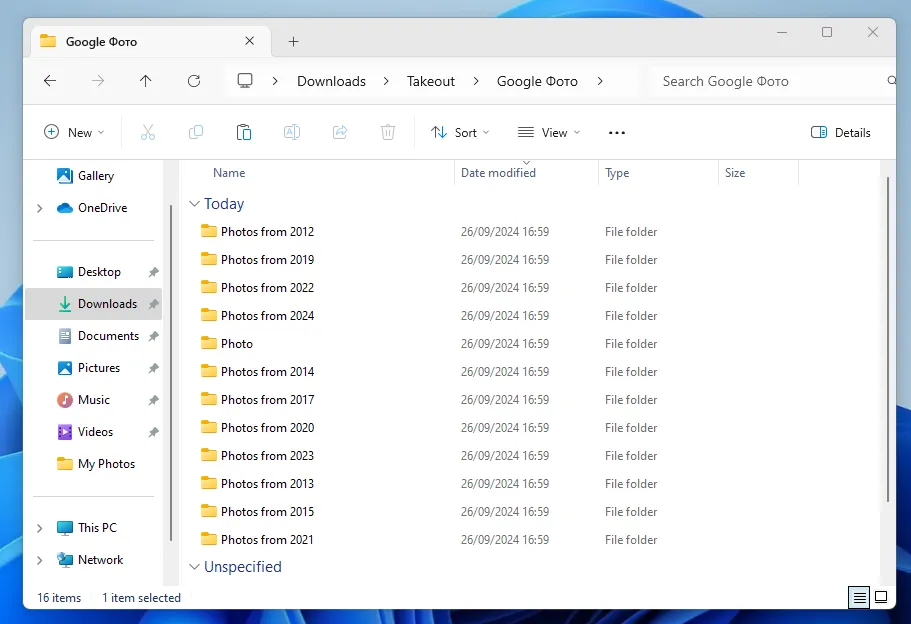
After downloading and unzipping, you will get a Takeout folder with a Google Photos directory inside, where all the photos are divided by year.
At first glance, it may seem that everything is fine: photographs are scattered over the years, metadata has been preserved and you can begin sorting and cataloging, but there are still some complexities.
What is a JSON file and how to combine it with photos from Google Photos
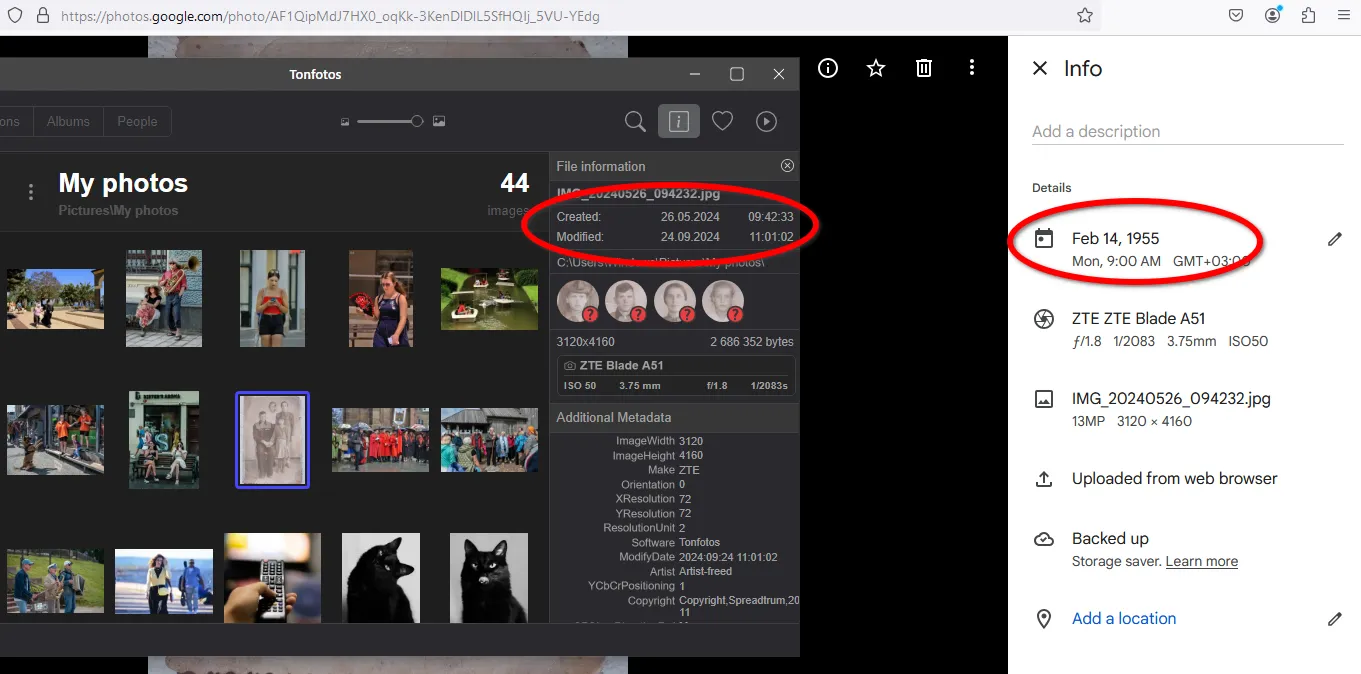
Metadata is just as important as the photos themselves, because they store information that makes the image informative. However, Google Photos acts strangely in relation to this data, which can make it difficult to organize a photo archive, for example, using Tonfotos.
For example, you decided to digitize old family photos by taking pictures of them on your smartphone and immediately uploading them to Google Photos for safekeeping. Of course, the date when the photo was taken will be saved in the cloud, and not the actual date, month or year of the digitized photo of relatives. If you simply change the date in Google Photos to match the old paper photo, this change will not be saved when you download the photo to your computer, this information will remain only in Google Photos.
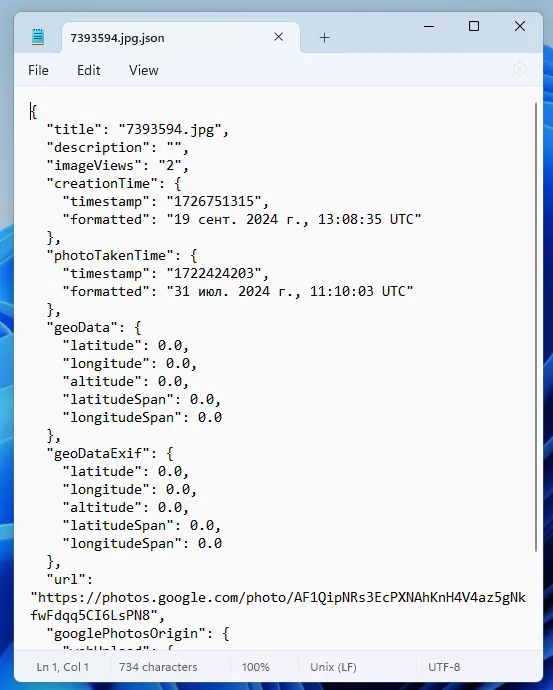
The situation is similar when using Takeout, only in this case all changes made to Google Photos are not lost, but are saved in a separate JSON file. The file contains structured metadata related to a specific photo, including the names of recognized faces.
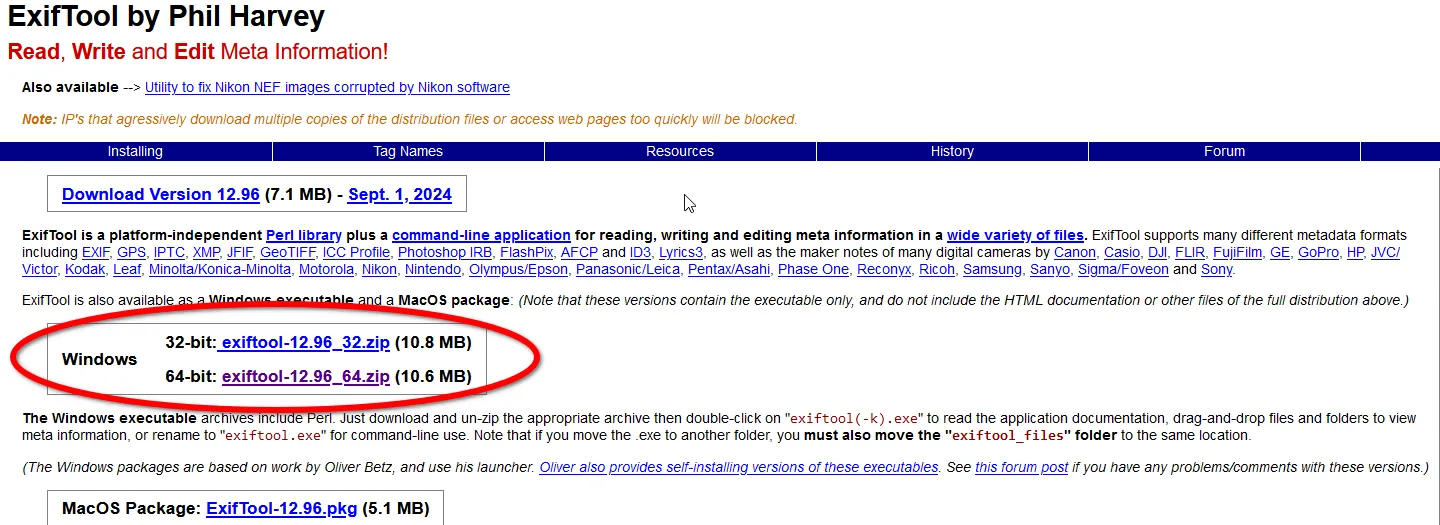
But Google doesn't provide tools to extract metadata from JSON into exported photos. The transfer can only be performed using third-party solutions. For example, using the free ExifTool console application.
Download the program archive according to the type and bitness of your OS.
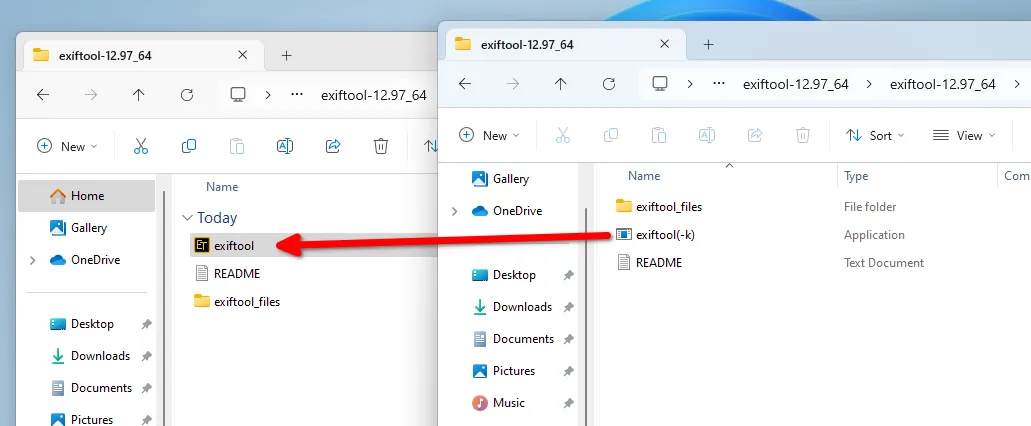
Unzip to a convenient directory and rename the program startup file by removing (-k).
Then open the command line by pressing Win+R and entering CMD, then the CD command and move the unzipped ExifTool folder.
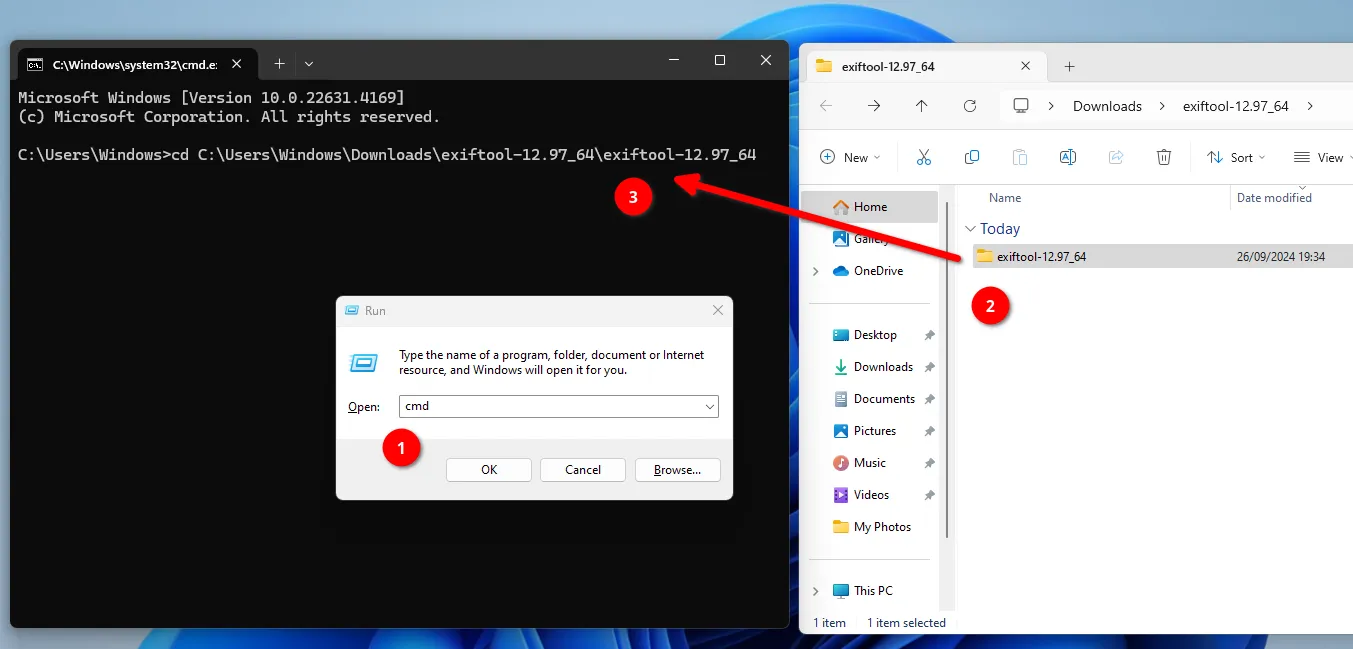
Next you need to enter the following command:
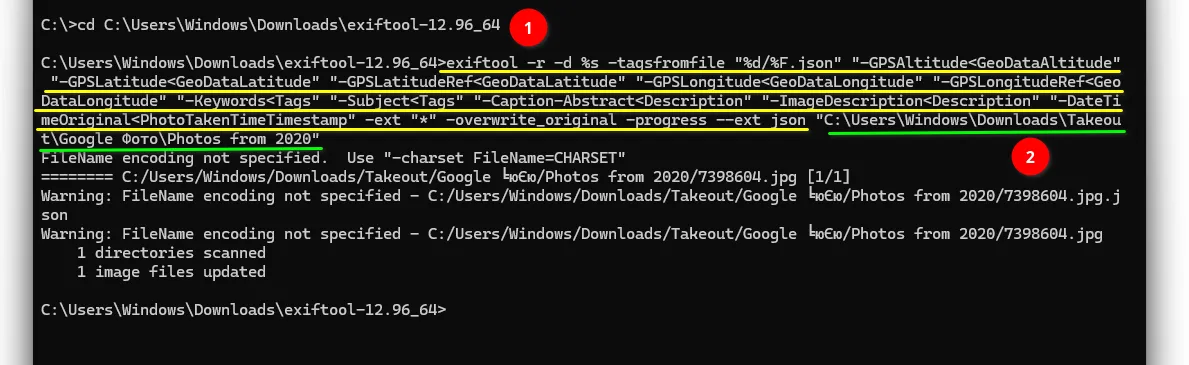
exiftool -r -d %s -tagsfromfile "%d/%F.json" "-GPSAltitude<GeoDataAltitude" "-GPSLatitude<GeoDataLatitude" "-GPSLatitudeRef<GeoDataLatitude" "-GPSLongitude<GeoDataLongitude" "-GPSLongitudeRef<GeoDataLongitude" "-Keywords<Tags" "-Subject<Tags" "-Caption-Abstract<Description" "-ImageDescription<Description" "-DateTimeOriginal<PhotoTakenTimeTimestamp" -ext "*" -overwrite_original -progress --ext json <DirToProcess>
This command automatically updates image metadata (such as GPS coordinates, tags, and description) based on information from JSON files with the same name. It works recursively through all folders and overwrites the original files without creating copies. The main data it adds is height, latitude, longitude, tags and description from JSON fields. The only thing the team can’t do is export a person’s name tag on a photo.

Note that instead of <DirToProcess> at the end of the exitfool command, you need to specify the folder location (in quotes) where the photos and JSON file are located. You can register the entire downloaded Google Photos catalog. Next, press Enter and wait for the result.
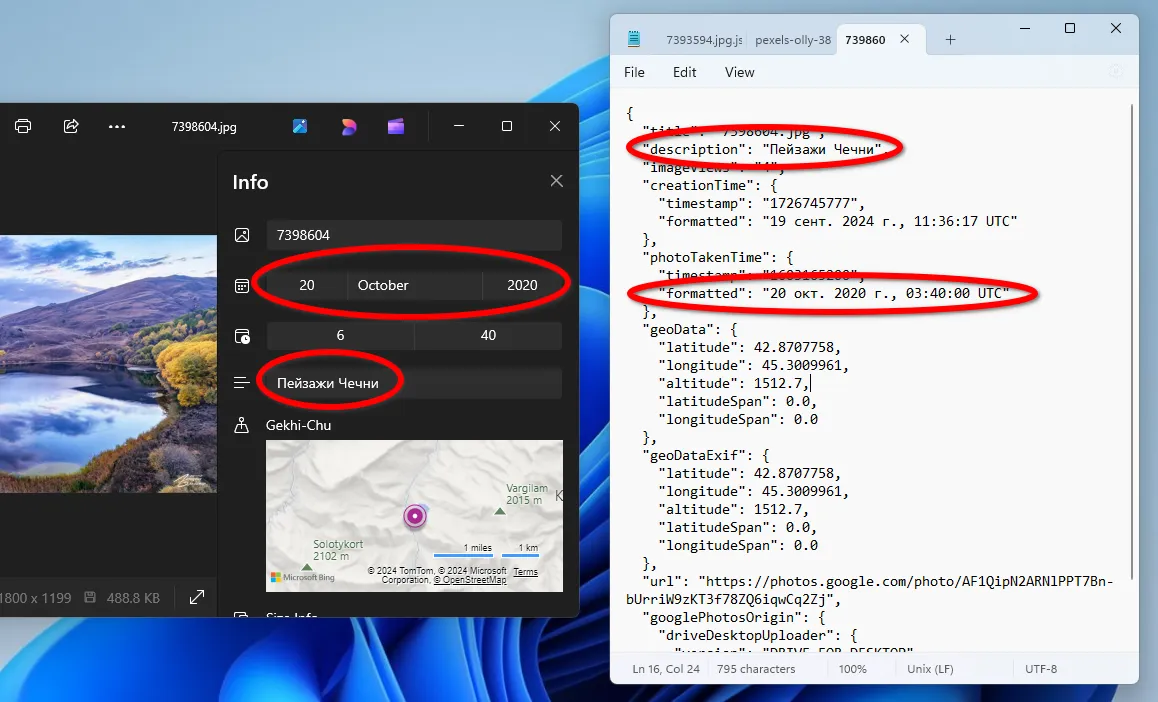
Once processing is complete, the photo files will automatically receive the missing metadata.
Unfortunately, the described method does not solve the issue with all types of metadata. There are still problems with albums created in Google Photos, when exporting using Google Takeout. The albums are not exported as tags, but as separate folders, which makes it difficult to sort them further. There is also a problem with tagging recognized people in photographs; the JSON file does not contain information about the identified faces location on the photo, only the names of the people, unfortunately. And if there are many faces in the photo, then, unfortunately, it is impossible to automatically mark who is who based on this information.
Also, the structure is not very convenient with large folders with all the photos for the year. But this problem can be solved, for example, using the import function of the Tonfotos program, which can arrange files into a more convenient structure, while simultaneously saving you from duplicates. And again, marking all the faces of your friends using Tonfotos will not be a problem - most likely you will even find more faces than were in Google Photos. You can download Tonfotos for free on the official website.
Conclusion
Although transferring photos from Google Photos may be challenging, there are tools that can help you recover your photos' most important metadata. Using the ExifTool and Tonfotos console program, you can not only save photos, but also restore important data such as description, tags and location. These solutions will simplify the process of organizing and cataloging the photo archive, while preserving all the information.