All the Ways to Back up Your Android Phone to an External Drive
Updated: October 1, 2025 Author: Vitaly
This article explores the optimal method for backing up data from an Android phone to an external drive. We'll explore both the built-in tools from various device manufacturers and third-party solutions.
In our digital world, data loss is almost catastrophic. Photos from your last vacation, important work documents, chats with loved ones—it's all stored on our smartphones. Of course, Google offers a convenient cloud service, Google One, which automatically backs up your contacts, calendar, and even some app data. But what if you want complete control over your files, aren't dependent on internet speed, or simply don't trust the cloud? In that case, local backup—directly to an external drive—comes to the rescue.
I've spent a lot of time researching this issue and want to share my experience. It turns out there are several approaches, each with its own unique features.
External Storage Requirements for Android Data Backup
Unlike iPhones, which only added the ability to connect external SSDs/HDDs after the switch to USB-C in version 15 (2023), Android phones have had this feature since 2011 (Android 3.1). However, as I've discovered, although support for storage devices exists, it comes with some caveats. This primarily concerns file systems.
Although Android runs on a Linux kernel, renowned for its versatility and flexibility, the OS only supports two external storage file systems: VFAT (FAT16/FAT32) and exFAT. The latter, introduced with version 11, only worked out of the box on devices where the manufacturer (such as Samsung) included a driver. Official support for Pixel devices was not yet available.
The exception is SD cards. Here, everything depends on the user's settings:
- Removable Storage. In this mode, the memory card is formatted to VFAT or exFAT depending on its capacity and used as a "regular flash drive" for photos, music, or videos.
- Adaptable Storage. This feature, introduced in Android 6.0 Marshmallow (2015), allows you to expand your device's internal storage. In this mode, the card becomes an extension of the /data partition. The file system format is ext4 or f2fs (selected by the firmware and device drivers), and all data on the card is encrypted and cannot be read when installed in a laptop or other phone.
As for other file systems, such as NTFS (Windows) or HFS/HFS+/APFS (Apple devices), Android does not support them even in read mode.
It turns out that to back up Android to an external drive while maintaining its functionality on other devices, you should choose exFAT as the most universal solution.
How to connect an external drive to Android to backup data?
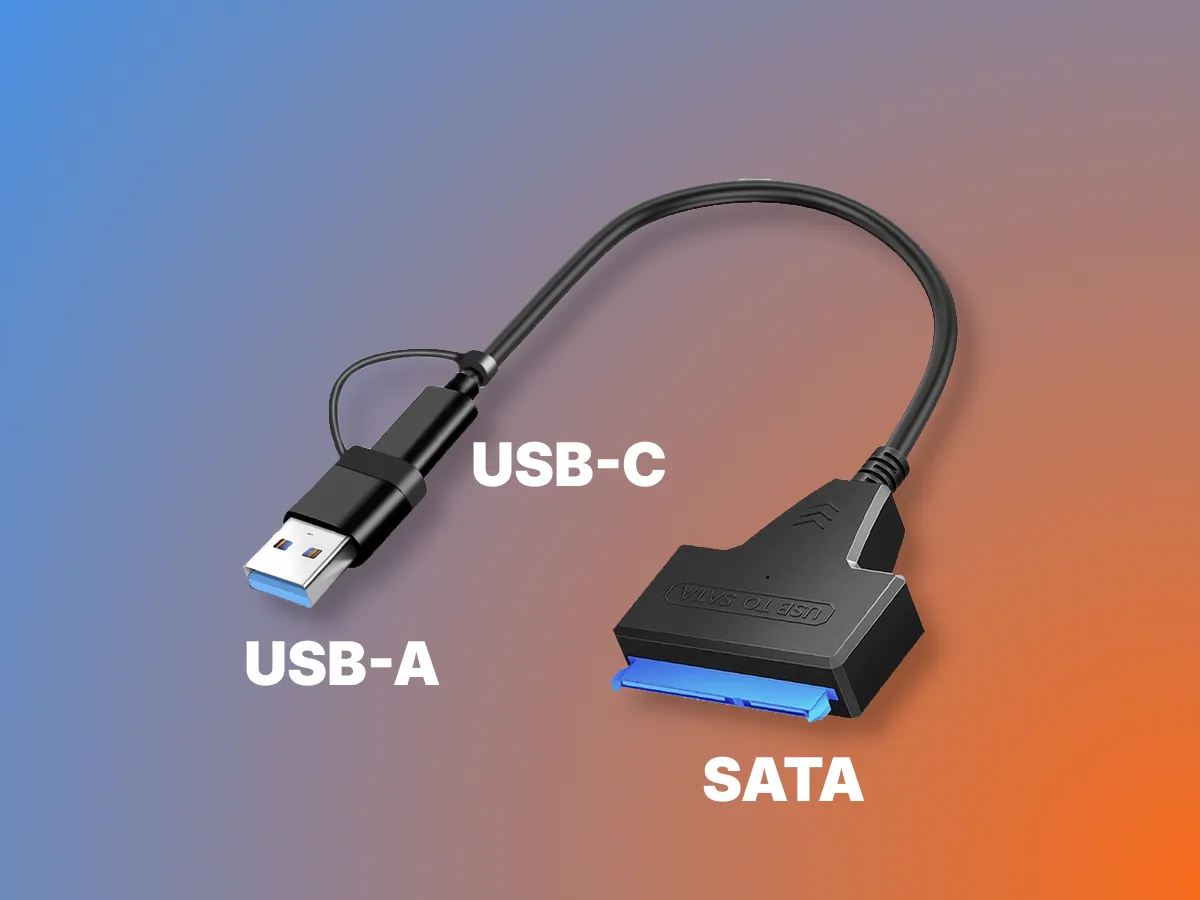
To connect an external drive to Android, you'll need a cable. There's no one-size-fits-all solution, and the choice depends on the SSD/HDD itself. For example, a regular SATA solid-state drive can be used as an external drive. These drives have no moving parts, and their casing already protects the internal circuit board. To connect such an SSD to your phone, you'll need a SATA to USB adapter.
This same adapter is also suitable for connecting 2.5-inch internal HDDs, which are powered by the current supplied by the phone.
If you have a dedicated external drive, in most cases it already comes with all the necessary cables and adapters to connect to Android phones.
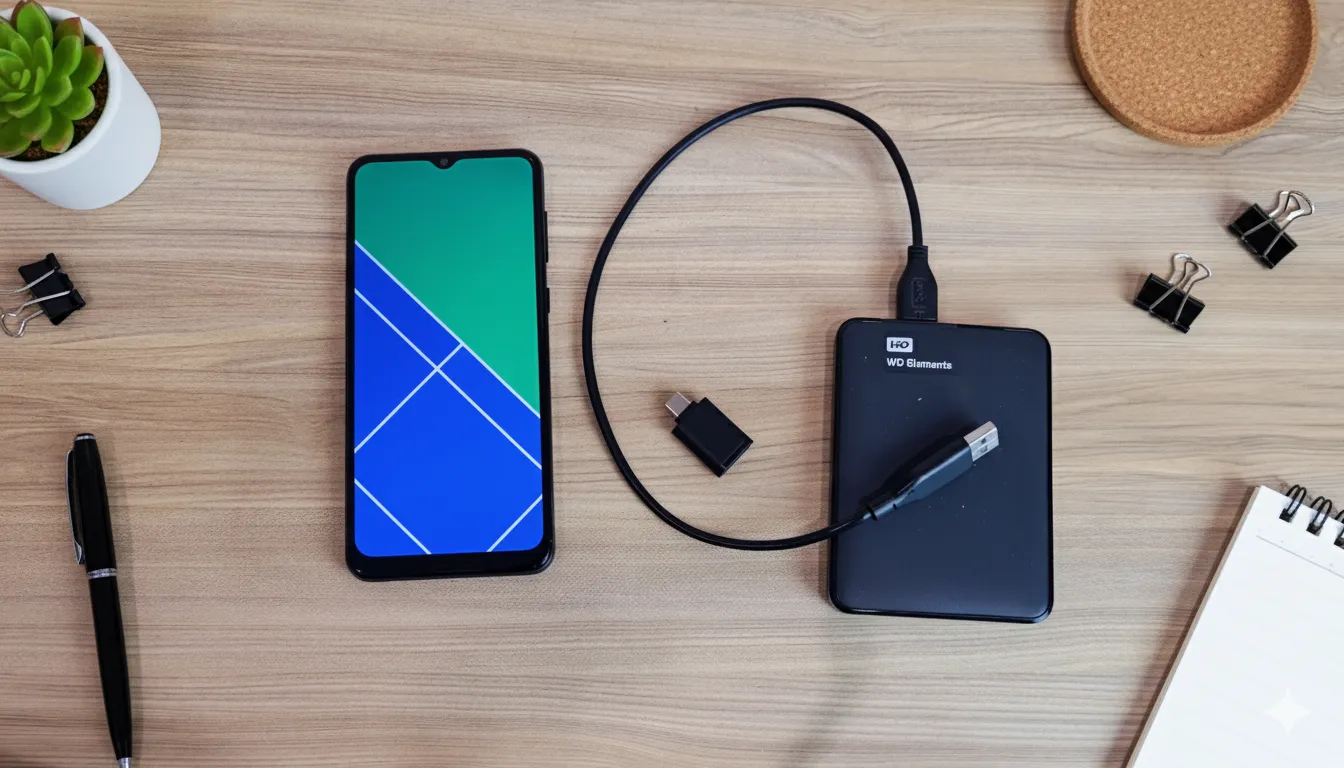
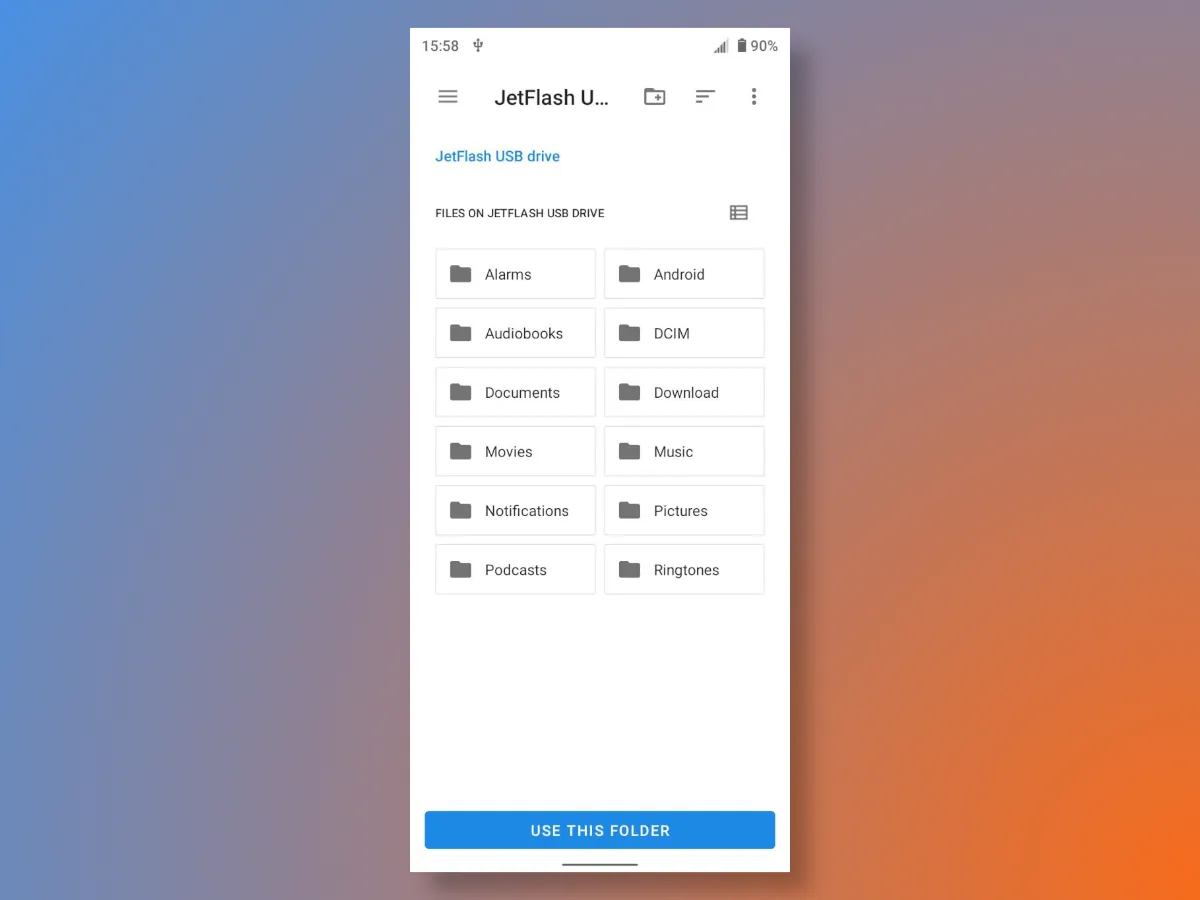
I would like to point out that regardless of the cable or type of external storage used, it will display the same on your Android phone.
Backing up data using the Android phone's built-in tools
Free distribution and open source have given Android its dominance in the smartphone market. It's a truly flexible and versatile operating system, but this comes with its own drawbacks, namely the lack of unified solutions. The same version of Android on phones from different manufacturers can provide an excellent user experience. This applies not only to the interface or individual apps, but also to system management, particularly data backups.
For example, the stock version of Android released by Google and used in Pixel phones doesn't have built-in tools for automatically creating backups to an external drive. Meanwhile, manufacturers like Samsung and Xiaomi offer this feature, although they implement it differently.
How to Back Up a Samsung Phone
Perhaps Samsung, in its proprietary One UI graphical shell, provides the simplest and most intuitive mechanism for backing up data to an external drive.
To launch the tool, open the settings and go to the General Guides section.
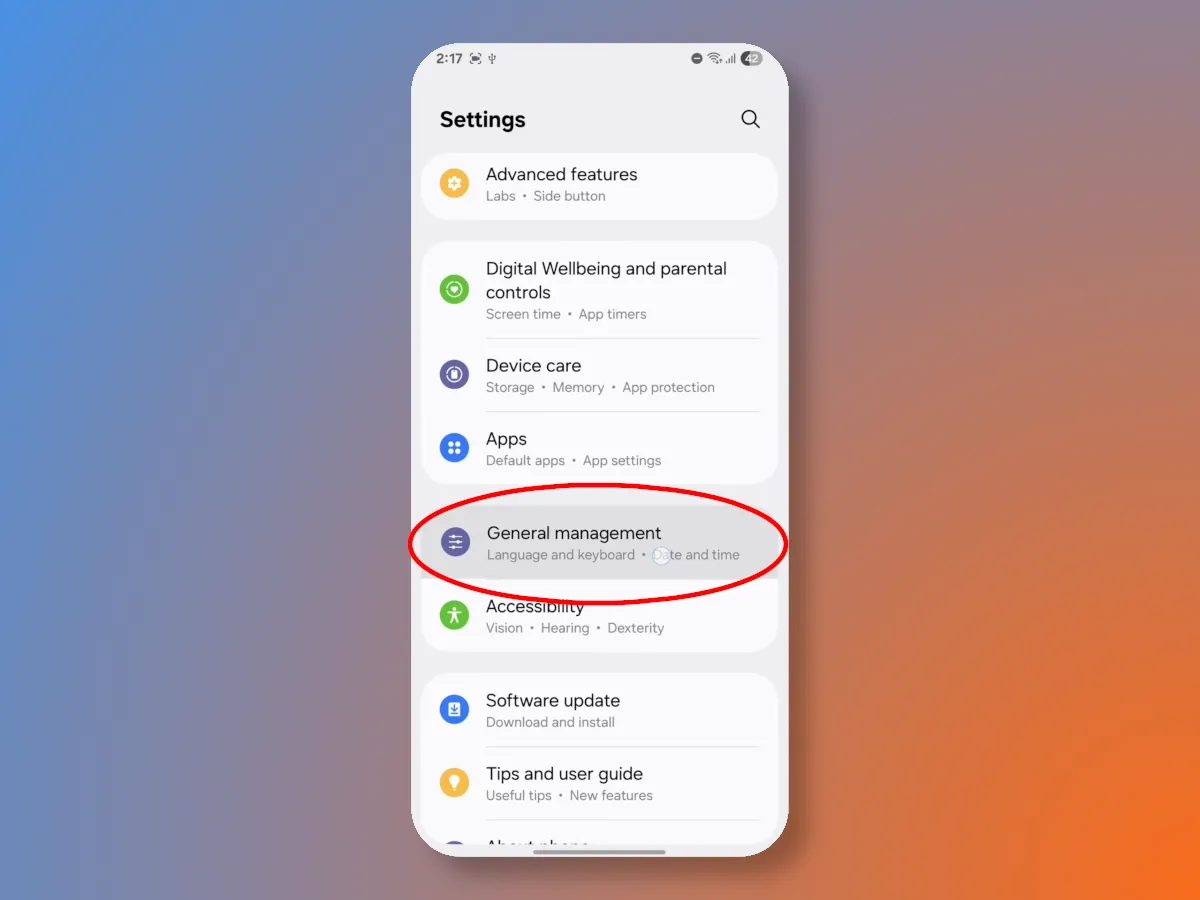
Almost at the very bottom of the section, you will find the Reset button, behind which is hidden the function for backing up Android phone data to an external drive.
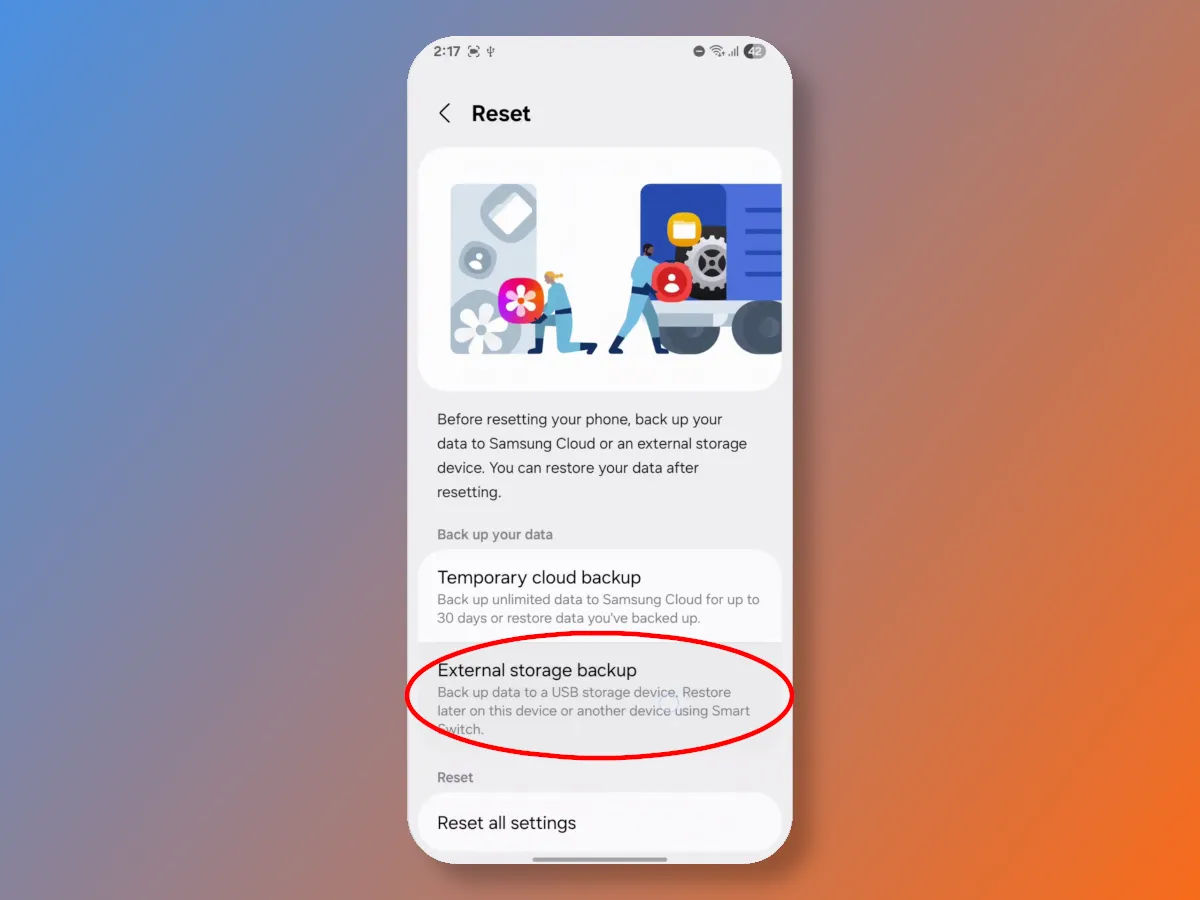
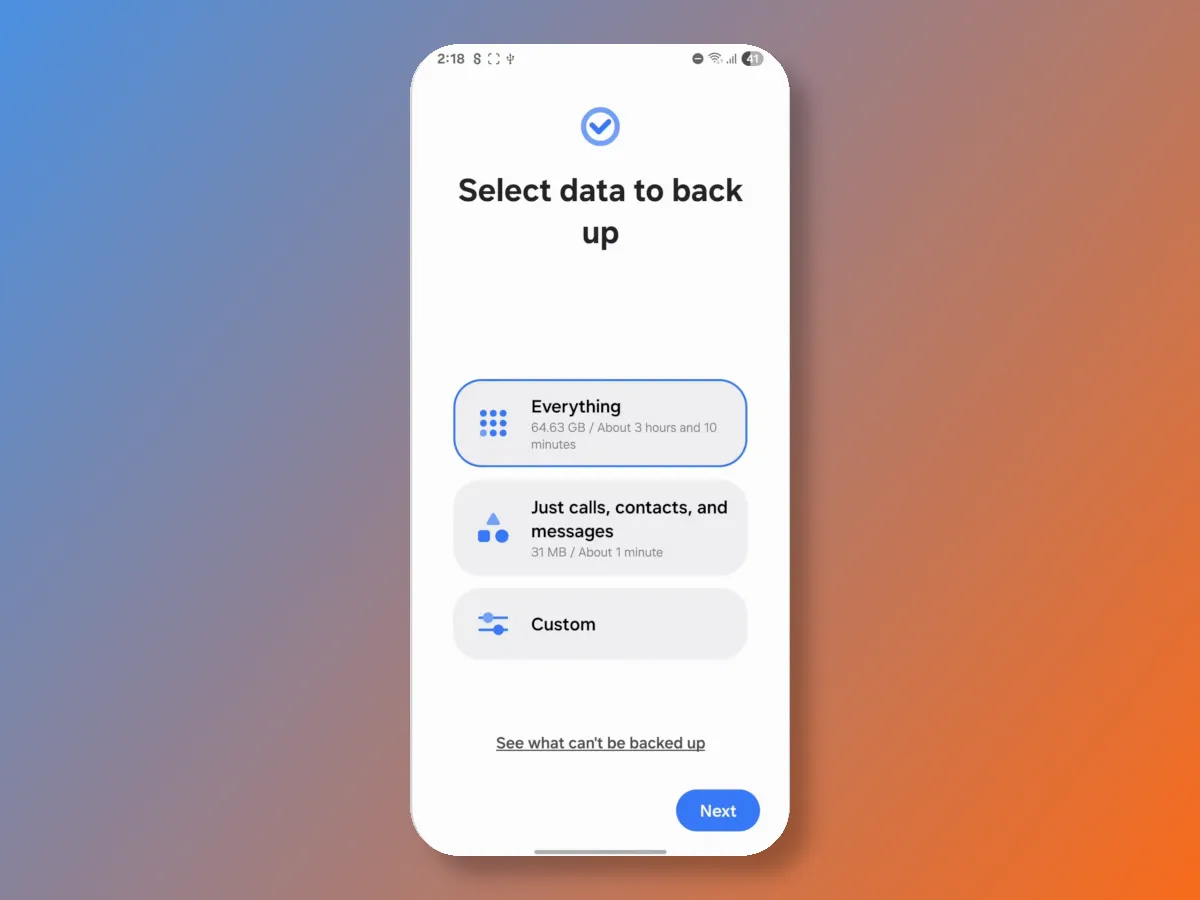
Next, you'll be presented with a simple and intuitive data export setup wizard. I'd like to point out that this feature is part of Android on Samsung, allowing full access not only to user data but also to files from installed apps, contacts, messages, and calls. You don't have to back up all your data; you can select only the data you consider most important, such as photos and videos.
If you need to restore files from a backup, simply connect the external drive and reopen the wizard, where you'll see an item listing previously completed backups.

Please note that the proprietary Smart Switch app, available for phones from other manufacturers, can create backup copies of data, but it can only be restored to Samsung smartphones.
How to create an Android backup on Xiaomi/Redmi/POCO phones?
Xiaomi and its subsidiary phones, while still based on Android, use their own graphical user interface, HyperOS. It also includes a data backup mechanism, but it's implemented differently. I was pleased to find that accessing this feature on HyperOS was easier than on the Samsung OS. Simply open Settings and select the appropriate option under About.
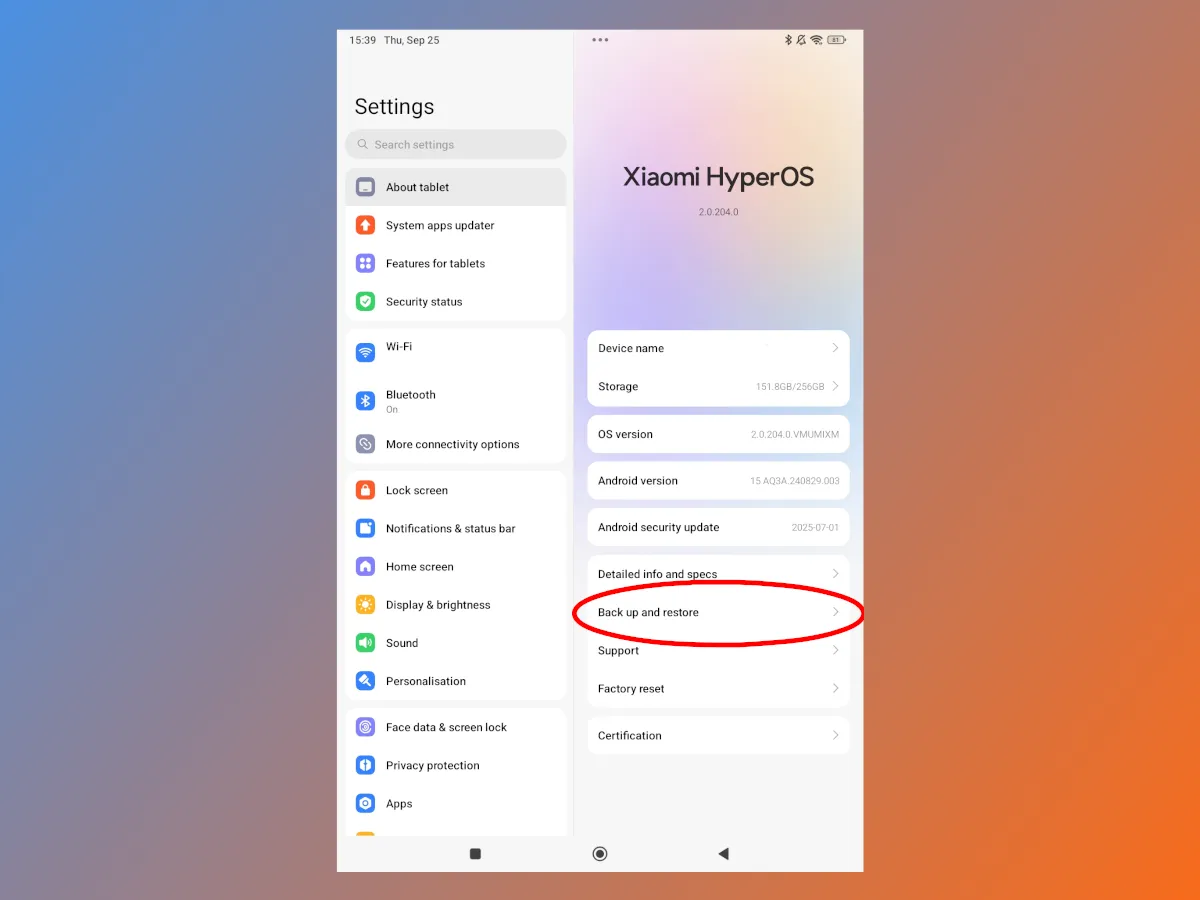
Here you'll find all the possible ways to back up your Android data, including using a Google account or Xiaomi Cloud. However, we're interested in exporting to a computer, which essentially doubles as a backup to an external drive.
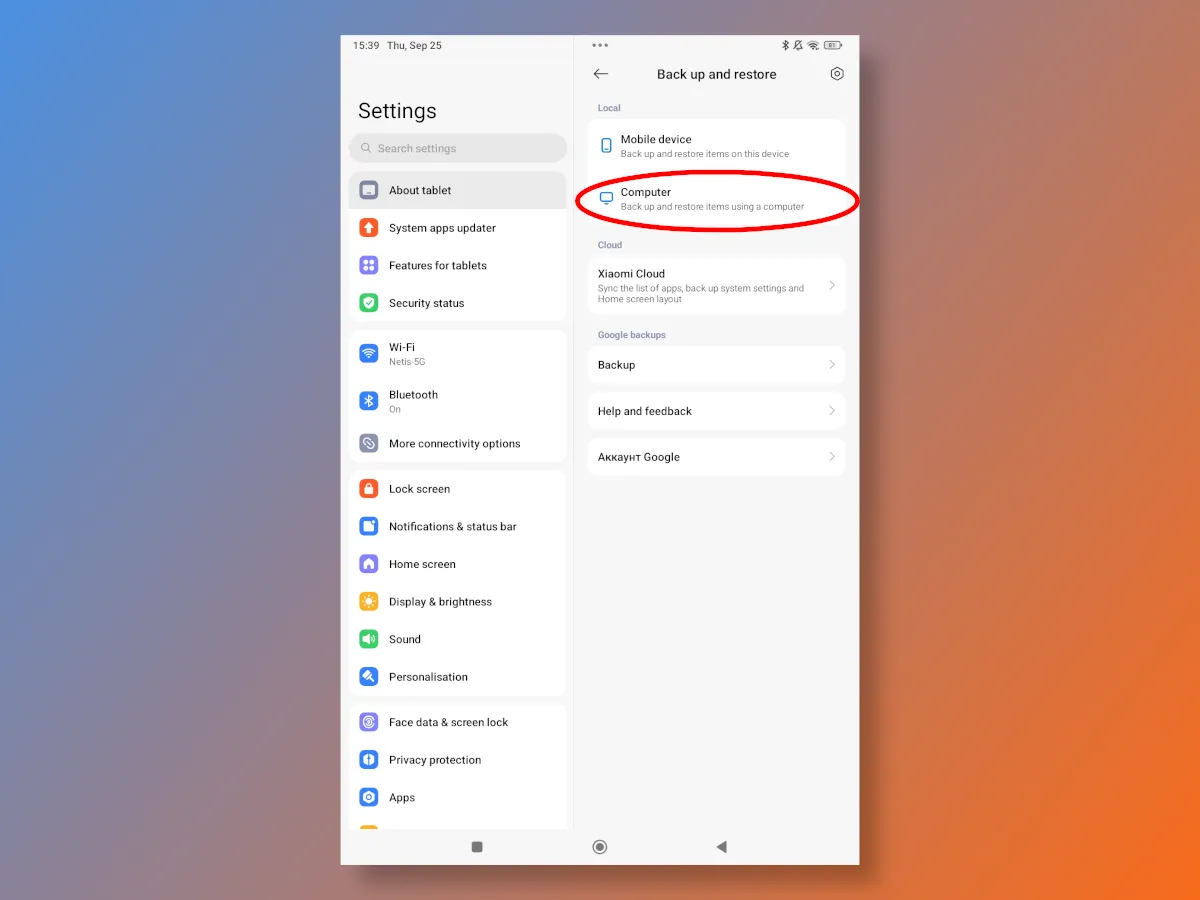
As with Samsung phones, Xiaomi, Redmi, and POCO owners can also export not only photos and videos, but also contacts and app data. To do this, an archive file is created, which then simply needs to be transferred to an external drive connected via USB.
Manually backup photos and videos from Android to an external drive
Unfortunately, not all Android phone manufacturers offer the ability to back up data out of the box. If you own such a device, I don't recommend installing third-party apps from Google Play, as they are generally useless. This is primarily due to the nature of the Android OS, which limits such apps' access to the phone's storage for security reasons. Consequently, they can only see and copy a portion of the data. Many of them don't create a backup in the true sense of the word, but simply copy files from selected folders, which can be done independently using the built-in File Explorer.
Furthermore, installing such apps carries certain privacy and security risks. By granting them access to your phone's storage, you're essentially trusting a third-party developer with your personal files, messages, photos, and other sensitive information. Unfortunately, such programs often collect user data for analytics or transfer to third parties. Additionally, many of them display intrusive ads, which not only interfere with app use but can also serve as a channel for malware distribution. In the worst-case scenario, you risk personal information leakage or a device infection.
To create backup copies of important files yourself, connect an external drive via USB, go to File Explorer, select the desired folders or individual documents, and click Copy to... in the additional menu, selecting SSD/HDD.
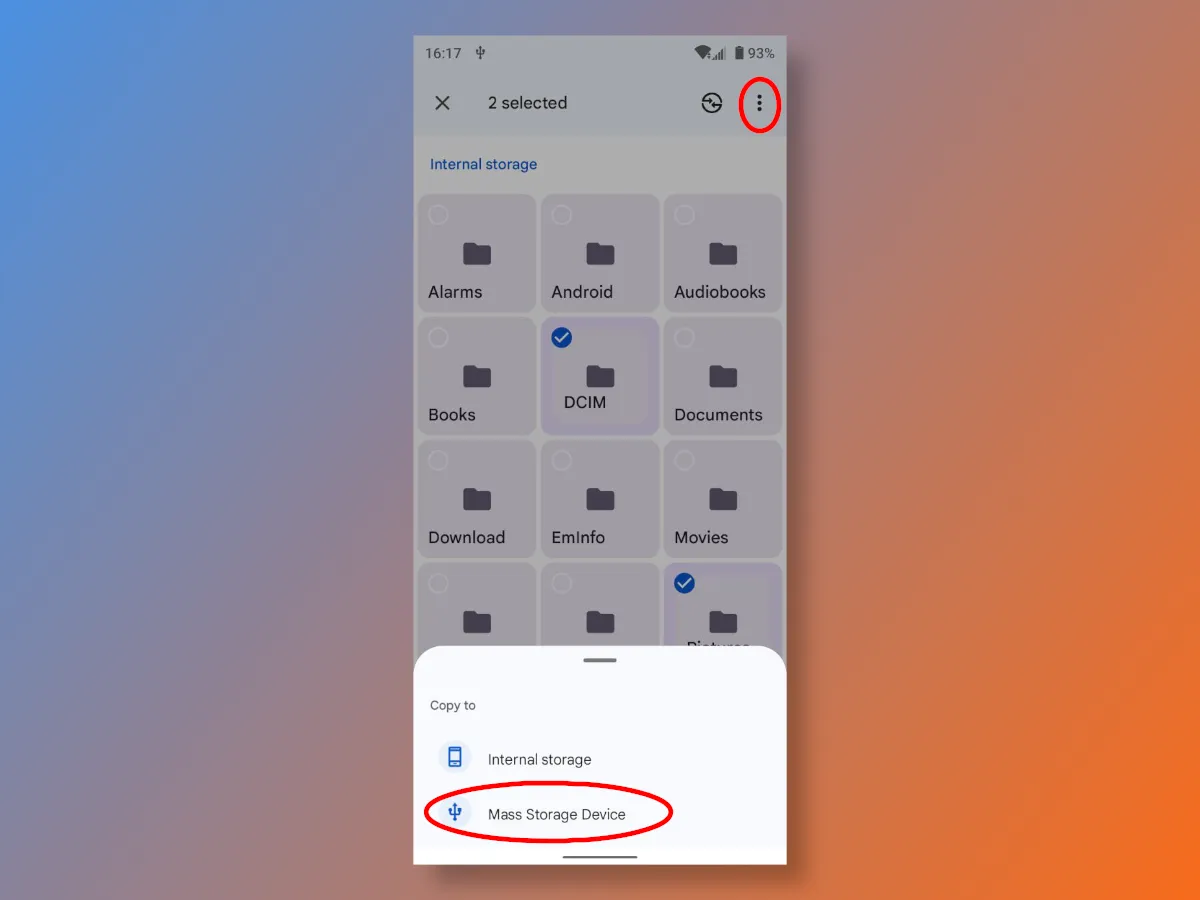
The advantage of this method is that there is no need to install questionable programs, and the files themselves can be easily opened on a computer or another phone.
Back up photos and videos from Android with automatic cataloging
No matter which of the above backup methods you choose, you'll end up with an unsorted set of files. This is how they're stored on the phone itself.
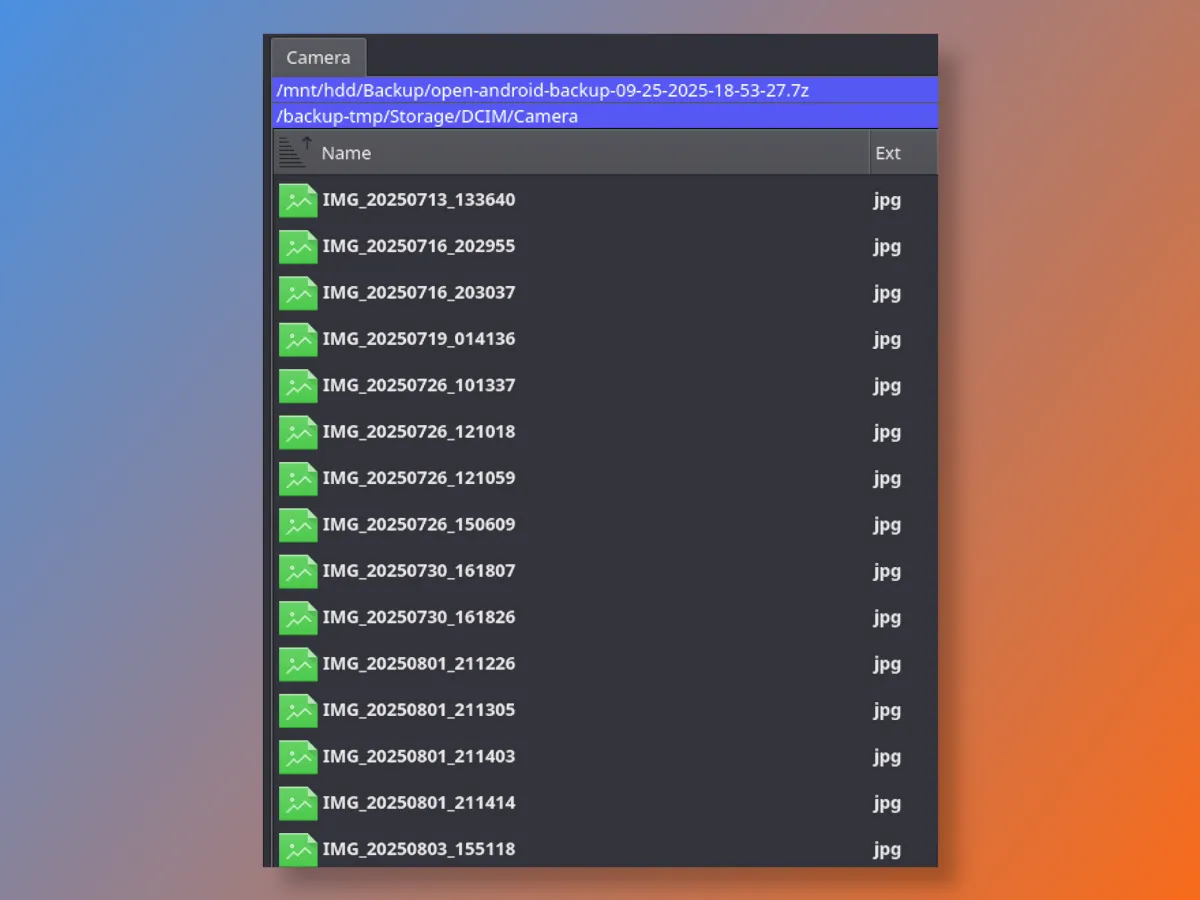
Finding the right photo or video in this endless list becomes an impossible task.
So I decided to do some research and found a more efficient way to back up photos and videos from Android—using the free photo archive cataloging app Tonfotos. Although it's a desktop app, it significantly simplifies the process of exporting media files.
To initiate a backup of photos and videos from Android, follow these four simple steps: connect the external drive to your PC, launch Tonfotos, connect your phone to the computer, and specify the export location in the dialog box that appears.
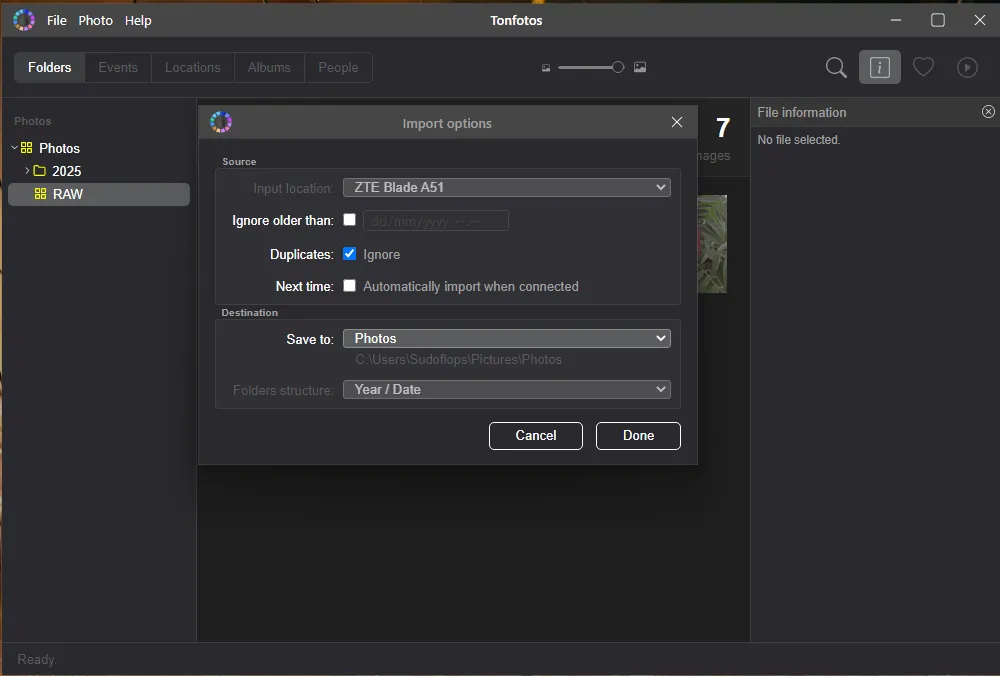
When you're finished, you'll have a clear folder hierarchy, with each photo placed in a directory named after the date the photo was taken.
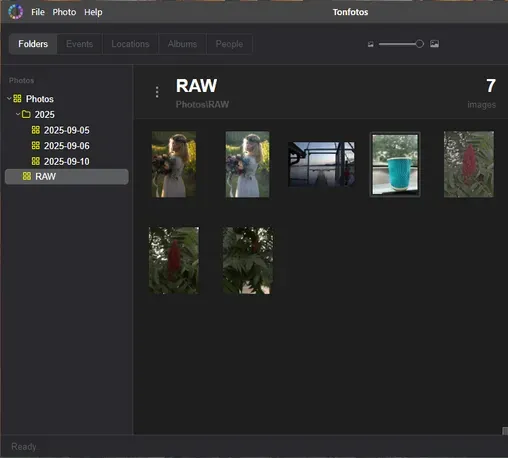
In addition, you get Tonfotos' extensive functionality for further sorting of media files:
- Automatic grouping of photos and videos by dates and events.
- Facial recognition and the ability to sort by people.
- Building an album hierarchy with easy navigation.
- Search by keywords, dates and shooting locations.
- Support for working with external drives and network storage.
- The ability to combine photo archives from different devices into a single library.
- Tools for removing duplicates and saving disk space.
- Support for exporting and importing archives while preserving their structure.
With Tonfotos, backup transforms from a chore into a convenient tool – your photos and videos aren't just saved, but organized into an easily manageable archive, where every shot is always at hand when you need it.
Conclusion
Backing up your Android device to an external drive isn't just a matter of convenience; it's a crucial step toward protecting your digital data. I've covered all the key options. Each method has its advantages and limitations, and choosing the right one depends on your needs: whether you need to quickly save just photos and videos, get a full system backup, or create a well-structured archive.
The key is to not put it off. Regular backups will protect you from losing valuable information, ensure access to important data, and give you the confidence that your digital world is securely protected.